What's For Dinner: Quesadilla Explosion


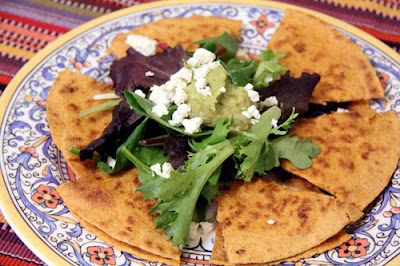
Since our default Mexican dish is typically some sort of topped tortilla, enchilada, or taco, I decided to change things up this week and go with a quesadilla dish. I bought a pack of red chile tortillas along with some queso fresco during my last trip to Whole Foods. I opted to make a black bean and queso fresco quesadilla for myself, and after making fun of my quesadilla (which really was tasty!), D made a quesadilla for himself filled with refried beans, black beans, and shredded mozzarella cheese. To cook the quesadilla, I sprayed a skillet heated over medium-high heat with olive oil, added a tortilla, topped it with cooked black beans and crumbled queso, then topped it with another tortilla. After a few minutes I flipped the quesadilla and cooked it for about a minute more. I served it up with spring greens, fresh guacamole, and a bit more crumbled queso fresco. An additional topping of salsa would have been nice; unfortunately our jar had gone a little funky. Next time!
SHARE:

What's For Dinner: Pesto, Pesto, Pesto!


We had some fresh basil left over from the other night's bruschetta appetizer, so I figured it was about time we made some pesto. Pesto is pretty easy; here's the recipe we used:

Fresh Basil Pesto (printer-friendly version)
makes about 1 cup

2 cups basil leaves, rinsed and patted dry
2 cloves garlic, minced
1/3 cup pine nuts, lightly toasted
1/4 cup freshly grated parmesan cheese
freshly ground black pepper
fine sea salt
olive oil

1. Toast the pine nuts in a skillet over medium heat for 1-2 minutes. Stir frequently and remove from the heat as soon as the pine nuts and/or walnuts become fragrant.
2. Place the basil, garlic, and pine nuts in the bowl of a food processor. Pulse to combine the ingredients.
3. Add in the cheeses. Pulse to combine. Use a rubber spatula to scrape down the sides if necessary.
4. Add the olive oil in a slow stream while pressing the "on" button.
5. Season with salt and pepper to taste.
6. Store unused portion in a tightly-covered container in the fridge. If the pesto is a bit dry, pour a layer of olive oil over the top of it prior to refrigerating to prevent the pesto from turning brown.

I served the fresh basil pesto with some rigatoni pasta topped with freshly grated parmesan cheese. But I wasn't done with the pesto yet . . .


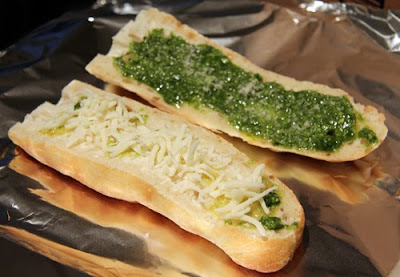
I also made some cheesy pesto bread from the remainder of the baguette we used to make the bruschetta. To do so, I cut the remaining baguette in half lengthwise. I drizzled both halves with a little bit of olive oil. Then I spread about two tablespoons or so of pesto on one half along with about a tablespoon of freshly grated parmesan cheese. On the other half I spread some shredded mozzarella cheese. I then placed both halves together and wrapped the whole shebang in aluminum foil. I then popped the foil package into an oven set at 350 degrees, and baked the bread for about 15 minutes.


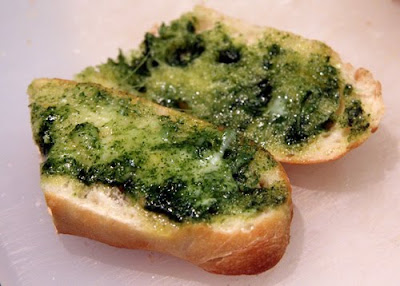
I cut the baked loaf into diagonal slices, and served it up. Mmm, I have got to get some fresh basil growing in one of our windows -- it is definitely one of my favorite things.
SHARE:

What's For Dinner: Tofu in a Coconut-Curry Tomato Sauce


Clearly I have not gotten over last week's coconut-curry sauce, as I decided to make it the highlight of another dinner entree. This time around I added in some chopped tomatoes and cooked garbanzo beans to the sauce, along with a dash of Vindaloo spice for some extra flavor. Yet again the coconut-curry sauce (and the new additions) knocked my socks off. Yum!

Tofu in a Coconut-Curry Tomato Sauce (printer-friendly version)
makes 4 servings

1 teaspoon toasted sesame oil
2 teaspoons fresh ginger, peeled and minced [easy tip for peeling the ginger -- use a spoon to scrape off the outer peel]
2 garlic cloves, minced
1/2 cup red bell pepper, chopped
1 cup green onions, chopped
1 teaspoon curry powder
2 teaspoons red curry paste
1/2 teaspoon ground cumin
1 teaspoon vindaloo spice
4 teaspoons tamari sauce
1 tablespoon brown sugar
1 (14-ounce) can light organic coconut milk
1 cup chopped tomatoes
1 (14-oz) can garbanzo beans

2 cups cooked jasmine rice
fresh basil, chopped

1. Dry fry the tofu and set aside.
2. Heat 1 t sesame oil in a large skillet over medium-high heat.
3. Add the minced ginger and garlic. Cook for about 1 minute.
4. Add in the chopped green onions and red pepper. Cook for one minute more.
5. Add curry powder, curry paste, and ground cumin. Stir to combine, and cook for an additional minute.
6. Stir in tamari sauce, brown sugar, 1/4 t salt, chopped tomatoes, and coconut milk.
7. Stir in the garbanzo beans.
8. Bring the mixture to a simmer. Cook over low heat for an additional 10 minutes.
9. Add the cooked tofu and stir to coat in the sauce. Cook for an additional minute or so, or until the tofu squares are warmed through.
10. Serve over a bed of jasmine rice. Garnish with chopped basil.
SHARE:

Weekend Shenanigans: Benadryl, Books, and Basil

It was a pretty low-key weekend around here given I was brought down with a case of sinus pressure and sniffles. No fun! Luckily, the weather was cold outside so I didn't feel all that bad spending the majority of the weekend lounging on the couch. One bonus of lying on the couch was getting the chance to read a couple of books, including Rakesh Satyal's Blue Boy and Alison Arngrim's Confessions of a Prairie Bitch (Arngrim played the nefarious Nellie Oleson on Little House on the Prairie, a show I loved as a child and may or may not have also re-watched in college.) I recently got my Philadelphia library card, and have been voraciously reading (and requesting books) ever since. I find that when I am in a new place, one of the first things I do is get my local library card. How can you not love the library -- tons of books and all for free! (Well, as long as you remember to return 'em on time!)

On Saturday night we put together a random meal, one of the constituents being tomato, basil, and mozzarella bruschetta. (One of my favorite flavor combinations.) This appetizer is a no-brainer -- just slice up some bread, a tomato (I purchased our first heirloom tomato of the season, and oh, it was so good, even if it cost $5.99/lb), add some fresh basil leaves, fresh mozzarella, drizzle with olive oil, and season with sea salt and freshly ground pepper. Done and done. (And delish.)
SHARE:

What's For Dinner: Margherita Pizza with Homemade Pizza Sauce


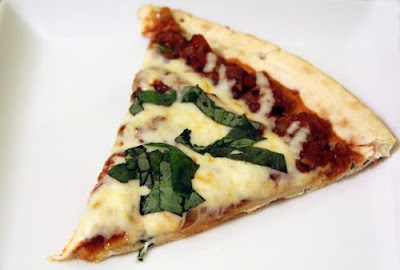
I was in a pizza mood the other night and decided that for once I'd make my own (as I've done before) rather than rely on something from the freezer. I decided to take it up a notch by trying my hand at making pizza sauce -- I think it turned out well, even though I did add some random ingredients including a little bit of leftover leek that was languishing in the fridge.

Margherita Pizza (printer-friendly version)
makes 2+ servings

1 organic pizza crust
cornmeal
pizza sauce (recipe below)
shredded mozzarella cheese
2 T chopped fresh basil leaves

1. Preheat the oven to 400 degrees.
2. Scatter about 1/2 T of cornmeal on a pizza peel.
3. Place the crust on the peel. Brush the crust with olive oil.
4. Top with the tomato sauce. (I was heavy handed and used about 1 1/2 C of sauce.)
5. Generously scatter with shredded mozzarella cheese.
6. Bake in the oven for 10-12 minutes, or until cheese is melted and bubbly.
7. Remove from the oven. Scatter top with chopped basil.
8. Let cool for several minutes then serve.

Pizza Sauce
makes about 2 1/2 cups

1 T olive oil
3 cloves garlic, finely chopped
1/2 C leek, finely chopped
2 1/2 C chopped tomatoes (I used Pomi brand)
1 t pizza seasoning
1/4 t dried parsley
1/4 t dried oregano
red pepper flakes
freshly ground black pepper
fine sea salt

1. Heat the olive oil in a large sauce pot over medium heat.
2. Add the chopped garlic and cook for 1 minutes, stirring frequently to prevent burning.
3. Add in the chopped leek and saute for another minute.
4. Stir in the chopped tomatoes.
5. Add in the pizza seasoning, parsley, and oregano. Add in a dash of red pepper flakes if desired. Stir to combine.
6. Reduce the heat to low, add the lid to the pot, and simmer for 20 minutes.
7. After 20 minutes, season to taste with salt and pepper, and any other seasonings if desired.
8. Allow sauce to cool before using.


SHARE:

What's For Lunch: Greek Yogurt Parfait


When yogurt isn't for breakfast, it's for lunch. Though I normally serve up my yogurt in a bowl, I was feeling a little fancy and opted to make a yogurt parfait instead. This glass is filled with multiple layers of Chobani 0% Greek yogurt, a drizzle of honey, a few blueberries, and a small handful of Kashi GoLean Crunch! cereal. Because I'm also a cinnamon fiend, I added a generous sprinkle of ground cinnamon to the top layer.
SHARE:

What's For Dinner: Tilapia with Coconut-Curry Sauce


We bought a few frozen tilapia fillets from Whole Foods the other day and I decided I needed to try out a new recipe this go-around. I've been craving the flavors of India lately, so I searched the Internet for a fish recipe that used a curry-flavored sauce. I think I hit the jackpot with the following recipe, which I've adapted slightly from its original form in Cooking Light. The coconut-curry sauce is the star of this entree, and not only smells delicious, but tastes delicious, too.

Tilapia with Coconut-Curry Sauce (printer-friendly version)
makes two servings [with a bit of sauce leftover]

1 teaspoon toasted sesame oil, divided
2 teaspoons fresh ginger, peeled and minced [easy tip for peeling the ginger -- use a spoon to scrape off the outer peel]
2 garlic cloves, minced
1/2 cup red bell pepper, chopped
1 cup green onions, chopped
1 teaspoon curry powder
2 teaspoons red curry paste
1/2 teaspoon ground cumin
4 teaspoons tamari sauce
1 tablespoon brown sugar
1/2 teaspoon salt, divided
1 (14-ounce) can light organic coconut milk
2 tablespoons chopped fresh cilantro
2 (6-ounce) tilapia fillets
2 cups cooked jasmine rice
2 lime wedges

1. Preheat the oven to 375 degrees.
2. Heat 1/2 teaspoon sesame oil in a large skillet over medium-high heat.
3. Add the minced ginger and garlic. Cook for about 1 minute.
4. Add in the chopped green onions and red pepper. Cook for one minute more.
5. Add curry powder, curry paste, and ground cumin. Stir to combine, and cook for an additional minute.
6. Stir in tamari sauce, brown sugar, 1/4 teaspoon salt, and coconut milk.
7. Bring the mixture to a simmer.
8. Once mixture begins to simmer, remove from the heat. Stir in the chopped cilantro.
9. Brush each tilapia fillet with 1/2 teaspoon sesame oil and season with the remaining salt.
10. Cover a baking sheet with aluminum foil. Place the fillets on the prepped baking sheet.
11. Bake in the oven for 12-15 minutes, or until the fish easily flakes when touched with a fork.
12. Serve each fillet over a bed of jasmine rice. Spoon a generous portion of the coconut-curry sauce over each portion.

(adapted from this Cooking Light recipe)
SHARE:

Tastemaker: Nature's Pride Hearty Wheat with Flax Bread


As part of the Foodbuzz Tastemaker Program, I recently received a loaf of Nature's Pride Hearty Wheat with Flax bread. I decided to try it out the best way I know how -- by making it the base of a peanut butter and jelly sandwich. (Well, technically a mixture of creamy and cruncy natural peanut butters and strawberry conserve.)

I'm a big fan of hearty sandwich breads, and this one does not disappoint. I particularly like that there are whole flax seeds embedded in each slice. Additionally, the ingredient list is remarkably short and contains no artificial flavors, colors, or preservatives. The bread is sweetened with sugar (and to a lesser extent honey and brown sugar) rather than high fructose corn syrup.

One slice of bread contains 100 calories, 1.5 grams of fat (which includes 0.5 g polyunsaturated fat and 0.5 g monounsaturated fat), 130 mg of sodium, 17 g of fiber (including 3 g of dietary fiber and 4 g of sugar), and 5 grams of protein.
SHARE:

Made From Scratch: Chocolate Cake with Chocolate Buttercream Frosting


I can not take any credit for baking or frosting this cake. But I can tell you that it is delicious. No, Delicious, with a capital D. This lovely cake was baked by D for my birthday on Sunday (though we didn't slice into it until yesterday.) D used this Barefoot Contessa recipe for the cake and this William-Sonoma quick chocolate buttercream recipe for the frosting. I highly recommend both recipes.
SHARE:

Weekend Shenanigans: Birthday Edition


Yesterday was my birthday -- I turned the big 3-3. It's kind of a random age; it lacks the "Gee, I guess I'm old now" feeling of 30, but isn't quite the "Joined a new demographic" age of 35. And happily, it's still a long way to 40. (Right?!)

The weekend was quite low-key. The weather was nice and sunny, though a bit brisk and quite cooler than Friday's 74 degrees. No complaints, though. Sunshine and blue skies work for me! After a bit of a sleep-in on Saturday D headed to the office for a few hours of work while I headed to Center City for a little retail therapy. After hitting up the Gap, Ann Taylor Loft, Sephora, and Macy's (and managing to only make three small purchases!), I stopped by Border's on the way home to see if there were any sales yet (our local store was just added to the chopping block) and treated myself to a peppermint cocoa trio (yum!) in their cafe. Upon arriving home I had a quick dinner of leftovers, then D and I headed out to Jet Wine Bar, which is located just a block or so away. We opted to share a bottle of the 2007 Steinbeck Syrah, a Californian wine from Paso Robles. We also shared a chocolate tart for dessert while watching old Starsky & Hutch episodes (with the sound off) on the large flatscreen TV behind the bar.

Sunday morning also got off to a late start (I love sleeping in!). After a quick breakfast we headed out on the town and, after running a couple of errands, we walked over to Reading Terminal Market, where we stopped off at the Down Home Diner for lunch. I opted for the grilled cheese and tomato sandwich (of course) with fries and a chocolate egg cream soda. Neither were life-changing, but they weren't bad either.


Following our meal we walked back through the Market to the Flying Monkey Bakery, where I bought a red velvet whoopie pie and a chocolate-dipped banana whoopie pie as snacks for later.


Afterward we meandered back home from the Market at 12th and Arch, and once here, D set to work baking me a chocolate cake from scratch. I lounged on the sofa; the birthday princess.

After the cake had been baked and iced, D and I headed out for Sunday School at Tria Cafe. The last time we went there was on a Sunday evening in late January; tonight the small restaurant was hopping, and we had to wait about half an hour for a table to open up. (Though they had seating outside under heat lamps, we weren't quite up to dining al fresco.) While waiting we each sipped on a glass of cava brut -- nothing says "Happy birthday!" like a flute of champagne! After being seated, we quickly got to work ordering and both took advantage of the day's Sunday School syllabus, which offers a low-priced glass of wine, cheese selection, and glass of beer. The wine du jour was a rosé, and the cheese was an earthy (and kind of stinky) selection from Switzerland.

For dinner I was boring and opted for the same entree I had last time -- a salad of mixed greens with mission figs, goat cheese, and pine nuts. But, yum, so good! D got a sandwich with fresh mozzarella, prosciutto, tomato, arugula, and garlic vinaigrette. I ordered a glass of a malbec blend with my dinner while D opted for the Sunday School beer special -- a pint of Lagunitas Hairy Eyeball. We think our order got lost in the mix as it took quite awhile for it to show up at our table. As an act of good faith we received a comped dessert -- a nutella panino -- basically a grilled white bread sandwich slathered with nutella on the inside. (And remarkably tastier than its description might sound.)

Upon our arrival back home we both found ourselves too stuffed to slice into the magnificent chocolate cake. So, we opted to try the whoopie pies I bought earlier in the day, instead. The first one we tried (and I made my birthday wish on) was the red velvet pie. The icing was good, though the pie itself was a bit dry. I couldn't help but taste the chocolate-covered banana whoopie pie as well, and it did not disappoint. The chocolate was rich; the pie tasted like two slices of banana bread, and the icing was divine. If I had known that someone was going to eat the rest of it in the morning, I would have taken a bigger bite!


All in all, an excellent weekend and a fabulous birthday. Can't wait to see what the rest of the year has in store for me!

Oh, and one little note -- A Less Processed Life is now on Facebook -- who isn't? In order to avoid annoying my Facebook friends with daily blog posts, I've opted to add a daily blog feed to the fan page instead. You can "like" the site by clicking here.
SHARE:

Exercise: "Starting From Zero" -- Again.


So . . . my stint as a weightlifter lasted less than a week. I went to the gym religiously early last week, following the workouts to a "T" -- well, aside from the pullups bit, anyway, as even getting one out was not happening (and gave me flashbacks to high school gym and my many failed attempts at the flexed arm hang). And then came Friday and our epic road trip out of town. One lower-body weightlifting workout -- missed. Then came this Monday, and I wasn't feeling all that great, so I did a "weak" upper-body workout with some dumbbells at home. Tuesday was a busy day (I had an orientation with the Monster Milers, which I'll detail in another post), so I got in a 4+ mile run, and figured I'd hit up my lower-body workout on Wednesday. But then Wednesday came and I didn't make my way to the gym. Thursday hit and the weather was just too nice to not go for a long run. And today, with temps in the 70s, I opted to go for yet another long run. So, excuses, excuses, I know. But I think there's a chance that the silver lining on all this is that I'm finally getting back into running.

My running journey really began back in 2005 when my friends convinced me to train with them for the 500 Festival mini-marathon in Indianapolis. I'd run several 5ks and 10ks before then, but had never really followed a specific training schedule up to that point. I really enjoyed training for the run (particularly since it meant a lot of chatting while running with my friends), and after a successful completion of the half-marathon in early May, I thought since I'd already put so much effort into training for 13.1 miles, why not keep up the momentum and train for a full marathon? I immediately set my sights on the Chicago Marathon in October. As additional motivation, I opted to participate as a charity runner for the American Cancer Society, which meant I had to raise at least $1000. That first year I followed the Hal Higdon novice training schedule religiously. For the most part I trained alone -- though my dear friends helped me with my 20 mile run by each joining me for a portion of the longest run on my training schedule.

Since I lived less than one mile from Chicago's lakefront trail, most of my runs occurred alongside Lake Michigan. One of the best parts about the lakefront trail is that mileage is marked along the way every half-mile. There are also several water fountains along the way, which helps with hydration. Plus, on the weekends Fleet Feet, a local running store, set up free water/Gatorade stops at a couple different places along the trail, catering to the many runners training for the marathon.

Training went well until around the August, when I started having trouble with my knees and IT-band. A course of physical therapy was recommended, so I ended up going to physical therapy twice a week for my last month of training. (Luckily there was a PT practice in the same building in which I worked at the time, which was super-convenient.) In order to protect my knees and ensure that I made it to the starting line, I opted to do most of my final mileage on the elliptical at my gym. The marathon was a great experience -- hard, but such a feeling of accomplishment once I crossed the finish line. Though I hobbled away from the course, somehow I found myself signing up for the marathon again in 2006.

That year I ran the marathon with D; I managed to shave about 15 minutes off my time, though my training had not been quite as stellar as the year before. Then again in 2007 I found myself back at the marathon starting line, this time with even a less stellar amount of training underneath my belt. And, that was the year that the marathon was cancelled mid-way through due to the high heat and humidity. (I was at about mile 20 when we heard "Stop running; the marathon has been cancelled!" being announced from helicopters flying overhead.) I rolled across the finish line with a super-disappointing time. And soon after ended my running career. (Or as I said at the time, I opted to take a sabbatical from running.)

Once we moved to Laramie I just could never get back into running. I was definitely burnt out from my last marathon experience and the 7200' elevation was not my friend. At that point I "officially" decided to put running on the backburner and decided to focus instead on aerobics and weight-training workouts (I've said this before, but seriously, Cathe Friedrich workouts are the best!)

Now that we've moved to the city my Cathe-commitment has waned a little bit; and though I belong to the gym at Penn it's sometimes hard to motivate myself to make the 1-mile walk there. But . . . now that the weather is getting better, I'm finding the call to hit the running trail once again. This week alone I've gone for a run three times, and have run on average five miles each time. I can breathe easy (yea, sea level!) and there is a great pathway that lies alongside the Schuylkill River. Though it lacks the mile markers and water fountains that the Chicago trail has, it still is a great place to run. (And it is much longer in length than the Chicago 18-mile-long pathway; some day soon D and I are going to have to explore on bike.)

All this to say that I'm re-committing to running. (Hopefully this exercise commitment will stick!) I'm not quite sure if I (or my joints, more importantly) are up for the Philadelphia marathon in November, but in the very least I am definitely considering the half-marathon and numerous 5 and 10ks throughout the spring and summer. Perhaps it's time to invest in a new pair of running shoes!
SHARE:

What's Baking: Mini Irish Soda Bread Loaves

Happy St. Patrick's Day! Last year I baked a full loaf of Irish soda bread using my Grandma Moran's recipe; this year I decided to mix it up a little bit and make mini Irish soda bread loaves. Apparently true soda bread is only made up of four ingredients: flour, salt, baking soda, and buttermilk. I added a smidge of sugar as well as some raisins, because, well, that's the way I like it! The mini loaves turned out a little more rustic than I was going for (I was in a bit of a rush to get the bread in the oven before the start of Top Chef All-Stars); luckily, though, they still taste great!

Mini Irish Soda Bread Loaves (printer-friendly version)
makes 8 mini loaves

2 cups unbleached all-purpose flour
1 1/2 cups organic pastry flour
1 teaspoon raw sugar
1 teaspoon salt
1 teaspoon baking soda
1 - 1 1/2 cups organic low-fat buttermilk
1/2 cup organic raisins
1 tablespoon caraway seeds [optional]

1. Preheat the oven to 450 degrees.
2. Wash raisins in cool water, drain well, and toss with some flour to coat. Set aside.
3. In a large bowl, whisk (or sift) together the flours, sugar, baking soda, and salt.
4. Stir in floured raisins and caraway seeds, if using. [I forgot to add them at this point, as you'll see in the image.]
5. Make a well in the center of the flour mixture.


6. Add the buttermilk.


7. Stir with a wooden spoon until ingredients are just moistened. Add additional buttermilk if necessary. [Aha, there are the raisins!]


8. Turn dough out on lightly-floured board. Knead until smooth -- about one minute. Add additional flour as needed.
9. Shape dough into a ball, about 6-8 inches in diameter. Make about 6-8 mini balls out of the larger round.
10. Place the dough balls on the prepared baking sheet. Use a knife to make a cross on the top of each dough ball down to within one inch of the bottom. [I was not as aggressive with my crosses as I should have been -- don't be afraid to cut deep into the dough!]


11. Bake 10 minutes at 450 degrees. Then decrease the temperature to 400 degrees and bake 10-15 minutes more.
12. Remove from the oven and cool on a wire rack.
13. Serve with butter. Note: It's best to eat (or share!) the mini soda breads within one day of baking.

 (adapted from this recipe)
SHARE:

Getting to Know Philly: Irish Potato Candy

{Irish potato candies from the Pennsylvania General Store}

Interestingly, Irish potato candy is neither Irish nor does it contain potatoes. Instead, it is a traditional Philadelphia confection made up of a coconut cream filling that is dusted with cinnamon to resemble a small potato. Prior to moving to Philly I'd never heard of this unusual St. Patrick's Day candy (the origins of which seem to be shrouded in mystery), but I figured in the interest of getting to know my new town, I'd better give it a try.

{Irish potato candies from Maron Chocolates}

Using this blog post as a guide, I picked up two varieties of Irish potato candy, one package from the Pennsylvania General Store (PGS) in the Reading Terminal Market (which deserves a post of its own -- stay tuned!) and another package from Maron Chocolates (MC) on Chestnut Street. The MC candy was more marble-shaped and harder in texture than the PGS candies, which were softer in texture, larger, and slightly more potato-shaped. I preferred the taste of the PGS candies, which were more coconutty in flavor. The candies from Maron Chocolates were a bit too sweet and buttery for my taste. Maron Chocolates is located in an ice cream shop (Scoop De Ville), and apparently later this week they will be selling ice cream mixed with the candies -- I think it may be more enjoyable as a mix-in rather than as something eaten on its own.

Irish potato candy is definitely unique and a once-a-year kind of treat. Though I'm not sure I'd seek out a box the next time St. Patrick's Day rolls around, at least now I can say I've given 'em a try!
SHARE:

Weekend Shenanigans: Cake Pops


This past weekend the stars aligned and D and I rented a cargo van to take some of our too-much-to-fit-in-our-small-apartment furniture to his parents' place in Michigan to store. Nothing like two 12-hour drives in three days! In between our epic road trip to and from Kalamazoo, we were able to get in some quality-time with the family. On Saturday while D and his dad visited a home expo, Sheila (D's mom) and I tried our hand at making cake pops. I have been obsessed with these things since receiving a batch last year as a gift around Thanksgiving (they were decorated as turkeys with pretzel legs and candy-corn tails), and I figured this would make a fun activity for the two of us to try together.

Sheila gathered all the supplies, and after a quick trip to pick up a few more essentials, we returned home and got things rolling by baking a cake. (We followed Bakerella's cake pop recipe.) To keep things simple, we used a mix from a box and also used store-bought frosting; when I'm feeling a little bit more adventurous, I'll have to try to make everything from scratch. The biggest lesson learned was that these things take time -- particularly in allowing enough time for cooling and chilling the dough balls, etc. After baking the cake, we let it cool, then crumbled it up into a large bowl. The crumbled cake was mixed with about 1/2 a can of frosting. From this doughy mixture we formed little cake balls. While chilling them for a few minutes, we melted some white chocolate and then dipped one end of each the lollipop stick into the chocolate before inserting them them into the chilled balls to help them stick. (At this point, I'd suggest chilling the balls for another 15 minutes or so -- we didn't, and some of the balls got a little too mushy and fell off their sticks.) We then dipped the balls in chocolate, tapping gently and carefully twirling to remove any excess chocolate. Next we decorated them with rainbow sprinkles and then stuck each pop upright into a piece of styrofoam to let the chocolate harden.

The cake pops seemed to be a hit with those who tried them later that evening -- and man, how can you not love cake on a stick? On Sunday, we packaged up a few for D and I to take on the road -- to do this, all you need is some small cellophane bags and colorful ribbon. Easy-peasy! And really yummy. Good thing I only packed up four to take home!
SHARE:

What's For Dinner: Pasta with Mushrooms, Grape Tomatoes, and Ricotta Cheese


I always tend to cook up too much pasta, so I end up with some leftover plain pasta in the fridge. I had about a cup of cooked bow-tie pasta on hand and decided, rather than just cover it with some tomato and basil sauce as I normally do, I'd whip together a light cheesy dish instead. For just throwing together some random ingredients, the results were actually quite tasty!

Pasta with Mushrooms, Grape Tomatoes, and Ricotta Cheese (printer-friendly version)
makes one serving

1 cup cooked pasta
1 tablespoon olive oil
1/2 pkg sliced mushrooms
6 grape tomatoes, halved
3 tablespoons organic part-skim ricotta cheese
1 tablespoon freshly-grated Parmesan cheese
fine sea salt
freshly ground black pepper

1. Heat the olive oil in a large skillet over medium-high heat.
2. Add the mushrooms and saute until browned and softened, about 2-3 minutes.
3. Add in the halved grape tomatoes and cook for about 2-3 minutes more.
4. Add in the cooked pasta. If cold from the fridge, cook until warmed.
5. Stir in the ricotta cheese and Parmesan cheese.
6. Season with salt and pepper.
7. Serve it up!
SHARE:

Cocktail Hour: Caipirinha


Though spring is just around the corner, the cold and rainy weather sure doesn't make it feel that way. What I wouldn't give for a beach vacation right about now! But, if I can't get to the beach, the least I can do is bring a little bit of the beach to me. Today's cocktail hour features the national drink of Brazil, a Caipirinha, which I first learned how to make in Laramie, of all places.

Caipirinha (printer-friendly version)
makes 1 cocktail

1 lime, rind removed, and cut into small chunks
2 oz Cachaça
1 teaspoon raw sugar

1. In a rocks glass, muddle together the lime and sugar.
2. Fill glass with ice.
3. Top with Cachaça and stir.
4. Drink!
SHARE:

What's For Dinner: Soba Noodles with Mushrooms, Carrots, Asparagus, and Tofu


Since I had some asparagus left over from last night's stuffed shells, I decided to use up the rest of the package in a soba noodle dish. In addition to the asparagus, I also sauteed up some tofu, mushrooms, green onions, and carrots. I pulled together a sauce by combining tamari sauce, lime juice, brown sugar, red pepper flakes, and Garlic Gold oil. Though this dish is the epitome of winging it, D declared that it was "restaurant-quality." A rave review, indeed!

Soba Noodles with Mushrooms, Carrots, Asparagus, and Tofu (printer-friendly version)
makes 2 large servings

2 tablespoons organic tamari sauce
1/2 tablespoon Garlic Gold oil
juice from 1 lime
1/2 tablespoon light brown sugar
pinch red pepper flakes
1/2 pkg soba noodles
2 tablespoons organic sesame oil
1 pkg organic lite firm tofu, cut into 1/2"-1" cubes.
1 cup sliced mushrooms
1 small bunch of green onions, chopped
2 medium carrots, quartered
1/2 pkg frozen asparagus cuts and tips, thawed
1/4 cup raw unsalted cashew nuts

1. In a small bowl, stir together the tamari sauce, Garlic Gold oil, lime juice, brown sugar, and red pepper flakes. Set aside.
2. Bring a large pot of water to a boil. Add in the soba noodles and cook per manufacturer's instructions. (I boiled my noodles for 8 minutes.)
3. Heat 1/2 tablespoon sesame oil in a large skillet over medium-high heat. Add the tofu cubes and brown on each side (about 2-3 minutes per side).
4. Remove the tofu cubes from the heat and place in a bowl. Set aside.
5. Add 1 1/2 tablespoons sesame oil to the skillet. Saute the mushrooms until browned. Add in the carrots, asparagus, and chopped green onions. Stir and cook for an additional 3-4 minutes.
6. Pour in 1/2 the sauce. Stir to evenly coat the veggies.
7. Add in the cashews.
8. Add in the cooked noodles. Pour in the remaining sauce. Stir to combine the ingredients.
9. Serve immediately.
SHARE:

What's For Dinner: Stuffed Shells, v. 2.0

I decided to make another round of stuffed shells for dinner. This time I used Garlic Gold Oil to saute the onions, replaced the spinach with kale, and added in some frozen asparagus. Though the original recipe calls for plain fresh mozzarella, I used some mozzarella balls marinated in olive oil, garlic, and other spices that I had on hand from Whole Foods. The result was as delicious as ever.

Stuffed Shells, v. 2.0 (printer-friendly version)
makes 4 servings

1/2 box jumbo pasta shells (about 14-16)
1 tablespoon Garlic Gold oil
1 white onion, chopped
1 cup frozen asparagus cuts, thawed
small bunch kale, chopped
1/2 tablespoon red wine vinegar
coarse salt
freshly ground pepper
1/2 container part-skim ricotta cheese (15 oz)
1 cup fresh mozzarella cheese, cut into small pieces (I quartered some mozzarella balls that had been marinated in olive oil and garlic)
1/4 cup freshly grated Parmesan cheese
2 cups tomato basil sauce
finely grated Parmesan cheese

1. Preheat the oven to 375 degrees.
2. Bring a large pot of water to boil. Season generously with salt.
3. Cook the jumbo pasta shells for ten minutes.
4. Once cooked, drain and rinse with cold water. Place the shells in a bowl and drizzle with olive oil. Set aside.
5. Heat a large skillet over medium-high heat. Add in the Garlic Gold oil. (Alternately, saute two cloves of garlic in the olive oil until golden.)
6. Saute the chopped white onion until softened and lightly browned, about 3-5 minutes. Stir in the thawed asparagus.
7. Stir in the chopped kale and saute until just wilted.
8. Add in the red wine vinegar and stir. Season with salt and pepper.
9. Remove the skillet from the heat and let cool.
10. Stir in the ricotta, mozzarella cheese, and Parmesan cheese.
11. Pour enough pasta sauce to cover the bottom into a 2-quart dish to cover the bottom.
12. Place the shells in the pasta sauce.
13. Generously stuff each shell with about 1 tablespoon of the cheese mixture.
14. Cover the dish with aluminum foil and bake in the oven for 45 minutes.
15. Remove the baking dish from the oven and uncover. Increase the oven heat to 425 degrees. Continue baking for another 15 minutes, or until the shells are lightly browned and the cheese is bubbly.
16. Serve the shells with additional heated pasta sauce. Garnish with finely grated Parmesan cheese.


SHARE:

What's Baking: Vegan Banana Coconut Walnut Bread


I'm still on my vegan baking kick, and decided to veganize my Mom's banana nut bread recipe. Since I was feeling a little extra adventurous, I also subbed in some whole wheat flour and added in some finely shredded coconut as well. This is the first time I've tried Earth Balance vegan buttery sticks -- which are made from an expeller-pressed natural oil blend including soybean, palm fruit, canola, and olive oils. Palm fruit oil is a bit of a controversial ingredient -- Earth Balance addresses this issue here. I've got to say, the resulting loaf of bread was moist and delicious, and no, Dad, it wasn't as dense as a brick. : )

Vegan Banana Coconut Walnut Bread (printer-friendly version)
makes one large or one medium and one small loaf

2 tablespoons ground flaxseeds
6 tablespoons water
1/4 cup raw sugar
1/4 cup brown sugar
1/2 teaspoons vanilla
1 cup unbleached all-purpose flour
3/4 cup whole wheat flour
1 teaspoon baking soda
1 teaspoon aluminum-free baking powder
1/4 teaspoon salt
1/4 cup organic finely shredded unsweetened coconut
1/4 cup walnuts, chopped
3-4 uber-ripe bananas, mashed

1. Preheat oven to 350 degrees.
2. Grease (I use cooking spray) one large or one medium and one small loaf pan.
3. In a small bowl, stir together the ground flaxseed and water. Let sit for about 2-3 minutes.
4. Use a stand mixer to cream together the vegan butter and sugars. Add the flaxseed mixture and vanilla and beat well.
5. In a separate bowl, stir the dry ingredients together with a fork.
6. While stirring, alternate adding the dry ingredients and mashed banana to the mixer bowl.
7. Stir in the chopped walnuts by hand.
7. Spoon the batter into the prepared loaf pan(s).
8. Bake for 45-60 minutes or until a knife or toothpick inserted into the bread center comes out clean.
9. Remove the bread from the oven and place pan on wire rack. Allow bread to cool in pan for 10 minutes.
11. After 10 minutes, remove the bread from the pan and allow to cool completely on the wire rack.
12. Wrap in foil and store in the fridge.


SHARE:

Exercise: "Starting From Zero"

Starting around January 2009, I started doing Cathe workouts. I'd never heard of her before catching one of her workouts on FitTV, an exercise and healthy living channel. Over the course of the year I toned up a bit and found that I really liked her weightlifting workouts, though I never graduated to using barbells as she did in her videos and instead stuck to my free weights. Here in Philly, our cable provider doesn't provide FitTV in our cable channel line-up. However, it turns out that starting around the first of the year, the channel stopped running Cathe workouts anyway. So, I've been a little lost when it comes to exercise.

I do own a few of Cathe's DVDs (I love, love, love Butts & Guts), and luckily she's run a bunch of specials lately which have allowed me to purchase my favorite workouts that aired on FitTV, including Pyramid Lower and Upper Body, the Slow & Heavy Series, Kick, Punch, and Crunch, and Boot Camp. But . . . if I really think about it, without access to a barbell and associated weights at home, I don't think my workouts are quite as effective as they could be.

Around February D began a consistent weightlifting (and nutrition) routine that he gleaned from Bodybuilding.com. Now I've decided to jump on the bandwagon, too. (Though I still have yet to give up my carb addiction . . . baby steps!) Today was my first "real" weightlifting workout, and wow -- do I have a long way to go! As D rightly told me as he helped me with the equipment this morning, "You're starting from zero." Though I was ready to throw in the towel when I could barely lift up the bar when doing bench presses -- the first exercise in the circuit -- I sucked it up and realized that I've got to start somewhere. And if that somewhere means just lifting up the (apparently 45-lb bar), then so be it. I'm definitely intimidated by all the equipment, but with D helping to demystify how everything works, I think soon enough I'll gain the confidence to work out with the heavy-lifting jocks.

The program that I plan to follow runs for 12 weeks. Here's what this week's workouts look like:
Monday: Upper Body
Bench Press: 3 sets of 8-12 reps
Bent Over Barbell Row: 3 sets of 8-12 reps
Dumbbell Shoulder Press: 3 sets of 8-12 reps
Skull Crushers: 3 sets of 8-12 reps
Barbell Curl: 3 sets of 8-12 reps

Tuesday: Lower Body
Barbell Squat: 3 sets of 8-12 reps
Stiff-Legged Deadlift: 3 sets of 8-12 reps
Leg Extension: 3 sets of 8-12 reps
Lying Leg Curls: 3 sets of 8-12 reps
Standing Calf Raises: 3 sets of 8-12 reps
Lying Leg Raises: 3 sets of 10-15 reps
Exercise Ball Crunches: 3 sets of 10-15 reps

Thursday: Upper Body
Dips: 3 sets of 8-12 reps
Pullups: 3 sets of 8-12 reps [Doing just one would be fine by me!]
Lateral Raises: 3 sets of 8-12 reps
Triceps Pushdowns: 3 sets of 8-12 reps
Cable Curls: 3 sets of 8-12 reps

Friday: Lower Body
Deadlift: 3 sets of 8-12 reps
Leg Press: 3 sets of 8-12 reps
Dumbbell Lunges: 3 sets of 8-12 reps
Seated Calf Raises: 3 sets of 8-12 reps
Dumbbell Shrugs: 3 sets of 8-12 reps
Decline Crunches: 3 sets of 10-15 reps
Hyperextensions: 3 sets of 10-15 reps


I'll repeat this routine (and hopefully increase weights along the way) for four weeks, and then move on to a new routine for weeks five through eight, and another for weeks nine through twelve. It should be an interesting ride. Hopefully I will be able to move tomorrow morning; particularly since I ran to and from the gym (two miles round-trip) and chased my weightlifting routine with 60 minutes on the elliptical.
SHARE:

Cocktail Hour: Aranciata Cocktail

I saw Lucinda Scala Quinn make this cocktail on an episode of Mad Hungry, and of course, as a huge fan of San Pellegrino aranciata (orange soda), I just had to try it out for myself. It did not disappoint. And . . . it's definitely the perfect drink to usher in the warmer weather as spring approaches!

Aranciata Cocktail (printer-friendly version)
makes 2 cocktails

2 oz Bacardi rum
juice from two limes, separated
dash of bitters
1 can San Pellegrino Aranciata

1. Pour the shot of rum and juice from one lime into the bottom of small glass.
2. Add a dash of bitters.
3. Top with aranciata.
4. Repeat above steps to make a second cocktail.
5. Serve!

SHARE:

What's For Dinner: Black Bean Quinoa Burgers

OK, this recipe is still a bit of a work-in-progress. The burgers tasted delicious, but the patties were a bit soft in texture. (I initially planned to just cook them in the skillet, but cooking for some additional time in the oven seemed to help things firm up a little bit.) It seems that placing the cooked patties in the fridge overnight and reheating the next day also helped the burgers to firm up. Though the taste was there, I definitely need to rethink my cooking method. Anyone have a go-to bean burger recipe or technique that I should try?

Black Bean Quinoa Burgers (printer-friendly version)
makes 6 burgers

1 cup black beans
3 carrots, chopped
pinch taco seasoning
pinch fine sea salt
pinch freshly ground black pepper
1 teaspoon ground cumin
1/4 teaspoon ground cinnamon
1/2 cup cooked quinoa

1. Preheat the oven 375 degrees.
2. Add the carrots to a food processor. Pulse until chopped finely. Add in the black beans and pulse again until combined with the carrots. Scrape down the sides of necessary. Pulse in the seasonings of your choice.
3. Scoop the mixture into a large bowl. Stir in the quinoa.
4. Form the black bean quinoa mixture into patties.
5. Heat a large skillet over medium-high heat. Spray with cooking spray.
6. Plop the burgers into the hot skillet. Cook on each side for about 4 minutes.
7. Put the burgers onto a non-stick baking sheet and cook in the oven for an additional 20 minutes.
8. Serve immediately. (I served my burgers up on Arnold Sandwich Thins along with some arugula and spinach leaves and a side of Southwestern roasted root vegetables.)
SHARE:

What's On the Side: Southwestern Roasted Root Vegetables

Since I had two yams wasting away on the kitchen counter, I decided to put 'em out of their misery by roasting them with a couple other veggies in the oven. Along with the two yams I also chopped up some red potatoes and carrots. I flavored the whole shebang with some taco seasoning, since I desired a little southwestern flavor to go along with the black bean burgers I was also cooking up.

Southwestern Roasted Root Vegetables (printer-friendly version)
makes 4 servings

2 yams
3 small red potatoes
3 medium carrots
olive oil
pinch sea salt
freshly ground black pepper
1 tablespoon taco seasoning (my blend includes Masa Harina, salt, chiles, tomato powder, garlic, cumin, California paprika, onion, white sugar, Mexican oregano, allspice)

1. Preheat the oven to 400 degrees.
2. Chop the yams, red potatoes, and carrots into similarly sized pieces.
3. Drizzle with olive oil. Season with salt, pepper, and taco seasoning. Toss (or stir if you're feeling uncoordinated) to evenly coat all the veggies in the seasonings.
4. Pour out onto a rimmed baking sheet.
5. Roast in the oven for 30 minutes; flip the veggies halfway through the cooking time. Potatoes and yams should be fork-tender and lightly browned when they're done.
6. Eat as-is or with a generous squirt of ketchup.
SHARE:

What's Baking: Vegan Lemon-Blueberry Bran Muffins


Though our crazy oven makes baking a bit difficult (rumor has it we're going to get a new one soon, yea!), I couldn't resist trying my hand at some vegan baking. I went vegan for about a two week period in college, but soon decided that I couldn't live without dairy products. (Ice cream and cheese, I'm looking at you!) However, I'm all about trying new things in the kitchen, so after finding a recipe for low-fat blueberry bran muffins, I decided to veganize the recipe as well as tweak it in several places. The resulting muffins? Wow -- seriously yum. I'm definitely going to have to make these again.

Vegan Lemon-Blueberry Bran Muffins (printer-friendly version)
makes ~16 muffins

1 T ground flaxseed
3 T water
1 1/2 C wheat bran
1 C plain rice milk (or other non-dairy milk)
1/2 C unsweetened organic applesauce
2/3 C brown sugar
1/2 t vanilla extract
juice from 1/2 a lemon
zest from 1/2 a lemon
1/2 C unbleached all-purpose flour
1/2 C whole wheat flour
1 t baking soda
1 t aluminum-free baking powder
1/2 t fine sea salt
1 t ground cinnamon
1/4 t ground nutmeg
1 C fresh blueberries
1 T chia seeds [optional]

1. Preheat the oven to 375 degrees. Grease a muffin tin or line with paper liners.
2. Stir together the ground flaxseed and water. Set aside.
3. Mix together the rice milk and wheat bran. Let sit for 10 minutes.
4. Combine together the "egg," applesauce, brown sugar, and vanilla in a large bowl. Stir in the lemon juice, lemon zest, and wheat bran mixture.
5. In a small bowl, stir together the two flours, baking soda, baking powder, salt, cinnamon, and nutmeg with a fork.
6. Stir the dry ingredients into the wet ingredients. Fold in the blueberries. Stir in the chia seeds if desired.
7. Spoon the muffin batter into the prepared muffin tin.
8. Bake for 15-20 minutes, or until muffin tops (ha!) spring back when touched.
9. Remove from the oven and place muffins on a wire rack to cool.

SHARE:
© A Less Processed Life. All rights reserved.
BLOGGER TEMPLATE MADE BY pipdig