What's Baking: Nearly Vegan Peanut Butter Cookies


So, these cookies are almost vegan -- and could be totally vegan if you didn't add in the chocolate chips. However, my mantra is "the more chocolate, the merrier" -- and what goes better with peanut butter than chocolate, anyway? I think these turned out okay -- I definitely added in everything but the kitchen sink with this recipe. Next round I think I'll work to decrease the sugars a bit as well as not use as much whole wheat flour. Otherwise, pretty wholesome treats, I think!

Nearly Vegan Peanut Butter Cookies
makes 18 cookies

1 1/2 cups whole wheat flour
1/2 cup ground flax seed
1/2 cup brown sugar
1 teaspoon baking powder
1/2 teaspoon baking soda
1/4 teaspoon fine sea salt
2 tablespoons canola oil
3 tablespoons applesauce
1/4 cup honey
1/4 cup maple syrup
1 teaspoon vanilla extract
1/4 cup smooth peanut butter
1/4 cup peanuts, chopped
1/4 cup chocolate chips, chopped
turbinado sugar

1. Preheat the oven to 325 degrees.
2. Combine the whole wheat flour, ground flax seed, brown sugar, baking powder, baking soda, and fine sea salt in a large mixing bowl. Stir together with a fork.
3. Add in the canola oil, applesauce, honey, maple syrup, and vanilla extract. Stir to combine. You may need to mush the dough around a bit to get everything evenly combined.
4. Stir in the peanut butter, chopped peanuts, and chocolate chips.
5. Spoon rounded tablespoons of dough onto a baking sheet. Use a fork to flatten each cookie. Sprinkle with turbinado sugar if desired.
6. Bake for 10-12 minutes, or until golden brown on the bottom.
7. Remove from the oven and allow to cool on a wire rack.
SHARE:

What's For Dinner: Lentil Dal (v. 1)


India is the inspiration for tonight's dish. This is my first whirl at making lentil dal; it actually came out rather well. My own major complaint about it is that it really wasn't all that spicy. I think this will be the first attempt of many to get this recipe just right -- I definitely want to amp up the spice a bit and try some other spice combinations. We enjoyed our lentil dal over some basmati rice and also with a shared piece of naan.

Lentil Dal 
makes 4 servings

3 cups water
1 cup dried lentils
1 cup basmati rice
2 1/2 cups water
1 tablespoon vegetable oil
3/4 teaspoons ground turmeric
3/4 teaspoons ground cumin
1/2 teaspoon ground ginger
1 medium onion, chopped (2 cups)
3 garlic cloves, minced
1 tablespoon tomato paste
1 tomato, seeded and chopped
1 jalapeño, seeded and chopped
1/4 cup fresh cilantro, chopped

1. Cook the basmati rice according to the manufacturer's instructions. I cooked it up in my rice cooker on the "brown rice" setting. Couldn't be easier!
2. Dump your lentils onto a kitchen towel. Pick out any rocks or other debris. Rinse the lentils in a colander.
3. Add the lentils to 3 C of hot water in a medium-sized pot. Bring to a boil, then reduce the heat to low and cover. Allow to simmer for about 25-30 minutes, or until the lentils are tender.
4. In a large skillet, heat the vegetable oil over medium heat. Once the oil is warm, add the spices and, stirring frequently, cook for about 30 seconds.
5. Add the chopped onions and minced garlic, saute for about 10 minutes, or until the onions have softened.
6. Stir in the cooked lentils (and cooking water). Stir in the tomato paste, then reduce the heat to low and simmer for about 10 minutes. Stir in the chopped jalapeño peppers and tomatoes.
7. Serve over a bed of basmati rice. Garnish with chopped cilantro.

(adapted from this Epicurious recipe)

SHARE:

Cocktail Hour: Pineapple Fizz

Let's pretend it's still the weekend, shall we? And if it's still the weekend, it's the perfect time to enjoy another cocktail, right? Another pineapple-flavored cocktail is on order for today -- this time inspired by a recent happy hour at Salt in Boulder.

Pineapple Fizz
makes one cocktail

1 1/2 oz rum
2 oz pineapple juice
1/2 oz fresh lime juice
seltzer water

1. Add ice cubes to a cocktail shaker. Pour in the rum, pineapple juice, and lime juice. Shake to combine.
2. Pour into a highball glass.
3. Fill the remainder of the glass with seltzer water. (Slowly! Or it may, um, overflow. Not that I have any experience with that, or anything!)
SHARE:

Cocktail Hour: Pineapple Margarita


Tonight's cocktail hour was inspired by an episode of the Barefoot Contessa. In the episode, Ina made a pitcher full of pineapple margaritas; I downsized and adapted the recipe a bit to make just two servings.

Pineapple Margarita
makes 1 cocktail

1 1/2 oz tequila
1/2 oz triple sec
1/2 oz lime juice
3 oz pineapple juice (I used a frozen (100% pineapple juice) variety)

coarse sea salt (I think turbinado sugar would be an excellent option as well)
ice cubes for shaker

1. Rub the edge of a martini or margarita glass with a damp paper towel. Dip the glass into a dish full of salt or sugar to rim the glass. Set aside.
2. Add the ice, tequila, triple sec, lime juice, and pineapple juice into a cocktail shaker.
3. Shake to combine.
4. Pour the contents into the prepared cocktail glass.
5. Drink up!
SHARE:

What's For Dinner: Venison Steak Salad

For tonight's dinner, I opted to make a steak salad with some venison steaks we had in the freezer. I put D in charge of cooking the steaks, and I put together the salad. Given the quick cooking time for the steaks and ease of putting together the salad ingredients, this made for quite the simple weeknight dinner--which clearly makes it my kind of meal!

Venison Steak (printer-friendly version)
makes 2 servings

2 4-oz venison steaks
fine sea salt
freshly black pepper
olive oil

1. Preheat the oven to 350 degrees.
2. Heat about 2 tablespoons of olive oil in a large oven-safe skillet over high heat. Place the steaks on the skillet and sear for about two minutes. Flip the steaks over, and place the skillet immediately into the oven.
3. Continue cooking the steaks in the oven for six minutes.
4. Remove the steaks from the oven and wrap them in aluminum foil. Allow the meat to rest for about three to four minutes.
5. After resting, cut the steaks against the grain on the bias to make strips for the salad.

Pecan-Cranberry (and then some) Salad
makes 2 servings

1 cup baby spinach leaves
1 cup mixed salad greens (and purples)
2 tablespoons crumbled goat cheese
1/3 cup dried cranberries
1/4 cup whole pecans, crumbled
balsamic vinaigrette

1. In a large salad bowl, mix together the spinach and mixed salad leaves.
2. Top the greens with crumbled goat cheese, dried cranberries, and pecans.
3. Dress the salad with balsamic vinaigrette.
4. Toss the ingredients to combine. Let the salad sit for a few minutes to allow the flavors to meld.


SHARE:

What's On The Side: Rosemary Ricotta-Goat Cheese Crostini


I prepped this simple crostini as an appetizer/side for dinner the other night. My inspiration for the spread came from one of the ravioli fillings I made a while back. However, instead of using store-bought rosemary, I was able to procure some fresh rosemary from our little herb garden outside. And I think I only got bit by about 10 mosquitoes (they are quite nuts this year) while harvesting it. Ah, the trials and tribulations I must go through to use fresh ingredients!

Rosemary Ricotta-Goat Cheese Crostini
makes 2+ servings

sourdough bread loaf, cut into slices (I just cut four slices for our servings)
3 tablespoons ricotta cheese
3 tablespoons goat cheese
fine sea salt
freshly ground black pepper
1/2 teaspoon finely chopped fresh rosemary
2 cloves garlic, pressed

1. Turn on your oven's broiler. Make sure an oven rack is located near to the broiler.
2. Place the slices of sourdough bread on a baking sheet.
3. Put the baking sheet under the broiler and heat the bread slices until lightly toasted. Remove from the oven.
4. In a small bowl, mix together the ricotta and goat cheeses. Season with salt and pepper to taste.
5. Stir in the finely chopped rosemary and pressed garlic.
6. Spread a generous amount of the rosemary-cheese mixture atop each slice of toasted bread.
SHARE:

What's For Lunch: Fresh Veggie Sandwich

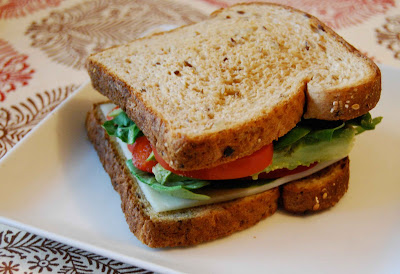
For lunch today I decided to make a fresh veggie sandwich. And to add a little extra flavor to my sandwich, I wanted to use a bit of hummus as a spread. A stop at one of the local grocery stores was unfruitful -- so I took that as a sign that I should make my own. And given that I almost always have the ingredients on hand, there really isn't much of a reason to not make it myself. Making hummus is quite easy -- just add a bunch of ingredients to a food processor, pulse the ingredients -- and voila! -- fresh hummus. To make my sandwich, I spread a generous dollop of hummus on two slices of toasted bread, then filled the sandwich with baby spinach leaves, sliced tomato, sliced avocado, and a square of monterey jack cheese.


Slightly Spiced Hummus
makes about 1 cup

1 can garbanzo beans, drained and rinsed
2 cloves garlic, minced
juice of one lemon
3 tablespoons tahini (sesame seed paste)
pinch of ancho chile powder

1. Combine all the ingredients in a food processor. Pulse to combine.
2. Use as a sandwich spread or as a veggie or chip dip.
3. Store any leftover hummus in a tightly-lidded container in the fridge.
SHARE:

What's On The Side: Curry Rice with Peas

I actually ate this as a lunch, but I think it would work rather well as a side, or even as a full entree with a little sauteed tofu. I was inspired to make this dish after watching an episode of Nigella Express in which Nigella made muttar paneer, one of my favorite Indian dishes. This creation is definitely not quite as satisfying, but did do the trick to quell my hunger and help me clear some leftovers out of the fridge at the same time.

Turmeric Rice with Peas
makes one serving

2/3 cup frozen peas
1 tablespoon water
1 cup coconut rice
1/2 teaspoon curry powder
1 teaspoon ground turmeric

1. Place the peas in a microwave-safe dish and add 1 tablespoon of water. Cook for about a minute and a half; remove from the microwave and stir. Cook for an additional 30-45 seconds if necessary.
2. Reheat the coconut rice or cook up a fresh batch.
3. Stir together the peas and rice. Season with the curry powder and turmeric.
4. Top with sauteed tofu (optional) or eat plain.
SHARE:

What's Growing: Fresh Herbs

The growing season in Laramie is quite short, making growing a garden a bit of an ordeal. Add on to that the fact that we rent our home, and there really is no incentive to put the work in to building raised beds, figuring out an irrigation system, and doing all the other work that would be necessary for making a garden grow here at 7200 feet.

However, I am a bit of a sucker for fresh herbs. And every time I purchase a package of fresh herbs from the store, though I have the best of intentions, it seems I am never able to use it all before it starts to go bad. So it makes a bit of sense to grow a herb garden outside. This past weekend, D turned the soil in a little patch along the side of the house and planted a bunch of fresh herb plants that we've been gathering over the past month or so. As you can see, our garden is a bit basil-heavy, but that's definitely one of the herbs we use most often. Rounding out our little garden is a rosemary plant and a few mint plants. (Because nothing says summer like a mojito made with fresh mint, right?)

Recently, I made my first harvest from the garden and plucked some basil leaves to put together a quick basil pesto to serve over pasta.


Fresh Basil Pesto
makes about 1 cup

2 cups basil leaves, rinsed and patted dry
2 cloves garlic, minced
1/3 cup pine nuts or walnuts (or both together), lightly toasted
1/4 cup freshly grated romano cheese
1/4 cup freshly grated parmesan cheese
freshly ground black pepper
fine sea salt
olive oil

1. Toast the pine nuts (and/or walnuts) in a skillet over medium heat for 1-2 minutes. Stir frequently and remove from the heat as soon as the pine nuts and/or walnuts become fragrant.
2. Place the basil, garlic, and nuts in the bowl of a food processor. Pulse to combine the ingredients.
3. Add in the cheeses. Pulse to combine. Use a rubber spatula to scrape down the sides if necessary.
4. Add the olive oil in a slow stream while pressing the "on" button.
5. Season with salt and pepper to taste.
6. Serve over pasta or as a spread for a toasted baguette. Store unused portion in a tightly-covered container in the fridge. If the pesto is a bit dry, pour a layer of olive oil over the top of it prior to refrigerating to prevent the pesto from turning brown.
SHARE:

What's For Dinner: (Mostly) Grilled Marinated Steak

Oof -- this steak dinner was almost the steak-dinner-that-wasn't. Earlier in the day we had joked about having the pizza place on speed-dial in case the steak didn't turn out well; little did we know at the time that we almost considered resorting to that choice!

For our final meal together before my parents returned to Ohio, we decided to make a steak dinner. This decision was heavily swayed by watching an episode of Good Eats in which Alton Brown cooked the steak directly on the coals after blowing away the ash with a blow dryer. Too intriguing not to try, right?

So, after a morning spent in Fort Collins, we stopped off at Whole Foods on the way home and picked up some steak. Though Alton used a skirt steak cut, they didn't have this cut at the meat counter, so we opted to purchase a slightly thicker cut of steak. (Which I can't quite remember the name of, though the butcher assured us it was "better.") Note the extra thickness. That will turn out to be a key player later on in the story.

So, once we got home, I put D in charge of making the marinade. We let the meat marinate for several hours, and in the meantime enjoyed a nice hike at Vedauwoo. After our hike in the woods, we came home and the men set to cooking the steak on the grill. The charcoal chimney was set up, the charcoals got hot, and after using the blow dryer technique to remove the ashes from the coals, the steaks were placed directly on the coals. Now, Alton cooked his steak for about a minute on each side, and then removed it from the heat, wrapping it in aluminum foil for 15 minutes and letting it rest. The men followed this same method. Of course, this meant we neglected to remember that our meat was a bit thicker than what Alton had used -- and yes, after 15 minutes of rest, it was found to be, um, still ready to moo when cut into to check out the meat's doneness. So, back to the grill! Several more minutes on the coals, but to no avail. It just didn't seem to want to cook. One theory is that, in addition to not taking into account the meat's thickness, the coals may also never have gotten hot enough to fully cook the meat.

So, long story short, the meat was finished in the stove under the broiler. I think the lesson here is to make sure the coals are extremely hot when cooking directly on them, and also take into consideration how thick the meat is when determining cooking time. But, for all the drama, the steaks turned out really nicely. All's well that ends well, right?

"The Steak That Almost Wasn't" Marinade

1/2 cup olive oil
1/3 cup soy (or tamari) sauce
medium bunch green onions, rinsed and diced
2 cloves garlic
1/4 cup lime juice (about 2 limes)
1/2 teaspoon red pepper flakes
1/2 teaspoon ground cumin
3 tablespoons dark brown sugar

1. Place all the ingredients in a blender. Place the lid on the blender and blend to combine.
2. Put the steak into a large glass bowl. Pour the marinade over the meat. Cover the bowl with plastic wrap.
3. Refrigerate for at least one hour.

 (adapted from Good Eats)

SHARE:

What's For Dessert: Tartlette aux Framboises


Following a trip to Paris last November (which involved a number of trips to different pastry shops around the neighborhood in which we stayed), I have been dreaming about trying my own hand at making a tartlette aux framboises (raspberry tart). A sale on raspberries at a local grocery store was definitely a sign that now was the time to give my pastry skills a whirl. As usual, I scoured the Internet for recipes, and the following recipe is an amalgam of recipes that I think resulted in a quite delightful tartlet. Perhaps not exactly the same as enjoying one in Paris, but I think without a doubt the best I could get here in Laramie!

Tartlette aux Framboises
makes 4 servings

For the pastry shell:
1/2 cup (1 stick) unsalted butter at room temperature
1/4 cup raw sugar
1 egg, lightly beaten
1 1/2 cups unbleached all-purpose flour
1/8 teaspoon fine sea salt

1. In an electric mixer, cream together the butter and sugar.
2. Slowly add in the lightly-beaten egg.
3. Add the salt and flour all at once. Continue mixing until the dough forms a small ball.
4. Remove the dough from the mixing bowl and place on a lightly-floured cutting board.
5. Knead the dough together. Place on a piece of plastic wrap and press out into a 1/2" disk.
6. Wrap the dough in the plastic wrap and chill in the fridge for at least an hour.
7. Preheat the oven to 400 degrees.
8. Separate the dough into six small balls. Roll out into 1/4" circles.
9. Place the dough into a buttered tartlette pan. Gently pat the dough into the pan. Cut off any excess dough. Prick the bottom of the dough with a fork.
10. Chill the prepared tartlettes in the fridge for at least 20 minutes prior to baking.
11. Cover the bottom of the dough with a parchment or aluminum foil circle. Add pie weights or dried beans.
12. Bake in the oven for 10-15 minutes, or until golden brown.
13. Remove from the oven and remove the pie weights and aluminum foil circles.
14. Let cool completely on a wire rack.

For the pastry cream (note, this makes a TON of pastry cream, much more than you'll need):
3  egg yolks
1 egg
2 tablespoons raw sugar
3/4 cup raw sugar
3 tablespoons cornstarch
3 tablespoons unbleached all-purpose flour
3 cups whole milk
3 tablespoons unsalted butter
2 teaspoons vanilla extract

1. Stir together the egg yolks, egg, and 2 tablespoons raw sugar.
2. Add in the cornstarch and flour and whisk together.
3. Heat together the whole milk and 3/4 cup raw sugar in a medium-sized sauce pan over medium heat. Whisk constantly to avoid scorching the milk. Remove from the heat when the milk begins to steam.
4. Pour half of the milk mixture into the egg mixture, whisking constantly.
5. Pour the egg/milk mixture into the saucepan and return to the stovetop. Bring to a boil over medium heat. Again, whisk constantly. Remove from the heat once it begins to boil. (You will note that the mixture will begin to thicken once it starts to boil.)
6. After it is removed from the heat, stir in the butter and vanilla extract.
7. Pour/spoon the pastry cream into a large bowl. Place plastic wrap atop the pastry cream, pressing it against the surface of the cream to prevent a skin from forming.
8. Place the pastry cream in the fridge and allow to cool completely.

For the apricot glaze:
1/2 cup organic apricot preserves

1. Heat the apricot preserves over medium heat, stirring constantly. Remove from the heat once it has liquified; allow to cool slightly.

To make one tartlette:
tartlette shell
pastry cream
~12 raspberries, rinsed and dried
apricot glaze

1. Add a large spoonful of pastry cream to the tartlette shell and spread evenly.
2. Place the raspberries, stem-side down, atop the pastry cream in a circle pattern.
3. Brush a thin layer of the apricot glaze atop the raspberries.
4. Return the tartlette to the fridge and allow to chill until ready to serve.

SHARE:

Cocktail Hour: Apricot Spritzer

Well, truthfully this post should really be called "Mocktail Hour" -- though who am I to judge if you opt to spike yours? Just a simple spritzer to take off the edge of the workday today. Light and refreshing. Yum.

Apricot Spritzer
makes one serving

8 oz club soda
3 oz apricot nectar (I used Looza brand)

1. Pour the ingredients into a pint glass. Stir to combine.
2. Add a couple ice cubes.
3. Spike with your libation of choice. (Optional)
4. Cheers!
SHARE:

What's For Lunch: Herb and Spinach Salad with Cherries

Just a simple salad for today's lunch. To make this salad, I just combined a handful of herb salad (organicgirl herb baby romaine salad -- with cilantro -- soo good!) with a handful of baby spinach leaves. A garnished the salad with about a dozen bing cherries, pitted and halved. To finish it all off, I drizzled the salad with balsamic vinaigrette, some homemade croutons (a great way to use up all the bread slices I mangled yesterday!), and a few Parmesan cheese shavings. Easy, fresh, and actually rather filling!
SHARE:

What's For Breakfast: Eggy in a Basket

I woke up this morning with a sudden desire to make eggy in a basket -- basically an egg cooked in a slice of bread. Since we had a loaf of sourdough bread leftover from dinner, I decided to use that as my source of bread. Unfortunately, I had a bit of an issue cutting out a flat slice, as you'll see in the image below . . .

Eventually, however, I managed to cut out two fairly-even slices. I used the open-end of a wine glass to cut a hole in the middle of the bread. (Obviously, a round cookie cutter would do the job, too -- I just don't happen to have one!) To make the eggy in a basket, first I melted about 1 tablespoon of unsalted butter in a large skillet over medium heat. After the butter had completely melted, I added the slice of bread and moved it around a little bit to coat it in the butter. Next, I cracked an egg into the hole in the bread slice. Since my bread was not exactly even on the bottom, a little bit of the egg white leaked out, however, I tried to smoosh down the leaky side a little bit so that the egg white would cook up, thus stopping the leak.

I seasoned the egg with fine sea salt and freshly ground pepper. After the egg set, I flipped it over and cooked the other side. If you like you could add a bit more butter to the skillet prior to flipping the egg; I opted not to do this for my serving. Cook the for another 1-2 minutes, and then remove from the heat and serve! Toast and egg all-in-one -- couldn't be better.

SHARE:

What's For Dinner: Spaghetti with Basil Aioli Topped with a Fried Egg

OK, pasta with a fried egg on top? Kind of weird, right? For some reason, this Giada De Laurentiis recipe totally caught my eye on a recent episode of Everyday Italian. This meal is pretty quick to pull together, and was a welcome hearty dinner after D and I partook in an hour-long trail run just up the road at Vedauwoo.

Spaghetti with Basil Aioli Topped with a Fried Egg (printer-friendly version)
makes two servings

For the aioli:
1 egg yolk (use super-fresh eggs)
1 teaspoon cayenne pepper
1/16 teaspoon ground cayenne
1 clove garlic, cut into small pieces
1/2 teaspoon fresh lime (or lemon) juice
fine sea salt
freshly ground black pepper
1/4 cup vegetable oil
1/4 cup olive oil
1/4 cup fresh basil leaves (from the herb garden!)

1. Combine all ingredients except the oils and the basil in a food processor. Process until just mixed together.
2. Pulse while slowly pouring in the two oils.
3. Add in the basil leaves, pulse to combine.
4. Pour the sauce into a large bowl. Whisk together to further combine the ingredients if necessary.
5. Set aside.

For the asparagus and pasta:
1 medium bunch of asparagus
4 oz spaghetti

1. Fill a large pasta pot with water and bring the water to a boil. Add a pinch of salt once the water begins to boil.
2. Break off the ends of the asparagus stalks; alternately just chop off the ends. Rinse the stalks.
3. Bundle the asparagus with a rubber band and place in the boiling water. Boil the asparagus for 4 minutes.
4. Remove the asparagus from the boiling water and immediately place in an ice water bath. Remove from the water and chop into 1" pieces. Set aside.
5. Place the spaghetti (or pasta of your choice) in the same boiling water in which you cooked the asparagus; cook according to the manufacturer's instructions. Add the chopped asparagus into the water to warm it up just before removing the pasta from the water.

For the fried eggs:
2 eggs
1 tablespoon olive oil

1. Just before the pasta is finished cooking, fry up two eggs in a skillet. (What could be easier?!)

Putting it all together:
1. Remove the spaghetti and asparagus from the water, and place in the bowl with the aioli. Stir together to fully coat the spaghetti and asparagus pieces in the sauce.
2. Place a healthy portion of spaghetti and asparagus on a plate. Top with a fried egg. Season with salt and pepper to taste. Eat!

 (adapted from this recipe)
SHARE:

What's For Dinner: Grilled Salmon Steaks

This evening's entree was inspired by a recent episode of Giada at Home in which Giada cooked grilled salmon alongside a citrus salsa verde. I opted to serve our salmon along with a citrus-mint salad. Though Giada cooked her salmon on an indoor grill, I had D (the household grillmaster) grill up the salmon outside. As to the salmon, D purchased it from Whole Foods when he was in Fort Collins. D opted to get four wild salmon steaks (which we had never tried before) as the fillets were from farmed salmon.

Grilled Salmon 
makes four servings

4 6-oz wild salmon steaks
2 tablespoons organic agave nectar
freshly ground pepper
fine sea salt
vegetable oil

1. Brush the top (non-skin) side of each salmon steak with agave nectar. Season each piece with salt and pepper.
2. Brush the grilling rack with vegetable oil to prevent the salmon from sticking.
3. Grill for about 3-4 minutes on each side, or until the salmon is flaky.
4. Let the steaks rest for five minutes after removing them from the grill.
5. Serve over a bed of coconut rice and alongside citrus-mint salad. (The citrus-mint salad is nearly the same as this citrus-apple salad recipe, though for additional flavor, I added about six chopped fresh mint leaves from our herb garden.

(adapted from this recipe)

SHARE:

What's On The Side: Coconut Rice


For tonight's rice dish, I opted to go with a little tropical flavor, as I was also serving a citrus-apple-mint salad on the side. Again, I made this dish in the rice cooker, though I'm pretty sure you could just follow the manufacturer's stove-top directions as well, and sub in the coconut milk for some of the water, as I did here. I found the coconut flavor to be a bit subtle, but I think it still managed to add an additional layer of flavor that I was going for.

Coconut Rice
makes 4+ servings

2 cups Thai jasmine rice
1 can organic coconut milk (I used a light variety)
3/4 cup water

1. Combine the ingredients in the bowl of a rice cooker. Cook on the "white rice" setting. Let stand for at least 15 minutes in the rice cooker after the cooking cycle is complete.
2. Fluff and serve.

SHARE:

What's To Drink: Grandpa Bronson's Famous Brandy Alexanders

A dessert-drink is the feature of today's cocktail spotlight. I was first introduced to the brandy alexander a few years ago when D and I went to visit his grandparents in Florida. At the Bronson household, the blender starts whirring around 11a, and before you know it, you're downing a delicious brandy-spiked ice cream shake. Soo good -- and quite indulgent.

While my parents were visiting last week, we got a hankering for an evening nightcap -- and brandy alexanders seemed to fit the bill. D called up his grandfather to get the recipe, since we were out to eat and I couldn't consult the book of family recipes I have to check to see if we had all the ingredients in the pantry. A quick run to the grocery store for ice cream and the liquor store for brandy and crème de cacao, we were ready to start blending! Though we may wait 'til our retirement years to start drinking brandy alexanders in the late morning, this cocktail does make a nice treat before bedtime.

Grandpa Bronson's Famous Brandy Alexanders
makes 4 servings

6 shots crème de cacao
8 shots organic half-n-half
4 scoops high-quality vanilla ice cream (I recommend Breyer's All Natural or Haagen-Daz 5 if you're just making one or two servings)
4 shots brandy
ground nutmeg

1. Blend together all of the ingredients except the nutmeg.
2. If it's too thin for your liking, add in a bit more ice cream.
3. Pour into serving glasses. (I was feeling fancy, so had mine in a martini glass; pint glasses work quite well, too.)
4. Sprinkle each cocktail with ground nutmeg.
5. Serve immediately!

SHARE:

What's On The Side: Roasted Asparagus with Parmesan


An easy side for tonight's dinner -- gotta take advantage of the fresh asparagus in the market right now! All you need is a little salt, pepper, olive oil, and parmesan cheese. Easy-peasy!

Roasted Asparagus with Parmesan
makes 4 servings

1 big bunch of asparagus
1 tablespoon olive oil
fine sea salt
freshly ground black pepper
2 tablespoons freshly grated parmesan

1. Preheat an oven to 400 degrees.
2. Rinse the asparagus, and break off the ends. (They'll snap where they should with light pressure.)
3. Spread the asparagus over a rimmed baking sheet.
4. Drizzle the asparagus with olive oil. Roll the asparagus to completely cover in oil. Season with salt and pepper.
5. Roast in the oven for 15 minutes.
6. Sprinkle the parmesan evenly over the asparagus stalks. Roast for one more minute.
7. Remove from the oven and serve immediately.

SHARE:

Where to Eat: Laramie


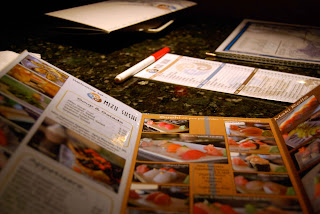
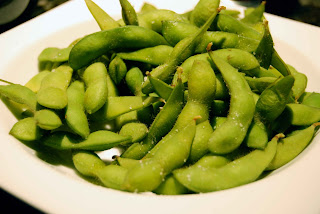
Mizu Sushi, which opened in Laramie this past January, is a welcome addition to the international cuisine scene in town. D and I have eaten there on several occasions, and have always enjoyed a great meal. The service is friendly and attentive; as soon as you accidentally drop a napkin on the floor, a new one is placed by your side. The ingredients are fresh and the flavors are rich. This time around, D and I visited Mizu along with my parents, who are in town this week. Though D and I typically share an order of sushi, tonight D branched out and tried a noodle dish. I stuck with my standard vegetarian sushi rolls. We started our meal off with a generous bowl of edamame. My parents opted to share an order of egg rolls to start off their meal.

{edamame}

{egg rolls}

Next, I had a bowl of miso soup (mmm, so salty and delicious!). Not a drop of soup was left in the bowl when I was done.

{miso soup}

D opted to have the shrimp and sliced pork vermicelli for his entree. The noodles came in a ginormous bowl; D nearly conquered the dish, though there was still a bit left over when he reached his food-intake limit.

{shrimp and sliced pork vermicelli}

I decided to be boring and got a typical order of cucumber rolls and avocado rolls. Unfortunately, they do not have tamago (sweet egg omelette) rolls (one of my favorites). I made quick work of getting the rolls into my stomach--and tested my ability to consume wasabi without completely clearing my sinuses at the same time.

{cucumber rolls and avocado rolls}

Mizu Sushi is located in a rather large building, with the sushi counter serving as a focal point against one wall in the middle of the space. The restaurant is decorated with a modern flair, and features tranquil colors and mostly muted artwork, though the back wall is dominated by a large separated mural of Katsushika Hokasai's "Great Wave Off Kanagawa" artwork.

Mizu Sushi
307 S Third Street
Laramie, WY 82070
(307) 745-3888
Open daily 11a to 9p.
SHARE:

What's For Breakfast: Chocolate-Kissed Granola Served Over Greek Yogurt

I just ran out of granola, so I guess it's (a fairly obvious) sign that it's time to make more! For today's recipe, I added several different kinds of nuts, and since I'm a bit of a chocoholic, I decided to also add a little bit of cacao powder for a hint of chocolate flavor. I think it turned out rather well! And -- like always -- it's easy to make, from start to finish, it took only about 30 minutes.

Chocolate-Kissed Granola
makes 8+ servings

2 cups rolled oats
1/2 cup unsweetened shredded coconut
1/4 cup raw sunflower seeds
1/2 cup walnuts, roughly chopped
1/2 cup pecans, roughly chopped
1/2 cup almonds, roughly chopped
1 tablespoon toasted wheat germ
1 tablespoon ground flax seeds
1/2 tablespoon cacao powder
1/2 cup dried cherries
3/4 cup dried cranberries
2/3 cup clover honey
1/4 cup dark brown sugar
1 1/2 teaspoons vanilla extract
1/4 teaspoon fine sea salt
1/2 tablespoon unsalted butter

1. Preheat the oven to 350 degrees.
2. Spread the oats, sunflower seeds, chopped nuts, and shredded coconut on a rimmed baking sheet. Bake for 6 minutes, stirring after about 4 minutes. Remove from the oven and pour into a large mixing bowl.
3. Decrease the oven temperature to 300 degrees.
4. Add the wheat germ, flax seed, and cacao powder to the large mixing bowl. Stir together.
5. In a small sauce pot, mix together the honey, brown sugar, vanilla, salt, and butter. Heat over medium heat; remove when mixture just comes to a boil and all ingredients are dissolved.
6. Pour the honey mixture over the oat mixture in the large mixing bowl. Stir in the dried cherries and cranberries.
7. Prepare a 9x13 baking dish by spraying with canola oil and then line with parchment paper cut to fit the bottom of the dish.
8. Spread the granola into the baking dish, gently patting it down.
9. Bake in the oven for 25 minutes, or until lightly browned. Allow to cool completely (about 2-3 hours.) Cut into squares or crumbles.
10. Store in a container with a tight lid.

SHARE:

What's For Dessert: Chocolate-Espresso Sorbet

Tonight's dessert recipe comes from another episode of the Barefoot Contessa. I've never made sorbet before, but given it has fewer fat and calories than the full-on ice cream we've been making of late, it seems about time I give a lighter recipe a try. I doubled the amount of cinnamon that was required in the original recipe (I'm a bit of a cinnamon nut) -- if you're not that big a fan, definitely take it back a notch. All in all, a good addition to my frozen-dessert repertoire, though for me it didn't quite have the same satisfying taste as the dairy version.

Chocolate-Espresso Sorbet (printer-friendly version)
makes 6+ servings

3/4 cup raw sugar
1/2 cup cacoa powder (I used Dagoba cacao powder)
1/4 teaspoon vanilla extract
1/8 teaspoon kosher salt
1/4 teaspoon cinnamon
2 cups water
1 tablespoon instant espresso powder
3 oz boiling water
1 1/2 tablespoons kahlua [optional]

1. Make the espresso by adding 3 oz boiling water to 1 heaping tablespoon of instant espresso powder. Alternately, if you have an espresso maker, you can just make one shot of espresso.
2. Combine the sugar, cacao powder, vanilla, salt and cinnamon in a small sauce pot. Stir in the water and prepared espresso. Warm over low heat until all ingredients are dissolved. Remove the pot from the heat.
3. Stir in the kahlua.
4. Pour the mixture into a bowl with a lid, and refrigerate until very cool. (At least one hour.)
5. Prepare the sorbet per your ice cream maker's instructions. Serve immediately, or if the sorbet is overly soft, spoon into a dish with a lid and freeze for an hour or overnight.

(adapted from this Barefoot Contessa recipe)
SHARE:
© A Less Processed Life. All rights reserved.
BLOGGER TEMPLATE MADE BY pipdig