Showing posts with label summer. Show all posts

What's On the Side: Easy Coleslaw for a Crowd

The arrival of the summer season calls for picnics, barbecues, and cookouts. And you can't have a cookout without coleslaw. This recipe for Easy Coleslaw is a real crowdpleaser.


Easy Coleslaw for a Crowd || A Less Processed Life

The arrival of Memorial Day means that summer is (unofficially) here. This fact can also be verified by the quantity of out-of-state license plates now seen throughout town.

Truth be told, we kind of missed spring this year up here in the Northwoods. We went straight from the depths of winter (and ice-covered lakes) into the heat of summer. And by heat of summer, I mean record-breaking high temperatures. There's a good chance I might melt before the heat breaks. TBD.

But I have to admit I love a good summertime cookout and eating al fresco. (Particularly if my chair is in the shade, ha ha.) And a cookout wouldn't be a cookout without a little coleslaw on the side. This recipe is super-easy, very tasty (the aleppo pepper gives it the tiniest amount of heat), and makes enough to feed a crowd. What's not to like about that?

Easy Coleslaw for a Crowd
makes 12 servings

For the dressing: 
1 cup mayonnaise
1 cup plain Greek yogurt (I use fat-free)
4 tablespoons lemon juice
1 1/2 tablespoons granulated sugar
1 1/2 tablespoons ground mustard
1/2 teaspoon aleppo pepper (or you can use plain freshly-ground black pepper)
1 teaspoon fine sea salt

2 16-ounce packages of prepackaged coleslaw mix

1. In a medium bowl, whisk together all of the dressing ingredients until well-blended. If necessary, season with additional salt and pepper to taste.
2. Add the coleslaw mix to a large serving bowl. Stir in the dressing as desired; toss to coat. Use more or less dressing depending on how you like your coleslaw; you can refrigerate extra dressing for up to a week. Chill in the refrigerator until ready to serve.

SHARE:

What I'm Bringing to the Picnic: Browned Butter and Miso Crispy Rice Treats

Think crispy rice treats are boring? They don't have to be! These treats get a sophisticated makeover with the sweet and savory flavor combination of browned butter and miso.


Browned Butter and Miso Crispy Rice Treats || A Less Processed Life

We are well into June and summer is just a few short weeks away. And that means it's picnic season!

Browned Butter and Miso Crispy Rice Treats || A Less Processed Life

When it comes to picnics, my favorite meals to pack are simple ones. Give me a loaf of crusty bread (don't forget a knife!, although rusticly-torn bread also adds a little bit of charm), some cheese, and freshly sliced tomatoes, and I'm a happy girl indeed.

Browned Butter and Miso Crispy Rice Treats || A Less Processed Life


But if you know me at all, you know that I am a big fan of dessert. Nothing bums me out more than a special meal that doesn't end with some sort of sweet treat. (Perhaps I should schedule a sugar intervention? Hmmm ... Nah.)

Now, I don't expect (or even most times want) something elaborate. Heck, even just a delicious morsel of chocolate often does just fine. But for a picnic, finger-friendly bars are the way to go. These Browned Butter and Miso Crispy Rice treats definitely check all the boxes. They are sweet, of course, but also have a deepened flavor from the nuttiness of the browned butter and umami savoriness from the miso. While they might be a little fancier than the recipe straight from the cereal box, they are just as easy to make.

And let me tell you, they are deliciously addictive. You will be the star of the picnic or potluck if you bring these to the table.

Browned Butter and Miso Crispy Rice Treats (printer-friendly version)
makes twelve 2-inch squares

8 tablespoons unsalted butter
2 teaspoons vanilla extract
1 tablespoon white or yellow miso
1 10-ounce package mini marshmallows
6 cups crispy rice cereal

1. Coat an 8-inch square cake pan with cooking spray. Set aside.
2. In a large pot, melt the butter over medium heat. Continue cooking as the butter begins to foam, then turn clear and golden, and then light brown bits start to form on the bottom and the butter gives off a nutty aroma. (I like to gently swirl the pot by hand to help the butter brown evenly.)
3. Turn off the heat and stir in the vanilla and miso paste. The mixture will foam slightly on the addition of the liquids.
4. Then stir in the mini marshmallows and continue stirring until completely melted. If the mixture is not hot enough to melt the marshmallows, turn the heat on low and stir until the mixture is smooth.
5. Remove the pot from the stove and stir in the crispy rice cereal. Once evenly coated, quickly spread the mixture into the prepped cake pan, using a spatula to press it evenly into the pan. Let cool completely before cutting into bars with a sharp knife. Store any leftovers in an airtight container at room temperature.
SHARE:

What's For Dinner: Sweet Corn Chowder

Sweet corn picked fresh in the morning makes for a delicious corn chowder for dinner
that tastes like a bowlful of sunshine. 

Corn Chowder || A Less Processed Life


SHARE:

What's For Dessert: Meyer Lemon Sorbet

Cool down with this refreshing Meyer lemon sorbet.


SHARE:

What I'm Drinking: Strawberry-Basil Moscow Mule

Summer is not over yet! Let's toast to the remaining days of warm weather with this refreshing
Strawberry-Basil Moscow Mule.


The upcoming Labor Day weekend marks the unofficial end of Summer, and while I am not sad about settling into the fall season and unboxing my sweaters and scarves, we do have a few things left on our Summer Bucket List to cross off before autumn really settles in.


At the top of that list is going kayaking at one of our local lakes before the season is out. Given that the wild rice season starts soon, we may have to also add a canoeing excursion to our list, as harvesting rice is really a two-person job. We still have some wild rice on hand from a harvest a few years ago, but our supply is quickly dwindling. Plus harvesting our own rice is kind of a fun perk of living in the Northwoods.

And after a long day on the lake (or, okay, more likely just a few hours), what better refreshment is there to be had than a Strawberry-Basil Moscow Mule made with the season's freshest berries and herbs straight from the garden?

This recipe for a Strawberry-Basil Moscow Mule was inspired by a drink I had this summer at a local restaurant. The sweetness of the strawberries and the peppery flavor of the basil leaves make for an excellent pair with the ginger and lime flavors of a Moscow Mule.

Strawbery-Basil Moscow Mule
makes one cocktail

3 strawberries, rinsed and hulled
1 tablespoon chopped fresh basil (about 3 leaves)
1 ounce fresh lime juice (from 1 lime)
2 ounces vodka
ice
ginger beer
lime slice or whole strawberry, for garnish [optional]

Add the strawberries and chopped to the bottom of a copper mug. Use a muddler to release the juices. Add the lime juice and vodka to the mug, then fill with ice. Top with ginger beer. Garnish with a lime slice or strawberry if desired before serving.
SHARE:

What I'm Drinking: Moscow Mule

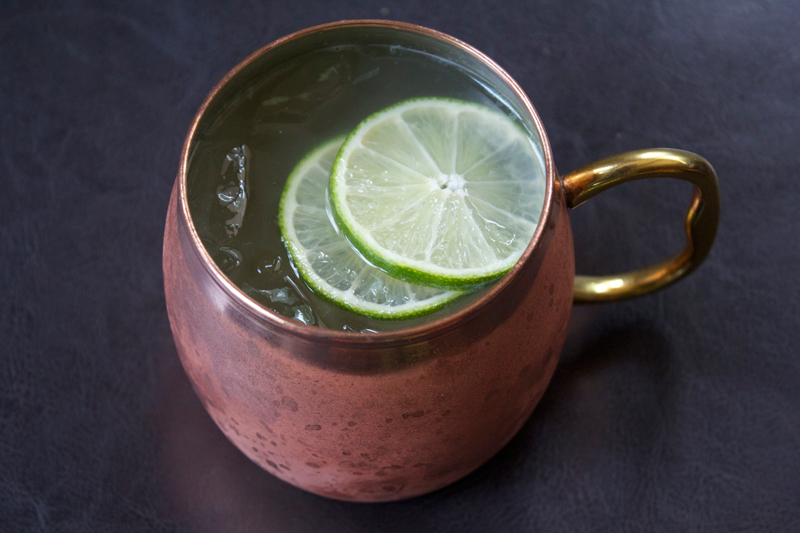
Beat the summertime heat with a refreshing Moscow Mule. 


Moscow Mule || A Less Processed Life

I have so much to talk about, but not enough time to write a full blog post. Let's see – we lost our power for over 24 hours last weekend due to storms that rolled through the area (that was fun!), we also put our new chicks out onto pasture last Sunday, and, perhaps most exciting, we brought home four new piglets to the farm on Saturday. They are the cutest. (You can judge their cuteness for yourself by following our farm on Instagram (@orangedogfarm) or on Facebook (https://www.facebook.com/orangedogfarm/). 

Moscow Mule || A Less Processed Life

Plus work deadlines are insane, I've taken on a small freelance project, and did I mention all the farm chores? Long story short, things are crazy busy around here.

And it has been hot. Like, capital H-O-T hot. Luckily we seem to have a little break in the weather today and it's nice and cool this morning. But that doesn't mean I'll be putting away my copper mugs for Moscow mules anytime soon!

Moscow mules – made with fresh lime juice, ginger beer, and spiked with vodka, are a perfect afternoon cocktail on a hot summer's day. Which, wait, is today, right? Happy First Day of Summer!

Moscow Mule
makes one cocktail

1/2 ounce lime juice
2 ounces vodka
4 ounces ginger beer
ice
lime slice, for garnish

Add the lime juice and vodka to a copper mug. Fill the mug with ice. Top with ginger beer. Garnish with a lime slice (or two) and serve.

Moscow Mule || A Less Processed Life
SHARE:

What's On the Side: Summer Pasta Salad


This past weekend, D and I were invited to a Barn Party at our friend's farm down in Milladore, Wisconsin. Along with my prize-winning chocolate chip cookies, I also brought along this savory pasta dish to share at the potluck.

The inspiration for this recipe comes from the cookbook Seriously Delish by Jessica Merchant, who is also the creator of the blog How Sweet It Is. The cookbook is gorgeous and features accessible recipes covering breakfast, lunch, dinner, and nearly everything in between.

Summer Pasta Salad || A Less Processed Life

Along with engaging -- sometimes irreverent, often hilarious -- headnotes, each recipe features a full-color image, which I love -- particularly as I am someone who likes to see what the resulting dish is supposed to look like at the end. I had to stop bookmarking recipes to try as nearly every page was earmarked.

Since I was making the salad for a crowd, I doubled the proportions of the ingredients. And of course, I couldn't help but tweak a few other things. Rather than peeling the asparagus into ribbons as called for by the recipe, I chopped it into bite-size pieces instead. I also added sliced black olives to the mix and switched honey with maple syrup for the sweetener in the dressing. This pasta salad is filling, zesty, and a great way to use those zucchini and tomatoes that are growing like crazy in the garden this time of year.

Summer Pasta Salad (printer-friendly version)
makes 16-18 servings

For the dressing:
2/3 cup olive oil
1/2 cup red wine vinegar
1 tablespoon pure maple syrup
2 tablespoons chopped fresh basil
2 tablespoons chopped fresh oregano
1/2 teaspoon fine sea salt
1/2 teaspoon black pepper

For the asparagus and zucchini:
3 tablespoons olive oil
1 pound asparagus, ends removed and cut on the diagonal into bite-sized pieces
4 small zucchinis, ends removed, halved lengthwise and sliced
4 garlic cloves, minced

24 ounces (1 1/2 boxes) fusilli pasta, cooked (Note, if you prefer a higher veg:pasta ratio, use just one 16 ounce box of pasta)
2 pints grape or cherry tomatoes, quartered or halved, depending on size
1 8-ounce can sliced black olives
8 ounces crumbled feta cheese

1. In a medium bowl, whisk together the olive oil, red wine vinegar, and maple syrup until well-combined. Stir in the chopped basil, chopped oregano, salt, and pepper. Set aside.
2. Heat the olive oil in large skillet over medium-high heat. Add the asparagus and zucchini and cook until just softened, 2-3 minutes. Stir in the minced garlic and saute until fragrant, about 30 seconds. Remove from the heat.
3. Add the cooked pasta to a large serving bowl. Add the asparagus mixture, tomatoes, sliced olives, and feta and gently stir to combine. Then pour the dressing over the pasta mixture and toss to coat. Refrigerate the salad for at least 30 minutes. Toss once more and season with additional salt and pepper to taste just before serving.

(adapted from a recipe in the cookbook Seriously Delish by Jessica Merchant)
SHARE:

What I'm Drinking: Strawberry Bourbon Smash


When it's hot out, I love to cool down with a bourbon smash. You can go about a million different ways with a bourbon smash -- the "smash" refers to muddling fresh fruits such as berry or citrus, typically with mint leaves, to give a fresh fruit flavor to the cocktail.


Strawberries are abundant in the marketplace these days, so I chose to feature this sweet berry in today's bourbon smash. Garnish with a couple of blueberries, and you've got a cocktail fit for celebrating the 4th of July.

Strawberry Bourbon Smash
makes one cocktail

3 strawberries, leaves removed and quartered
4 fresh mint leaves
1 ounce simple syrup
2 ounces bourbon
ice cubes

To garnish:
1 strawberry
1 blueberry
mint sprig

1. Muddle the quartered strawberries and mint leaves with the simple syrup in the bottom of a bar glass or cocktail glass. Add the bourbon and shake with ice.
2. Strain into an old fashioned glass filled with ice cubes.
3. Garnish with a strawberry, blueberry, and mint sprig.
SHARE:

What I'm Drinking: A Pimm's Cup

As the temperatures warm up, a refreshing Pimm's Cup will cool you down.


After a long day of work (or play) I like to cool down with a refreshing cocktail. The Pimm's cup is the perfect cocktail for a hot summer's day.


The Pimm's cup gets its name from Pimm's No. 1, is a gin-based liquor made in England that features flavors of herbal botanicals, caramelized orangem and delicate spices.


A traditional Pimm's cup is made with muddled citrus and cucumber, Pimm's No. 1, and lemonade (or lemon soda). Other versions replace the lemonade with ginger ale. Feeling rather egalitarian, I opted to make mine with both. Sliced strawberries and a sprig of mint wouldn't be a bad idea, either. The Pimm's Cup is a pitcher-friendly cocktail, making it a great option for a get-together with friends.

Pimm's Cup
makes 1 cocktail

4 thin cucumber slices
2 thin orange slices
2 thin lemon slices
ice
2 oz Pimm's No. 1
1 oz lemonade
3 oz ginger ale  

1. Ring the bottom inside edge of an 8-ounce mason jar with alternating cucumber, orange, and lemon slices. Or if you're feeling less fancy, place the slices in the jar haphazardly.
2. Fill the jar with ice. Pour 2 ounces of Pimm's No. 1 into the jar. Top with lemonade and ginger ale. Add a whimsical straw, and serve!

SHARE:

What's For Dessert: Fresh Peach Tart


Let's take a quick break from all my garden and tomato talk with this delightful peach tart, shall we? D picked up a bagful of tennis-ball-sized peaches from our parking-lot produce guy the other day. I tossed around the idea of doing a cobbler or crumble, but in the end, figured it was about time I attempted to make a tart.

Of course, given my pastry-dough phobia, I opted for a recipe that used a pat-in crust rather than one that required rolling out. One of these days I will be less intimidated by pastry dough, but this past Sunday was not that day.


The original recipe instructions warn bakers to not overmix the dough; I think I might have mixed it a bit too much as it was a bit crumbly on the edges going in, and remained quite crumbly after baking. The crumbliness had no affect on the taste however -- the crust is light in texture and the almond flavor shines through. 

The addition of a crumble on top -- which melts into the peaches as the tart bakes -- adds a bit of sweetness and the addition of flour helps to soak up any extra juiciness so the tart shell doesn't get soggy. I couldn't help but add in a little spice and added a dash of my favorite three -- cinnamon, nutmeg, and ginger. 

The resulting tart tastes like a slice of summer. And of course, it wouldn't be summer without a little scoop of vanilla ice cream on the side.

makes one 11-inch tart

For the pastry:
1 1/2 cup unbleached all-purpose flour
1/2 teaspoon fine sea salt
1 teaspoon sugar
1/4 cup vegetable oil
1/4 cup extra-virgin olive oil
2 tablespoons organic skim milk
1/2 teaspoon almond extract
3 to 5 small ripe peaches, pitted and sliced (about 1/4 to 1/2-inch wide)

For the crumble topping:
2 tablespoons unbleached all-purpose flour
3 tablespoons brown sugar
3 tablespoons granulated sugar
1/4 teaspoon fine sea salt
1/8 teaspoon ground cinnamon
1/8 teaspoon ground nutmeg
pinch ground ginger
2 tablespoons unsalted butter, cold and cut into cubes

1. Preheat the oven to 425 degrees.
2. In a large bowl, whisk together the flour, salt, and sugar. 
3. In a separate bowl, whisk together the oils, milk, and almond extract. Pour the oil mixture into the flour mixture and use a fork to mix together. The dough should be just dampened; don't overmix.
4. Spoon the dough into the tart pan and use the pads of your fingers to pat the dough into the pan, covering the bottom and sides in a thin layer. 
5. In a small bowl, stir together the flour, sugars, salt, cinnamon, nutmeg, and ginger. Add the butter cubes and use a fork or pastry blender to cut the butter into the dry ingredients until it resembles pebble-sized (and smaller) crumbles. 
6. Starting on the outer edge, arrange the peaches in an overlapping circle over the pastry. I filled the center with peaches going the opposite direction; use whatever pattern is pleasing to you. Sprinkle the crumble mixture evenly over top the peaches. 
7. Bake for 35-45 minutes, or until the pastry is golden brown and the fruit is bubbly. Remove the tart from the oven and cool on a wire rack. Remove the tart from the pan (carefully!) and serve warm or at room temperature. A scoop of vanilla ice cream on the side is always a good idea. 

(adapted from this Food52 recipe)

SHARE:

What's For Dessert: Roasted Balsamic Strawberry and Greek Yogurt Popsicles


As I promised on Monday, today I have a popsicle recipe to share with you that features roasted balsamic strawberries. To complement the sweet and savory flavor of the strawberries, I used tart Greek yogurt, sweetened just slightly with raw honey. I don't have much to say about these popsicles other than that they are delicious! I will definitely be making another batch soon. And I love that these are a healthy treat and packed with protein to boot. As the summer heats up, I'm sure I'll have many more popsicle recipes to share -- I've got a bunch of ideas brewing in my head already. 


Roasted Balsamic Strawberry and Greek Yogurt Popsicles (printer-friendly version)
makes six popsicles

For the strawberries:
1 pound organic strawberries, rinsed, hulled, and cut in half
2 tablespoons raw sugar
4 tablespoons balsamic vinegar

For the yogurt:
1 cup plain Greek yogurt (I used 2% low-fat plain Chobani)
2 tablespoons honey

1. Preheat the oven to 350 degrees.
2. Place the halved strawberries in a bowl. Add the sugar and stir to combine, evenly coating the strawberries in the sugar. Add the balsamic vinegar and stir.
3. Pour the strawberry mixture (and all juices, use a spatula if necessary to scrape out any remaining liquid) into a baking dish. (I used an 11"x7" aluminum pan; use whatever you have on hand, so long as the berries are in a single layer.)
4. Roast the strawberries in the oven for 35-40 minutes, or until the juices are bubbling and the strawberries have softened.
5. Remove from the oven and let cool completely.
6. After the strawberries have cooled, add them (and all the liquid) to the bowl of a food processor. Pulse several times until the strawberries are slightly pureed. Now you're ready to make the popsicles!
7. In a small bowl, stir together the yogurt and honey until thoroughly combined.
8. Add a dollop of strawberries to the bottom of each popsicle mold, then add the yogurt mixture, continuing to layer until each popsicle mold is full. Use a skewer or thin knife to swirl the strawberries and yogurt together, using an up-and-down motion.
9. Place the tops on the molds and freeze for at least 4 hours.


SHARE:

What's For Dessert: Rhubarb Crisp


One benefit of working in the publishing world (aside from the huuuuge paycheck, ha ha ha!) is that typically during the summer months publishing companies offer a "Summer Friday" program in which you work extra hours over a two-week period to get every other Friday off during the summer months. I'm pretty sure this is a perk due to the East Coast tradition of leaving early on Fridays to beat the traffic when heading off to one's summer home in the Hamptons or similar for the weekend during the summer months. When I first started my career in publishing, the Summer Friday program ran from just after Memorial Day up to Labor Day; with the arrival of the economic downtown and various merges, the program was chiseled away at until only a few select Fridays were offered, and just half-Fridays at that. This year, the every-other full-Friday program is back in action, along with an every Friday half-day option. I thought long and hard about which option I would choose, and opted to go with one of the every-other full-Friday off schedules. It's a tiny perk (and we have to work the extra hours to make up for it, so it's not really a "free" Friday), but I'll take it if it means I can get a three-day weekend five times during the summer.

All this to say that my first summer Friday was two weeks ago, and D and I took advantage of my day off to make an overnight trip to Milwaukee, which is located three hours to the east. On Friday night we took in a Milwaukee Brewers game (which turned out to be a win against our former home team, the Philadelphia Phillies). On Saturday, after a leisurely breakfast, we made our way to the Cathedral Square Park East Town Farmers Market, where I picked up a lovely bunch of asparagus and two ruby-red bunches of rhubarb.

Though I typically pair rhubarb with strawberry in the desserts I have featured on this blog, I was ready to spotlight the tart flavor of rhubarb on its own. Mark Bittman's (The Minimalist) column published in the New York Times in 2010 titled "Rhubarb Crisp That Stands Up to Pie" totally caught my eye and I decided to give it a try. (Heh, anything that can get me out of making a pie crust...)

Long story short, this crisp is truly delicious. The tartness of the rhubarb is balanced (but not overwhelmed) with the addition of granulated sugar; the pecan-oat crisp topping is crunchy, sweet, savory, and just buttery enough to make it taste a bit indulgent without feeling too guilty about it.

If rhubarb season hasn't totally waned where you live (it has only recently become available up here in Northern Wisconsin), you have to give this recipe a try. Or at least be sure to file it away for next year!

Rhubarb Crisp (printer-friendly version)
makes 6-8 servings

5 cups sliced rhubarb (cut into ~1/2 to 1-inch pieces)
1/4 cup granulated raw sugar
1 tablespoon fresh lemon juice
1 teaspoon lemon zest
3/4 cup brown sugar
1/2 cup unbleached all-purpose flour
1 teaspoon cinnamon
1/8 teaspoon ground nutmeg
1/4 teaspoon kosher salt
6 tablespoons cold unsalted butter, cut into small pieces
1/2 cup rolled oats
1/2 cup pecans

1. Preheat the oven to 375 degrees. Grease an 8- or 9-inch baking dish and set aside.
2. Stir together the rhubarb, granulated raw sugar, lemon juice, and lemon zest. Pour into the prepped baking pan.
3. In the bowl of a food processor, add together the brown sugar, all-purpose flour, cinnamon, nutmeg, salt, and butter. Process for 30-60 seconds, or until the mixture resembles small peas and just begins to come together. Add in the oats and pecans and pulse until just combined. Spoon the mixture over top the rhubarb, covering it evenly.
4. Bake in the oven 45-50 minutes, or until the topping is browned and the fruit is bubbling. Let cool before serving.

 (adapted from this Mark Bittman recipe)
SHARE:

What's For Dessert: Warm Fresh Peach Sauce over Vanilla Ice Cream


I was considering going to the gym this afternoon, but a couple of peaches in the fridge were calling their siren song, so I chose to make a warm peach sauce instead. Priorities! Though I chose to use my sauce as a topping for a (big) scoop of vanilla ice cream, I think it would make a great pancake or waffle sauce as well.

Warm Fresh Peach Sauce (printer-friendly version)
makes enough for 2-3 servings

1/4 cup water
1 tablespoon dark brown sugar
1 teaspoon cornstarch
2 peaches, cut into 1" pieces (peeling is up to you; I peeled one and didn't peel the other)
1/8 teaspoon ground nutmeg
1/4 teaspoon ground cinnamon

1. Add the brown sugar and cornstarch to the water in a sauce pot and stir until both the sugar and cornstarch have dissolved. Bring the mixture to a boil over medium-high heat.
2. Add in the chopped peach pieces. Season with nutmeg and cinnamon and stir to combine.
3. Reduce the heat to medium-low and simmer, stirring occasionally. Cook for an additional 5-10 minutes, or until the peach sauce comes to your preferred thickness.
4. Serve warm over vanilla ice cream.
SHARE:

What's Baking: Blueberry Crumb Bars


While at Golden Harvest the other day, I couldn't resist picking up a quart of Michigan-grown blueberries, even though I already had a pint of blueberries in the fridge. I knew I wanted to make some sort of baked good with them -- but I also wanted to stray away from the typical blueberry coffee cake that I always make. A quick search on Smitten Kitchen (one of my favorite blogs), and I had my recipe to try. I made a few small alterations to the recipe (originally from AllRecipes), and the resulting crumb bars are full of blueberry-goodness with just the right amount of sweetness and savory cinnamon flavor. Now I just need to resist the urge to eat the entire panful in one sitting...

Blueberry Crumb Bars (printer-friendly version)
about 36 small bars

For the fruit filling:
1 quart blueberries, rinsed and patted dry
juice of one lemon
1/2 cup white sugar
4 teaspoons cornstarch

For the dough:
1/2 cup white sugar
1/2 cup light brown sugar
1 teaspoon aluminum-free baking powder
1 teaspoon ground cinnamon
1/4 teaspoon ground nutmeg
1/4 teaspoon kosher salt
3 cups unbleached all-purpose flour
zest from one lemon
1 cup (two sticks/16 tablespoons) unsalted butter, chilled and cut into small cubes
1 egg

1. Preheat the oven to 375 degrees. Grease a 13"x9" baking dish. Set aside.
2. In a medium bowl, combine the blueberries, lemon juice, sugar, and cornstarch. Stir gently to combine the ingredients.
3. In a large bowl, stir together the sugars, baking powder, cinnamon, nutmeg, salt, and flour.
4. Mix in the lemon zest.
5. Use a pastry cutter to cut the butter into the flour mixture. Add in the egg and also blend in with the pastry cutter. Dough will be crumbly.
6. Pat half of the dough into the prepped baking dish. Top with the blueberry filling. Sprinkle the remaining dough crumbles over top of the blueberry layer.
7. Bake for 45-60 minutes, or until the top of the crumble is just beginning to brown. Cool on a wire rack for 30 minutes. Cover and place in the refrigerator to chill. These crumb bars are easier to cut after they have been chilled.

(adapted from this Smitten Kitchen recipe)

SHARE:

What I'm Drinking: Pomegranate-Lemonade Mimosa


Back in my college days, Thursday night marked the unofficial start of the weekend. Let's pretend that's still the case, okay? While at my BodyPump class this evening I got it into my mind that lemonade + sparkling wine could make for a tasty evening cocktail. So, right after class I hightailed it from the gym to the state store (gotta love Pennsylvania) and picked up a bottle of Cupcake Prosecco. Next it was off to the grocery store, where I bought a small package of fresh raspberries and a carton of lemonade. I was initially just going to buy straight-up lemonade, but I was intrigued by the Newman's Own Pomegranate Lemonade, so I decided to give it a whirl.

Pomegranate-Lemonade Mimosa (printer-friendly version)
makes one cocktail

2 oz pomegranate lemonade (or you could use whatever fruit juice you have on hand)
Prosecco (or other sparkling wine)
fresh berries for garnish

1. Chill the prosecco, if not already cold.
2. Add 2-3 berries to the bottom of a champagne glass.
3. Pour 2 oz of lemonade over the berries.
4. Top with Prosecco.
5. Serve immediately.
SHARE:

What I'm Drinking: Sangria


Given the large amount of fruit in my fridge after Friday afternoon's produce fest, it should come as no surprise that, just as I predicted, sangria made an appearance over the weekend. And let me just say that this is some mighty fine sangria. When it comes to the wine, I have no qualms with reaching for the  less inexpensive stuff. (Wines from Barefoot, Little Penguin, and Yellow Tail would all make good options, I think.) Last time I made a white sangria, so for this batch I opted to go the traditional route and went with a red. Barefoot Sweet Red Wine ($5.99/bottle in Philly) was an excellent choice for this citrus-y wine punch.

Sangria (printer-friendly version)
makes one large pitcher

750 mL red wine
1 cup orange juice
1/2 cup brandy
1/2 cup halved red grapes
1/2 cup quartered strawberries
1 nectarine, cut into bite-size pieces
1 granny smith apple, cut into bite-size pieces
1 orange, peeled and cut into bite-size pieces.

1. Pour the wine into a large pitcher.
2. Add in the orange juice and brandy; stir to combine.
3. Carefully drop in the chopped fruit.
4. Chill in the refrigerator for at least two hours or overnight.
5. Serve over ice. (If you're feeling super-special, add in a cup of sparkling fruit juice or Italian soda before pouring.)
SHARE:
© A Less Processed Life. All rights reserved.
BLOGGER TEMPLATE MADE BY pipdig