What's For Dinner: Veggie Beef Chili


Last weekend I had plans to make a veggie chili, but someone insisted that I add in some beef. Luckily for him, I had yet to do the grocery shopping for ingredients I needed to make the recipe, so I picked up some grass-fed beef while at Whole Foods. However, I think this chili would be just as good without the beef, or you could always substitute in some soy crumbles as a meat substitute. Long story short, this chili was hearty and delicious, and would make an excellent addition to your Super Bowl game-day meal plan.

Veggie Beef Chili (printer-friendly version)
makes 6+ servings

1/4 pound grass-fed ground beef
1 15-oz can of black beans, rinsed and drained
1 1/2 cups low-sodium vegetable juice
1 cup chopped tomatoes
1 cup frozen whole kernel corn
1 small zucchini, chopped
1/2 yellow or orange sweet pepper (ribs and seeds removed), chopped
1/2 onion, chopped
2 teaspoons chili powder
1/4 teaspoon dried oregano
1/4 teaspoon fine sea salt
1 teaspoon cocoa powder
1/2 teaspoon cinnamon
1/2 teaspoon cumin
1/2 teaspoon ancho chili powder
1 clove garlic, minced
dash cayenne pepper
dash paprika

1. Brown the meat in a skillet over medium-high heat, about 5-7 minutes. Cover a plate with a paper towel. Spoon the cooked meat onto the plate to drain off the excess fat.
2. Add the meat along with the rest of the ingredients to a 1 1/2- or 2-quart slow cooker.
3. Cover and cook for 6 to 8 hours on the low setting, or 3 to 4 hours on the high setting.
4. Serve with toppings of your choice, such as oyster crackers, shredded cheese, plain Greek yogurt, or green onions.
SHARE:

What's Happening: My Morning With Martha

As you may have guessed from Thursday's post, I scored a last-minute ticket to be in the audience for the taping of Martha's exercise show this morning in New York City. After donning my exercise gear (required!), I headed to the television studio bright and early for the 10a taping of her show. This was the first time that I was a member of a live studio audience, and the experience was a lot of fun. I'm glad I got to see her show live before its expected end in April. Here are a few pictures from this morning:

{Martha Stewart Living Omnimedia studios in Chelsea}

{studio cameras}

 {oh, that kitchen!}

{Joey revving up the audience}

{Martha filming promos after the end of the show}

 {loot from the show}
SHARE:

Snacktime: Super-Simple Nachos


Since the Super Bowl is just around the corner, I thought I'd post a super-simple nachos recipe. I made these nachos last weekend for the championship games on Sunday. Though I used grass-fed ground beef in the recipe, you could easily swap out the meat with soy crumbles or just double the beans to make a vegetarian option.

Super-Simple Nachos (printer-friendly version)
makes two hearty servings

1/4-lb grass-fed ground beef (I like White Oak Pastures, which can be found at Whole Foods in many areas)
2 cups tortilla chips (I used whole-grain scoops)
1 cup kidney beans, drained and rinsed
1/2 cup salsa of your choice
3/4 cup monterey jack cheese, shredded (use more or less depending on your love for cheese)

1. Preheat the oven to 350 degrees.
2. Brown the beef over medium-high heat in a skillet on the stovetop. Scoop the cooked meat onto a plate covered with a paper towel to remove any excess grease. Set aside.
3. Fill the bottom of a 9" pie plate (or other rimmed dish suitable for the oven) with tortilla chips. (If using scoops, make sure they are scoop-side up.)
4. Add the toppings starting with ground beef, then kidney beans, then shredded cheese. Top all with the salsa.
5. Bake in the oven until the cheese is nice and melty, about 5 minutes. (Keep your eyes on the nachos to ensure the cheese doesn't burn.)
6. Let cool slightly and then eat up!
7. Cheer on your team to victory.
SHARE:

Are You A Martha Fan and An Exercise Enthusiast?

{via}

Quick shout-out to local readers in the Philly/NYC metro area -- last-minute tickets are still available for Martha's Exercise Show, which is taping this coming Monday, January 30 at 10 a.m. You can request tickets at the link here. (Scroll to the bottom for special-audience events.)
SHARE:

What's Baking: Coconut Double Chocolate Chip Cookies


Last weekend, D requested that I bake a batch of cookies, and I was happy to oblige. I started out with the recipe I made last June for coconutty chocolate chip cookies (which are seriously delicious as they are), and along with some tweaks here and there, I also opted to add in some white chocolate chunks. Next time I think I'll add some macadamia nuts, too -- then I'll be well on my way to becoming a gourmet-cookie-baking maven!

Coconut Double Chocolate Chip Cookies (printer-friendly version)
makes 18 cookies

1/2 cup unsalted organic butter
1/2 cup light brown sugar
1/2 cup granulated sugar
1 whole egg
1 egg white
1/2 teaspoon vanilla
1 1/4 cup oatmeal
1/4 cup unsweetened coconut flakes
1 cup unbleached all-purpose flour
1/4 teaspoon kosher salt
1/2 teaspoon aluminum-free baking powder
1/2 teaspoon baking soda
1 cup milk chocolate chips
1 cup white chocolate, chopped (or use chips)

1. Preheat the oven to 350 degrees.
2. Cream together the butter and sugars.
3. Stir in the egg and egg white until completely combined.
4. Stir in the vanilla extract.
5. Add the oatmeal and coconut flakes to the bowl of a food processor. Process until nearly flour-like in texture.
6. In a medium-size bowl, stir together the oatmeal-coconut mixture and flour.
7. Stir in the salt, baking soda, and baking powder.
8. In several batches, combine the dry ingredients with the wet ingredients, stirring between additions.
9. Stir in the milk chocolate chip and chopped white chocolate by hand.
10. Place the dough in the fridge and let chill for at least 20 minutes.
11. Use a small ice cream scoop to portion out the dough onto a non-stick baking sheet. (You should be able to fit nine cookies on the baking sheet per batch.)
12. Bake in the oven for 10-12 minutes, or until lightly browned.
13. Remove from the oven and let cool on a wire rack.
14. Try not to eat all of the cookies in one sitting.
SHARE:

What's For Dinner: Thai-Style Vegetable Rice (Revisited)


I last made this dish in 2010 (exactly two years ago, to be exact - ha!), and it's still one of my favorite slow-cooker recipes. I mixed things up a little bit by adding in some chopped butternut squash (we still have a few hanging out in our cupboard from last summer's CSA share) to this version. I always add in way more vegetables than the recipe requires, which means I have several days' worth of leftovers. I don't mind, though, as it's so tasty!

Thai-Style Vegetable Rice (printer-friendly version)
makes four servings

1 1/2 cup low-sodium vegetable broth
1 C frozen shelled edamame
1 sweet potato, peeled and cut into 1-inch pieces
2 medium carrots, sliced
1 cup frozen green peas
1 cup butternut squash, peeled and cubed
1/2 t curry powder
1/4 t ground cumin
1/8 t ground ginger
1 clove garlic, minced
1 cup uncooked instant brown rice
1/4 cup reduced-fat unsweetened coconut milk
1 tablespoon fresh cilantro
2 tablespoon unsalted roasted whole cashews, chopped

1. Combine the broth, vegetables, spices, and garlic into a 2-quart slow cooker.
2. Cover and cook on the low-heat setting for 4.5 to 5 hours or on high for 2 to 2.5 hours.
3. If cooking on low, turn to the high-heat setting and stir in the brown rice. Cover and cook for about 15 minutes or until the rice is tender. Stir in the coconut milk and cilantro.
4. Garnish each serving with a sprinkling of chopped cashews.
SHARE:

What's For Dinner: Slow-Cooker Ratatouille


Yesterday's rainy weather inspired me to break out our slow cooker and put together the ingredients for ratatouille. The thing I like best about using the slow cooker is that I just have to chop up and/or pour in a bunch of ingredients, and several hours later dinner is ready without much fuss. I love when the dinner hour rolls around and the meal is already cooked and ready to be eaten!

Slow-Cooker Ratatouille (printer-friendly version)
makes four servings

1 eggplant, chopped into small cubes
2 small zucchini, chopped
1/2 orange pepper, chopped
1/2 large onion, chopped
1 clove garlic, minced
1 cup chopped tomatoes (this time of year I suggest getting the boxed kind; I like Pomi brand)
1 small can low-sodium vegetable juice
8 oz low-sodium tomato sauce
1/4 teaspoon fine sea salt
1/8 teaspoon black pepper
1/2 teaspoon herbes des Provences
1 tablespoon fresh basil leaves, torn

1. Add all of the ingredients (except the basil) into a 2-quart slow-cooker bowl. Stir to combine.
2. Cook on low for 4-5 hours.
3. Season with additional salt and pepper if needed.
4. Stir in the fresh basil.
5. Serve with freshly-grated Parmesan and Parmesan toasts (recipe below).


Parmesan Toasts (printer-friendly version)
makes two servings

1/2 French baguette
olive oil
freshly-grated Parmesan cheese

1. Cut half a baguette into small rounds.
2. Place the rounds on a baking sheet.
3. Brush with olive oil.
4. Place in the oven under the broiler and toast for about 30-45 seconds.
5. Spread freshly-grated Parmesan over each round.
6. Place under the broiler until the Parmesan is melted and bubbly, about 30 seconds.
7. Serve immediately.
SHARE:

What's Baking: Cinnamon Buttermilk Coffee Cake


We finally woke up to a few inches of snow on Saturday morning. I was almost convinced we were never going to see the white stuff this winter! For some reason, the presence of snow made me crave a slice of coffee cake, so I quickly set to putting one together. Simple as ever, with a few new ingredients -- this time I opted to replace most of the milk I usually use with buttermilk. I also added a generous amount of chopped pecans to the topping. D said this coffee cake was the best he's ever had -- so I have a feeling my substitutions were a brilliant idea!

Cinnamon Buttermilk Coffee Cake (printer-friendly version)
makes eight servings

1 1/2 cup unbleached all-purpose flour
2 teaspoons baking powder
1/4 teaspoon kosher salt
2 teaspoons ground cinnamon
1/4 teaspoon ground nutmeg
1/2 stick unsalted butter, softened
1/4 cup granulated sugar
2 tablespoons light brown sugar
1 egg
2/3 cup low-fat buttermilk
1/3 cup skim milk
zest from one lemon
1 teaspoon vanilla extract

For the topping:
1/3 cup granulated sugar
2 tablespoons light brown sugar
2 tablespoons unbleached all-purpose flour
2 tablespoons unsalted butter (cold)
1/2 teaspoon ground cinnamon
1/4 teaspoon ground nutmeg
1/8 teaspoon ground ginger
1/4 cup chopped pecans

1. Preheat the oven to 375 degrees.
2. Combine the flour, baking powder, salt, cinnamon, and nutmeg in a medium-sized bowl. Stir together with a fork.
3. Cream together the butter and sugar. Beat in the egg, buttermilk, and skim milk.
4. Slowly add in the flour mixture to the wet ingredients.
5. Stir in the lemon zest and ground cinnamon.
6. Spoon the batter into a greased 8"x8" glass baking dish.
7. Make the crumb topping by combining together the sugars and flour. Use a pastry blender to cut in the butter. Stir in the cinnamon, nutmeg, and ginger. Stir in the chopped pecans
8. Spoon the crumb mixture evenly over top of the batter.
9. Bake in the oven for 25-30 minutes, or until a toothpick inserted into the middle of the cake comes out clean.
10. Cool on a wire rack for a few minutes before serving.
SHARE:

Cocktail Hour: Rum-n-Root Beer


What is it about four-day workweeks that make them seem like they last forever? It felt like it took forever for Friday to arrive this week. Time to celebrate the end of the work-week with a Friday evening cocktail.

Rum-n-Root Beer Cocktail (printer-friendly version)
makes one serving

2 oz rum
4 oz root beer
ice cubes
bing or maraschino cherry

1. Place 3-4 ice cubes in a small glass.
2. Pour 2 oz rum and 4 oz root beer into the glass.
3. Add a bing or maraschino cherry. (I am seriously loving Tillen Farms Bada Bing Cherries right now.)
4. Celebrate the beginning of the weekend!
SHARE:

What's For Breakfast: Freshly-Squeezed Orange Juice


Let's talk orange juice. Last summer, this article about commercially-processed orange juice caught my eye. The idea that the carton of orange juice in my fridge was not exactly the "freshly-squeezed," "pure," or entirely "natural" product that the juice companies purported it to be kind of blew my mind. Sure, when you think about it, it is kind of odd that every carton of orange juice made by a particular brand tastes the same. Unlike the orange juice that comes from a carton, two glasses of truly freshly-squeezed orange juice rarely taste exactly the same.

I was so intrigued by the concept that I went straight to Amazon and bought a copy Squeezed: What You Don't Know About Orange Juice by Alissa Hamilton. Though the book may not exactly be a page-turner, the story inside about the Florida citrus industry and the orange juice industry in particular was very elucidating.

Long story short, calling the juice you can buy in a carton "freshly-squeezed" is not the whole story. Yes, the oranges are squeezed, but the juice that is extracted doesn't go straight into a carton. Instead, in many cases, it goes into huge storage tanks where it is deoxygenated (and hence loses its flavor) for long-term storage. Typically, a different company produces "flavor packs" from a separate batch of oranges that provides the flavor and color for each batch of orange juice. Different companies have different mixes of flavors depending on the tastes of their consumers. For example, Minute Maid orange juice has a sweeter and more candy-like flavor than Tropicana or Florida's Natural products.

According to the author,
"The deal that now almost every orange juice processor makes to create a decent-tasting processed juice involves an intricate give and take between orange juice processor and flavor manufacturer, usually an outside flavor and fragrance house operator. Typically, the orange oils and essences that juice concentrators collect during evaporation are sold to flavor manufacturers, who then reconfigure these by-products and sell them back to juice companies."
So, the orange juice you drink from most brands of cartoned orange juice comes from two completely different batches of oranges. Interestingly, orange juice marketed as 100% Florida juice doesn't necessarily have to be made from, uh, Florida oranges. According to Catalina Ferre-Hockensmith, a staff member of the FDA's Center for Food Safety and Applied Nutrition,
"The natural orange flavor added to 100 percent Florida juice does not have to be derived from Florida oranges. We have no provisions in our juice standards of identity that stipulate from what oranges natural orange flavor must be derived. Therefore, the natural orange flavor added to 100 percent orange juice does not have to derive from the orange squeezed."
This news is particularly troubling as oranges grown outside the United States are not subject to the same regulations in terms of pesticide and fungicide use. For example, oranges grown in Brazil are treated with pesticides and fungicides that are illegal to use in the United States.

In addition, though the flavor packs are derived from natural means, that is, the essential oils and natural essences that are found in oranges, the flavor they impart is not replicated in nature. According to Daniel King, director of technical services at the Florida Citrus Processors Association,
"These flavor houses actually go in and fractionate these oils into various sections and individual components and then reblend from them. So you may put back into the product a blend that is relatively unknown in nature."
And, orange juice isn't even necessarily 100% made up of oranges. According to Hamilton,
"During the fall Hamlin orange season for instance, many [not from concentrate] producers add tangerines to their "100 percent orange juice." Tangerines contribute desired hue to the otherwise pale Hamlin squeezed juice. The practice is legal, so long as the citrus hybrid does not exceed 10 percent of the total juice content."
Clearly, a commercial that indicates that drinking a glass of freshly-squeezed orange juice from a carton is exactly the same as drinking from a straw stuck in an orange is not telling the true story. Not by a long shot. According to Hamilton,
"The history of processed orange juice and its marketing highlights the fact that as a society we tend not to care too much about deceptive advertising unless the product being pushed is measurably harmful."
The funny thing is, frozen orange juice from concentrate (from which most "freshly-squeezed" brands clearly differentiate themselves) is actually closer to "freshly-squeezed" than the stuff you can buy in a carton. According to citrus industry consultant Allen Morris,
"...with aseptic [storage] tanks, the juice is heated before it goes into the tank and then again before it goes into the package, but with frozen block warehouses the juice is frozen and then heated only before it goes into the package. The more the juice is heated the more its freshly squeezed flavor is depleted."
The only way to be certain the orange juice you are drinking is freshly-squeezed? Juice it yourself. One orange = one small glass of orange juice. It doesn't get much fresher than that. Or, an even better (and more nutritious) option would be to just peel the orange and eat it whole. 
SHARE:

What's For Lunch: Choco-Berry Smoothie


Since things are crazy-busy around these parts, my lunch break has now turned into a quick gym break. Following a workout, all I really want is something quick to make and easy to eat, since I'm heading straight back to my computer. Enter the smoothie! The great thing about a smoothie is that your options are endless. I even have a big bag of spinach in the fridge so that later this week I can give a green monster a whirl. Until then, I'm sticking with my favorite flavors -- chocolate and berries. This time I mixed the two together. I know -- wild and crazy, right?

Choco-Berry Smoothie (printer-friendly version)
makes two servings

3/4 cup skim milk
1/2 cup coconut-pineapple water [optional]
1/2 cup frozen whole strawberries (unsweetened)
1 cup frozen mixed berries (unsweetened)
1 scoop chocolate whey protein powder
handful of ice cubes

To make your smoothie:
Add all of the ingredients into your blender and mix well. (If you don't have a Vitamix, you may want to blend all the ingredients together except for the ice, and then add cubes individually until your smoothie reaches the consistency you prefer. Then, pour into a glass and drink up! (Straw optional.)
SHARE:

What's Baking: Vegan Whoopie Pies


As I promised, here is the recipe I used to bake up a batch of whoopie pies yesterday. Just to be different, I opted to make a vegan version of the classic whoopie pie. You can easily un-veganize this recipe by using eggs and butter in place of their vegan replacements.

Vegan Whoopie Pies (printer-friendly version)
makes 12 pies

1/2 cup (1 stick) Earth Balance vegan butter, softened
1 cup light brown sugar, firmly packed
1 Ener-G egg (1 1/2 teaspoons Ener-G egg replacer mixed with 2 tablespoons of warm water)
1 teaspoon vanilla extract
2 cups unbleached all-purpose flour
1/3 cup Dagoba cacao powder
1 teaspoon aluminum-free baking powder
1 teaspoon baking soda
1/2 teaspoon fine sea salt
1 cup lowfat buttermilk

1. Preheat the oven to 350 degrees. Spray a whoopie pie pan with nonstick cooking spray and set aside.
2. Sift together the flour, cacao powder, baking powder, baking soda, and salt. Set aside.
3. Use an electric mixer to cream together the butter and brown sugar. Mix on high speed until the mixture is light and fluffy.
4. Add in the reconstituted "egg" and vanilla. Stir to combine the ingredients. Use a spatula to scrape down the sides of the mixing bowl if necessary.
5. Add half of the dry ingredients into the mixer. Mix at low speed until just combined.
6. Pour in the buttermilk and mix on low speed until just combined.
7. Add in the remainder of the dry ingredients and stir on low speed until the batter just comes together.
8. Spoon about two tablespoons of batter into each whoopie pie cavity. Use a small spatula to spread the batter evenly into each divot; each cavity should be about 2/3 full.
9. Bake 8-12 minutes, or until the cake bounces back when touched lightly with your finger.
10. Let the cakes cool in the pan for 10 minutes before turning them out onto a wire rack to cool completely.
11. While the cakes are cooling, make the filling. (See recipe below.)
12. To assemble the pies, add a healthy dollop of the filling to the flat side of one cake and sandwich with another to form the pie.

Vegan Whoopie Pie Filling
makes enough to fill 12 whoopie pies

6 tablespoons Earth Balance vegan butter
1 1/2 cups powdered sugar, sifted
1/8 teaspoon fine sea salt
1 teaspoon vanilla extract

1. Use an electric mixer to beat the vegan butter until creamy. 
2. Add the sifted sugar and salt. Slowly increase speed as you mix the ingredients together.
3. Add the ricemellow creme and vanilla and beat at high speed until the filling has a whipped consistency.

(adapted from this Wilton recipe)
SHARE:

Three-Day Weekend Shenanigans: Where'd The Time Go?


I had such high hopes for this long weekend -- get ahead with some work items, do some baking, and get in a little rest and relaxation. Of those three items, I can for sure check at least one item off, as the whoopie pies are currently cooling on a wire rack next to me as I type this. Fingers crossed they taste good! I have yet to make the marshmallow filling, but I figured I'd let them all cool down first and make dinner in the meantime.

The only other thing I accomplished this weekend was getting in a little bit of rest -- I think we slept in every day of the weekend! I also caught up on some magazine reading on my Kindle (I'm nearly through with the January issue of O Magazine, I think I'm now only about four magazines behind in my reading!).

I love three-day weekends, I just wish they didn't always seem to fly by so fast! Guess I'll have another chance to use my time wisely when Presidents' Day rolls around next month. Now, off to make some marshmallow filling and finish up those whoopie pies!
SHARE:

Friday Five

{via}

1. One of my Christmas gifts from D's parents was a whoopie pie pan. I think the cold wintry weather forecasted for this weekend may be an excellent excuse to bake up my first batch of from-scratch whoopie pies! Do I start with the standard chocolate and marshmallow fluff pie, or go straight for the stars with a red velvet recipe? Oh, the decisions!

{via}

2. D's Christmas gift to me was a Kindle Fire. So far I am absolutely in love with it. It came in quite handy during our recent road trip to Florida, and it's a great way to bring things to read on the road without having to pack a big pile of books and magazines. Thus far I've accessed digital issues of Sunset, Glamour, and Self magazines. (The digital editions of which are included as part of my print subscription.) I've also started subscriptions to Martha Stewart's Whole Living and Everyday Food magazines as well as Oprah's O Magazine. In order to not break the bank (because it's way too easy to buy books and magazines with that thing!), I've also started to borrow ebooks from Philadelphia's Free Library. I love that I can get recent books on my Kindle (for free!) from the library.


{via}

3. I totally joined the blogger bandwagon and picked up a tube of Nars lipstick in Heat Wave during a recent trip to Sephora. This color is touted as being a bright red-orange that can be worn by people with a variety of skin tones, and I do believe it works for me! It's definitely a "wow!" pop of color, so I wouldn't wear it everyday, but it is a fun shade to wear to shake things up for a night out on the town.

{via}

4. My favorite souvenir that we brought back from our trip to Florida was several bags of Florida citrus fruits. We picked up a bag of orange and grapefruit at Publix in Lakeland, and then picked up a couple more bags of each at a fruit stand on our drive back north. D and I have really been loving the addition of a glass of freshly-squeezed orange juice to our morning routines. (More to come on that next week!)

{via}

5. It's official. I'm obsessed with Downton Abbey. I watched the first season on a marathon-viewing of episodes on Netflix last year. (I was literally up until 2 a.m. watching episodes; I just couldn't cut myself off without knowing how it all ended!) The second season just started on PBS this past Sunday, and so far, so good! I've become completely intrigued by the time period, and found myself watching a documentary on World War I on the Military Channel last night. I cannot wait to find out what happens next!
SHARE:

What's For Dinner: Aunt Denise's Tortellini Soup


For tonight's dinner, I headed to my favorite resource -- the cookbook of recipes from family and friends that my Mom gave to us as a wedding gift. Tonight's recipe comes from D's Aunt Denise. I first had this soup last autumn when D's Mom cooked up a batch when we were all up at the family cottage in northern Michigan. This is the perfect soup to accompany a cold winter's night. I highly recommend serving it alongside some crusty bread so that you can sop up any of the tasty leftover broth in your bowl.

Aunt Denise's Tortellini Soup (printer-friendly version)
makes 8 servings

1 tablespoon olive oil
1 medium onion, minced
3 garlic cloves, minced
1 can diced tomatoes with basil and garlic
1 10-oz package of frozen spinach
4 cups low-sodium vegetable broth
1/2 teaspoon crushed red pepper
1/4 teaspoon dried rosemary
1/4 teaspoon dried thyme
1/2 teaspoon Italian seasoning
2 teaspoon dried parsley
1/2 teaspoon fine sea salt
1/2 teaspoon black pepper
1 package cheese tortellini
Parmesan cheese, freshly grated

1. Saute the onion and garlic in the olive oil over medium heat until the onion is transparent.
2. Put the sauteed onion and garlic into a 4-quart slow cooker along with the diced tomatoes, frozen spinach, and veggie broth.
3. Stir in the crushed red pepper, rosemary, thyme, Italian seasoning, parsley, sea salt, and black pepper.
4. Cook on low for 8 to 9 hours.
5. Just before serving, cook the tortellini according to the directions on the packaging.
6. Place a few cooked tortellini in the bottom of each bowl and pour the broth over it.
7. Sprinkle freshly-grated Parmesan cheese over the top of each bowl of soup and serve.

Note: Refrigerate the leftover tortellini and broth separately, as the tortellini will become too soft if left in the broth.
SHARE:

What's For Dinner: Chicken with Peanut Sauce Served Over Noodles


Last night I tasked D with making dinner with the stipulation that he had to use chicken tenderloins and leftover extra-wide egg noodles in his dish. D opted to make up a batch of chicken with peanut sauce served over noodles. First, he cooked the tenderloins in a small bit of oil in a saute pan on the stovetop. In a separate saucepot, he whipped up a batch of peanut sauce, which he also warmed on the stovetop. To put the dish together, D added the leftover noodles to the saute pan with the cooked chicken, and topped the whole shebang with peanut sauce. He let this mixture cook until the noodles were warmed through, and made sure the chicken and noodles were both evenly coated in the sauce. Each serving received an additional topping of freshly chopped (roasted, unsalted) peanuts, and I added a garnish of cilantro to my plate. All in all, a yummy way to take care of some leftovers! 
SHARE:

What's For Dinner: Dad's Fried Noodles


Last night I made up a batch of fried noodles for dinner. Fried noodles take me back to my childhood, when my Dad would wield the spatula over the electric skillet, making up a batch of fried noodles for dinner on a Saturday night. These noodles are so simple to make, yet so delicious to eat. I like my fried noodles served up with a hearty portion of ketchup. Everything's better with ketchup, right? 

Dad's Fried Noodles (printer-friendly version)
makes 8 servings

1 16-ounce package of wide egg noodles (I used extra wide)
2 tablespoons vegetable or canola oil
3 eggs
freshly-ground black pepper
fine sea salt

1. Add noodles to 4-6 quarts of boiling water and cook for 10 minutes.
2. Drain noodles. Set aside.
3. Heat the oil in an electric skillet set to 375 degrees. 
4. Carefully add the drained noodles to the heated oil.
5. Lightly brown the noodles, stirring occasionally, cooking for about 5-8 minutes.
6. While the noodles cook, crack the eggs into a small bowl and beat with a fork until just blended.
7. Pour the eggs over the noodles and continue to stir until the eggs are cooked, about 2-3 minutes.
8. Season to taste with salt and pepper.
9. Serve with (plenty of) ketchup.
SHARE:

New Year, New Gym: City Fitness Philadelphia

{via}

After my major fitness extravaganza last August and the half-marathon I ran in September, I fell off the fitness bandwagon. I fell off it hard. Though I did do a few at-home Cathe workouts, trips to the gym were non-existent, as after the summer term ended, I let my not-so-used membership to the Penn gym lapse. Since mid-summer, I've been waiting and waiting, and waiting some more, for the new City Fitness gym to open up just a few blocks from our apartment in the Graduate Hospital neighborhood. First they were going to open in August, then September, then November . . . after a number of setbacks due to construction in a historic building, they finally opened just after Christmas. Meanwhile, I kept watching their pre-opening specials come and go, as I didn't want to get roped into a membership when the actual opening date kept being pushed back. Then, when we were in Florida, Rue La La ran an awesome deal for a year's membership at the gym, and I jumped. Basically, I got a full year's deluxe membership for just under half-price. (A deluxe membership includes unlimited use of gym equipment, unlimited classes (which I'm totally looking forward to attending), and unlimited tanning (Oh! Yay! Yeah, that "perk" won't be used). I think my membership deal also comes with three personal training sessions and a 30-day pass for a guest.) Not too shabby, really. 

Thus far, I've been to the gym four times, and I'm really loving it. Surprisingly, each time I've gone (at varying times during the day) there have been plenty of available treadmills and ellipticals. Today during my lunch hour I took a 30-minute Butts & Guts class (basically a lot of leg work, core work, and plyometric exercises), then hit up the weight room for a little free-weight action (though the weight room still totally intimidates me, sigh), and finally ended my workout with 20 minutes on the elliptical. 

They're still putting the final touches on the gym (I think a juice bar is still to come), but so far, so good. I'm looking forward to trying out more classes (I've already got my eye on taking a spinning class tomorrow and a Body Pump class later this week) and getting back into the regular routine of heading to the gym on a daily basis. The fact that it is only five blocks away will definitely help my motivation. And let's face it, after rampant holiday eating (which, I actually don't regret at all), it's great to be getting back into a fitness routine. And since I've already signed up to run a half-marathon in May, I can't afford to let my fitness level slip any more! 

How about you -- do New Year's resolutions have you heading to the gym these days? Have you added anything new to your fitness routine?
SHARE:

What's In My Kitchen: Vitamix


Our newest kitchen gadget was the unexpected and extremely generous gift of a Vitamix from my parents for Christmas. (Thanks, Mom and Dad!) I had heard about the wonders of the Vitamix and seen the demo at our local Costco, but owning one was not on our radar. The Vitamix takes blending to a whole new level. (It is a "high-performance blender," after all!) Thus far we've made several smoothies, protein shakes, and even a batch of vanilla ice cream (that recipe still needs a little tweakage). I'm looking forward to trying many of the recipes from the cookbook that came with the Vitamix, and I've already got my eye on several hearty soup recipes that look absolutely delicious. 

Good Mornin' Vitamix Smoothie
makes two 16-ounce servings

1 orange, peeled and quartered
1 apple, cored and halved
1 cup frozen mango chunks
1 banana, peeled (frozen or fresh)
1 cup ice cubes

1. Add all the ingredients to the Vitamix pitcher.
2. Start blending at variable one. Increase the speed to variable ten, then flip to high.
3. Blend for 45 seconds, or until the smoothie reaches the desired consistency.
4. Serve it up and start your day!
SHARE:

What's For Breakfast: Oatmeal

{credit: istockphoto}

Now that the weather is cold once again, I am fully embracing hot breakfasts to start off my day. While I had been on a steel-cut oats kick for awhile, while at home over Thanksgiving break we shared a breakfast of rolled oats, and my, how I had forgotten what a great texture they have! My two favorite brands of late have been Bob's Red Mill Extra Thick Rolled Oats (super chewy) and Whole Foods 365 Brand Old Fashioned Rolled Oats (great texture and inexpensive). One of the great things about having a bowl of oatmeal is that you can customize your breakfast by adding whatever toppings you like, which means your bowl of oats can differ on a daily basis.

For today's breakfast, I made up a batch of old fashioned oats on the stovetop. After they had cooked (in just five minutes!), I topped off my bowl of oats with some brown sugar, a handful of dried cranberries, chopped pecans, and a sprinkling of chia seeds. I also stirred in a little bit of skim milk. D also had a bowl of oatmeal this morning. He had his oats straight up, though he also had an egg and toast on the side. 
SHARE:

Holiday Shenanigans: Florida Edition


D and I spent Christmas together at home in Philly. After opening presents in the morning, I whipped up a batch of Alton Brown's french toast for breakfast. In the afternoon, we went for a long walk around the neighborhood with the dog; it was quite nice as not many people were up and about. A special bonus of the empty city was that we were able to score a parking spot for our car right in front of our building -- that rarely happens! Our Christmas dinner featured a small roasted chicken, mashed fingerling potatoes, homemade stuffing, and cranberry sauce.

After spending a quiet Christmas at home, at 4 a.m. on the 26th, D and I packed up the car (and the dog), and hit the road for an 18-hour road trip. Our destination? Lakeland, Florida, home to D's grandparents. After all was said and done, we arrived in Lakeland around 10:30 p.m. Our GPS originally predicted that we'd arrive at our destination around 8:30 p.m.; but a spate of bad traffic (and accidents) in South Carolina added in two additional hours.

Since we had Leroy with us, we opted to stay in a hotel since dogs are not allowed in D's grandparent's neighborhood. The morning after our arrival, we started what would be a morning ritual of heading to Lake Parker Park to work off some of Leroy's energy by walking one of the many lakeside pathways in the park.
{morning views and avian fauna at Lake Parker Park}

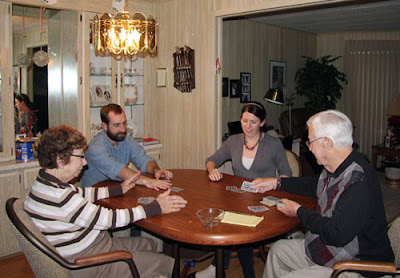
Highlights of our visit with D's grandparents included several rounds of Grandpa Bronson's famous brandy alexanders, watching a 3-D movie on their fancy TV, being entertained by dinner theatre in Orlando (somebody please do a documentary on a behind-the-scenes look at the Capone's actors: I'm dying to know their backstories), and learning how to play stupid, a card game (which I won! Woot!). Here are a few photos from our trip to Florida:

{Grandpa Bronson and his famous brandy alexanders}

{enjoying my first brandy alexander of our stay}

{watching a 3-D movie wearing our cool glasses}

{dinner theatre at Capone's -- a picture says a 1000 words}

{ready to enjoy an evening card game}

{dealing cards}

Leroy was a surprisingly well-behaved houseguest and it didn't take long before he let both Grandma and Grandpa Bronson pet and handle him. There may be hope for our little rescue dog after all! After spending four days in Florida, we packed everything back up again and hit the road early on the 30th. We made it back to Philly around 10:30 p.m. and after schlepping several loads of stuff back into our house (ok, D schlepped most of the stuff while I chilled with the dog in the car, which was illegally parked on the street), we soon called it a night.

New Year's Eve was another low-key holiday for us; D had the sudden onset of a cold, so we opted to stay in for the night. We feasted on a dinner of herb-roasted chicken breasts along with leftover stuffing, mashed potatoes, and cranberry sauce from our Christmas meal. Somehow we managed to stay up until midnight and toasted with a glass of champagne before heading to bed. And there you have it! A full report on our holiday shenanigans from Christmas to New Years. I hope you all had a wonderful holiday season!
SHARE:

Under the Weather

{credit: istockphoto}

It appears that my new year is starting off less with a bang and more with a bug. I spent the majority of the day in bed, and the most exciting meal I ate today was a small mugful of reheated (albeit homemade) chicken soup. I'm feeling a little better this evening, so hopefully I'll be back to regular posting tomorrow. I've got a lot of fun things and recipes to share with you later this week!
SHARE:
© A Less Processed Life. All rights reserved.
BLOGGER TEMPLATE MADE BY pipdig