What's Baking: Apple-Cinnamon Coffee Cake


If you are not eating leftover pumpkin, apple, or pecan pie this morning for breakfast (full disclosure: I am considering doing the same), consider giving this recipe for apple-cinnamon coffee cake a try. This easy coffee cake offers plenty of flavor without a lot of calories and fat -- the perfect antithesis to yesterday's Thanksgiving feast.

I have a tendency to lower the sugar in most recipes I try. In the case of this coffee cake, I balked at the one cup of granulated sugar the original recipe called for and simply halved the amount. I don't think the flavor suffers at all; to my palate the coffee cake is still plenty sweet, especially since it has a cinnamon-sugar streusel topping.

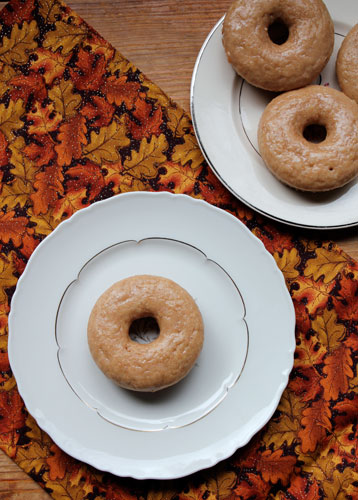
Apple-Cinnamon Coffee Cake (printer-friendly version)
makes 12 servings

For the cake:
1 1/2 cups whole-wheat pastry flour
1/2 cup granulated sugar
1 1/2 teaspoons aluminum-free baking powder
1 1/2 teaspoons ground cinnamon
1/2 teaspoon fine sea salt
3/4 cup organic skim milk
2 tablespoons unsalted butter, melted
1 teaspoon vanilla extract
1 large egg, lightly beaten
1 cup diced peeled Granny Smith apple (small dice - the apple pieces should be about pea size)

For the streusel topping:
1/4 cup packed brown sugar
1 tablespoon granulated sugar
2 tablespoons whole-wheat pastry flour
1 teaspoon ground cinnamon
1/4 teaspoon ground nutmeg
2 tablespoons unsalted butter, cold and cut into small cubes

1. Preheat the oven to 350 degrees. Lightly grease an 8-inch square baking dish with cooking spray and set aside.
2. In a large bowl, sift together the whole-wheat pastry flour, granulated sugar, baking powder, cinnamon, and sea salt. In a medium bowl, stir together the skim milk, melted butter, vanilla, and egg. Pour the wet ingredients into the dry ingredients and stir to combine. Fold in the diced apple. Spoon the batter into the prepped baking dish.
3. In a small bowl, stir together the sugars, flour, cinnamon, and nutmeg. Cut in the cubed butter with the use of a pastry blender or two forks until the mixture resembles pea-sized crumbles. Carefully spoon the streusel evenly over top the batter.
4. Bake for 40-45 minutes, or until a toothpick inserted into the center of the cake comes out clean. Let the cake cool for 10 minutes on a wire rack before serving.

 (adapted from this Cooking Light recipe)
SHARE:

What I'm Helping With: Last Minute Thanksgiving Food Ideas

'Twas the day before Thanksgiving, and all through the house, people were chopping, and prepping, and scurrying around like a mouse. 

The Thanksgiving feast is no joke, am I right? Hopefully by now you have made your trip(s) to the grocery store and have all your ingredients on hand, and are ready to roll on Thursday. (Or perhaps you've made reservations for Thanksgiving dinner at your favorite restaurant ... no judgement here!) However, if you are still in search of some last-minute Thanksgiving food ideas, be it appetizers, sides, or desserts, I've got you covered. 

Some small bites before the main event:


Side dishes that shine:


Don't forget to leave room for dessert:


SHARE:

What's For Dinner: Slow-Roasted Brisket


It will probably come as no surprise to hear that I love cooking shows. And cooking magazines. And cooking podcasts. Lately I've been listening to podcasts from The Splendid Table, Alton Brown, and America's Test Kitchen while taking Leroy on his morning walks. Speaking of America's Test Kitchen, I am also a fan of the eponymous cooking show on PBS as well as its sister show, Cook's Country. On a recent lazy Saturday, D and I watched an episode of Cook's Country in which they featured a recipe for Atlanta brisket. I had a feeling such a dish would be right up D's alley. And since I had never cooked a brisket before, I was intrigued to try a new-to-me cut of meat.

I was able to procure a brisket from our local natural foods store, though it was frozen and not fresh. Unlike the brisket they featured on the show, my brisket was seriously lacking in a fat cap, but I forged ahead undaunted. I fully intended to follow the recipe to a T, except that I wanted to substitute Mexican Coke (which is made with cane sugar) for the regular Coke (which is made with high-fructose corn syrup) the recipe called for. Alas, I could not source any Mexican Coke in town, so I opted to use a natural root beer instead. I don't think the brisket suffered at all due to this substitution; if anything, root beer adds in a bit more flavor than a straight-up cola would.

The key to a successful slow-roasted brisket is time -- this is not a recipe that you can rush. Make sure you allow plenty of time for all the steps -- and don't end up eating around 8 p.m. as we did. Let's just say, for me, successfully completing this recipe may have been a bit of a comedy of errors -- leading to three separate trips to the grocery store in one afternoon to finally ensure I had all the ingredients on hand. But, even with all that drama, in the end, the brisket turned out fabulously, and I'd definitely make this recipe again.

Slow-Roasted Brisket (printer-friendly version)
makes 6-8 servings

1 (3 1/2-pound) beef brisket, flat cut, fat trimmed to 1/4 inch
1 tablespoon kosher salt
freshly ground black pepper
4 teaspoons vegetable oil, divided
2 large white onions, halved and sliced 1/2 inch thick
2 cups root beer
1 1/2 cups ketchup
4 teaspoons onion powder
2 teaspoons packed dark brown sugar
1 teaspoon garlic powder
1 teaspoon dried thyme leaves

1. If necessary, trim the fat from the brisket so that it is no more than 1/4-inch thick. (The brisket I used had already been trimmed to within an inch of its life, so I skipped this step.) Use a fork to poke holes all over the top and bottom of the brisket. Then rub both sides with salt -- use 1/2 tablespoon per side. Wrap the brisket tightly in plastic wrap, place on a platter and refrigerate for at least 6 hours.
2. Preheat the oven to 325 degrees.
3. Remove the brisket from the fridge, unwrap it, and use paper towels to gently wipe off any excess moisture. Generously pepper both sides of the brisket.
4. Add 2 teaspoons of vegetable oil to a large skillet and heat over medium heat. Place the brisket in the skillet, fat side down and brown for 4 minutes. To help it cook evenly, place a foil-wrapped heavy skillet (such as a Dutch oven or cast iron skillet) over top the brisket to flatten it out. After the bottom has browned, flip the brisket over and brown for 4 minutes on the opposite side.
5. Remove the brisket from the skillet and place on a platter.
6. Add another 2 teaspoons of vegetable oil to the skillet and add in the sliced onions. Saute until golden brown (about 12-15 minutes), stirring occasionally. Once cooked, spoon the onions into a 9x13 baking dish. Place the brisket over top the onions, fat-side up.
7. In a large bowl, stir together the root beer, ketchup, onion powder, brown sugar, garlic powder, and dried thyme. Pour this mixture over top the brisket.
8. Place a folded sheet of parchment paper over top the brisket. Then cover the entire baking dish with aluminum foil. Roast the brisket in the oven for 3 1/2 - 4 hours, or until the meat easily falls apart when a fork is inserted into it.
9. Remove the brisket from the oven, and let it rest, uncovered, for 30 minutes.
10. Remove the brisket from the baking dish and place it on a cutting board. Cut the brisket into slices against the grain. Use a spoon to remove any fat from the sauce, then place the sliced brisket back into the baking dish and coat each piece in the sauce before serving.

(adapted from this Cook's Country recipe)

SHARE:

What's Baking: Simple Buttermilk Biscuits


I made brisket for dinner the other night (recipe to come soon), and while it was cooking away in the oven, I asked a friend (and coworker) what I should serve on the side. (iChat is such a lifesaver during a long workday -- Leroy isn't much of a conversationalist.) Since my friend is from South Carolina, I figured he could provide expert advice on sides for the Southern dish I was cooking. He immediately suggested buttermilk biscuits, so I knew I'd have to bake up a batch. (Once fresh buttermilk biscuits are mentioned, nothing else comes close.) A quick trip to the grocery store, and I had the key ingredient (read: buttermilk) in hand.

Though I've made buttermilk biscuits in the past, more often than not they have turned out as flat, dense discs of dough. I didn't have much time to dedicate to baking up the biscuits (I figured I'd bake them once I took the brisket out of the oven, as it required a 30-minute rest), so I knew I'd need a fairly drama-free recipe to work from. A quick Google search for "easy buttermilk biscuits" brought me to a recipe posted on Completely Delicious. This recipe originates from The Gourmet Cookbook, and it is definitely a keeper. For once my biscuits came out nice and fluffy and full of delicious buttery flavor. Though we typically have yeast rolls on Thanksgiving, I'm thinking maybe this year these simple buttermilk biscuits should find their way onto our holiday dinner table.


Simple Buttermilk Biscuits (adapted from this Completely Delicious recipe)
makes 8 biscuits

2 cups unbleached all-purpose flour
2 teaspoon aluminum-free baking powder
1/2 teaspoon baking soda
1/2 teaspoon coarse sea salt
1/2 cup unsalted butter, cold and cut into cubes
3/4 cup buttermilk

1. Preheat the oven to 425 degrees. Line a baking sheet with parchment paper or a silpat and set aside.
2. In a large bowl, whisk together the flour, baking powder, baking soda, and sea salt.
3. Use a pastry blender or two forks to cut the butter into the flour mixture until it resembles pea-sized crumbles. Add in the buttermilk and stir until the dough forms into a ball.
4. Turn the dough out onto a floured surface. Fold the dough over itself about six times. Then use a floured rolling pin to roll the dough out into a 1/2" thickness. Use a 3-inch round cutter to cut out eight biscuits from the dough.
5. Place the biscuits 2 inches apart on the prepped baking sheet. Bake in the oven for 12-15 minutes, or until golden brown. Remove from the oven and place on a wire rack to cool. Store any leftover biscuits at room temperature in an airtight container for up to three days.

SHARE:

What's For Dinner: Margherita Pizza with a Homemade Crust


Truth bomb: we probably eat pizza about once a week at our house. Growing up, pizza was a common Saturday night dinner -- our favorite was delivery from LaRosa's, a Cincinnati institution. These days we typically pick up a pizza in town from Zadnick's, where our favorite is their margherita pizza. I'm all for simple toppings when it comes to pizza -- a little red sauce, mozzarella cheese, and some fresh basil is all I need.

I know we should make pizza more often at home, if for the cost-savings alone, but I've always been a little petrified of making my own pizza dough. And then Deb of Smitten Kitchen posted a recipe for "lazy pizza dough" -- music to my ears! Her post includes options for a 6-hour, 12-hour, and 22-hour rise; thus far I've tried the 6-hour rise recipe a few times, and it has changed my life! Okay, that may be overstating it a bit, but seriously, I never realized making pizza dough could be so simple. Any recipe that calls for one bowl and a little bit of stirring (yes! a no-knead pizza dough!) is right up my alley.

This pizza dough bakes up nice and crispy on the outside, but tender on the inside. (I love a bubbly pizza crust!) In the past when making a margherita pizza from scratch I've used fresh mozzarella, but this time around I followed Deb's advice and used "aged" mozzarella (the kind that comes packaged in plastic in the shape of a brick, rather than in water or wrapped in plastic as a soft ball), and I did notice that my pizza wasn't soggy as it has been in the past. A little freshly-grated Parmesan adds a little extra dimension, and you can't go wrong with the addition of fresh basil. I prefer to add the basil after the pizza comes out of the oven; otherwise it can get a bit burnt.

Long story short, if you've been itching to make your own pizza from scratch but have been too intimidated by all the rising and kneading, give this recipe a whirl. It has definitely been a game-changer for me.


Margherita Pizza with a Homemade Crust (printer-friendly version)
makes enough for two (9x13-ish) pizzas

For the crust: 
3 cups unbleached all-purpose flour
1/2 teaspoon active dry yeast
1 1/2 teaspoons coarse sea salt
1 1/4 cup water, plus an additional tablespoon or two if necessary

1. In a large bowl, stir together the flour, yeast, salt, and water. The dough will be pretty shaggy and sticky; if it seems too dry, add in a bit more water. Cover the bowl with plastic wrap and set in a warm place and let the dough rise for six hours, or until doubled in size.
2. Once the dough is ready to use, lightly oil a baking sheet and set aside. Generously flour your countertop or other work surface and set the dough on it. Sprinkle flour over top the dough ball and divide into two portions. Use your hands to gently stretch out the dough into a rectangular shape to fit your baking sheet. Once stretched out, set the dough onto the prepped baking sheet.
3. You can repeat this process with the second ball of dough, or you can wrap the extra dough in plastic wrap and refrigerate until ready to use. (The last time I made this pizza, I refrigerated the dough for several days before making the second pizza, and it turned out just fine.)

For the sauce and toppings:
1 28-ounce can whole peeled tomatoes (see note about using crushed tomatoes below)
1 clove garlic, minced
1/2 teaspoon coarse sea salt
generous pinch of ground oregano
dash of red pepper flakes
pinch of sugar
8 ounces (1/2 cup per pizza) aged mozzarella, shredded (sold in bricks, not balls)
olive oil, for drizzling
1/4 cup finely grated Parmesan 
fresh basil leaves, gently torn or chiffonaded 

1. Preheat the oven to 500 degrees.
2. Place the tomatoes in a colander over a bowl and let them drain for 20-30 minutes. (You could shorten this step slightly by using crushed tomatoes and only draining them slightly; if you do this, you could also skip the immersion blender step.)
3. Once the tomatoes have drained, place the tomatoes into a bowl. Stir in the minced garlic, salt, oregano, red pepper flakes, and sugar. Use an immersion blender to blend the sauce to your preferred consistency. (I prefer a chunkier sauce.)
4. Spread about 1/3 cup of the sauce over the prepared pizza dough.
5. Top with about 1/2 cup of shredded mozzarella cheese. Drizzle with olive oil.
6. Bake in the oven for 10-15 minutes, or until the cheese is bubbly and the crust is golden brown. Remove from the oven and sprinkle 1/4 cup of Parmesan cheese over top the pizza. Follow with fresh basil. Let cool for a few minutes before slicing and serving.

(lightly adapted from this amazing Smitten Kitchen recipe)
SHARE:

What's Baking: Lemon Sugar Cookies


The holiday cookie season is nearly upon us, so I'm trying out a few new-to-me cookie recipes now before the holidays really kick into high gear. I first came upon this lemon sugar cookie recipe while watching an episode of PBS's Martha Stewart Bakes, and immediately pinned the recipe to come back to later.

This past weekend I found myself at D's family's cottage up in Northern Michigan with an open afternoon and all the ingredients I needed on hand, so I figured it was as good a time as any to try this recipe out. Since I didn't have any cookie cutters with me, I made drop cookies (as the original recipe intends), but I think with some additional chilling time, this dough would work quite well for cut-out cookies. Given the delicious lemony (but not-too-lemony) flavor of these sugar cookies, I'm sure I'll get a chance to try this out as I plan to make another batch soon!

Lemon Sugar Cookies (printer-friendly version)
makes about 16-18 large cookies

3 cups unbleached all-purpose flour
1 teaspoon aluminum-free baking soda
1/4 teaspoon coarse sea salt
1 3/4 cups granulated sugar
1/4 cup packed light brown sugar
1 teaspoon finely grated lemon zest
1 cup unsalted butter, softened
2 large eggs
1 tablespoon fresh lemon juice
granulated or sanding sugar, for sprinkling

1. Preheat the oven to 350 degrees. Line a baking sheet with parchment paper or a silpat and set aside.
2. In a medium bowl, whisk together the flour, baking soda, and sea salt. Set aside.
3. In a large bowl, stir together the sugars and lemon zest. Then add in the butter and beat until light yellow and fluffy. Stir in the eggs one at a time. Then stir in the lemon juice. Finally, stir in the flour mixture a little bit at a time until just incorporated.
4. Cover the dough with plastic wrap and chill in the fridge for 30 minutes.
5. Using a spoon and your fingers, form the chilled dough into 1" balls (slightly smaller than ping-pong ball size). Gently flatten the balls with the back of a spoon. Sprinkle sanding or granulated sugar over top each cookie, tap it down with your fingers, then sprinkle on a bit more.
6. Bake in the oven for 15 minutes, or until golden brown. Remove from the oven and set the baking sheet on a wire rack to cool for 5 minutes. Then remove the cookies from the baking sheet and let cool completely on the wire rack. Cookies can be stored in an airtight container for up to three days.

(lightly adapted from this Martha Stewart recipe)
SHARE:

What's For Dinner: One-Pan Harvest Pasta


A couple of months ago D and I celebrated our fourth wedding anniversary with a trip to Ironwood, Michigan for a weekend stay at the Bear Track Cabins near the shores of Lake Superior. The cabin we stayed at was on just-the-right-side of rustic chic. Given its backwoods location (not meant in a derogatory manner, it was located in the middle of nowhere), we had no cell service for the majority of the weekend. And it was actually quite liberating! I am definitely guilty of endlessly checking my phone for updates in this app or that, and it was quite nice to turn my phone off and forget about it for a few days. (Well, aside from a short trek to Black River Harbor where there was cell service -- you can bet your bottom dollar I instagrammed the heck out of the forest, waterfalls, and scenic Lake Superior shoreline while we wandered the trails with Leroy.)

All this to say that while unplugged I had plenty of time to catch up on my reading. And since D has commandeered my Kindle of late, I had a number of magazine issues to read through once I got my hands back on it. Since moving back to the Midwest, I started reading Midwest Living, and I have to say the magazine never fails to provide several recipes that I end up pinning for later. The one-pan harvest pasta recipe published in the magazine's September issue went directly to my bookmarks list. I've made it two times thus far; the first time in my Dutch oven and the second time in a large skillet. Using a large skillet is your better bet, as more surface area means your veggies will cook more evenly. You will want to use a skillet with a lid; I've found a sheet or two of aluminum foil can work as a lid in a pinch if necessary.

The resulting dish is full of flavor, chockful of veggies, and quite satisfying. Though the original recipe says it makes four servings, I think it's more realistic to say it makes six to eight servings; unless you prefer ginormous portions or are particularly hungry.

One-Pan Harvest Pasta (printer-friendly version)
makes 6-8 servings

2 tablespoons vegetable oil
1 small eggplant, cut into 1-inch pieces (about 4 cups)
1 medium zucchini, cut into 1-inch pieces (about 2 cups)
2 tomatoes, coarsely chopped (about 1 cup)
1/3 cup chopped red or yellow onion (the red onion provides a slightly sharper flavor)
2 cloves garlic, minced
1 19-ounce can cannellini beans, rinsed and drained
1 3/4 cups reduced-sodium vegetable broth
1/2 cup elbow macaroni (uncooked)
1/2 teaspoon crushed red pepper flakes
coarse sea salt and coarse ground black pepper
torn fresh basil (for garnish)
freshly-grated Parmesan (for garnish)

1. In a large skillet, heat the oil over medium-high heat. Add in the eggplant, zucchini, tomatoes, onion, and garlic and saute until tender, about 7-9 minutes. Stir occasionally to prevent the vegetables from sticking to the bottom of the pan.
2. Stir in the cannellini beans, vegetable broth, elbow macaroni, and red pepper flakes. Bring to a boil, then reduce the heat to a simmer. Place the cover on the skillet and let cook, stirring occasionally, for 7-10 minutes, or until the pasta is al dente.
3. Remove from the heat and season to taste with salt and pepper. Garnish with fresh basil and Parmesan before serving.

(adapted from this Midwest Living recipe)
SHARE:

What's Baking: Butternut Squash Bread


I had a bit of roasted butternut squash puree left over from making last week's Roasted Butternut Squash Phyllo Cups recipe, so I opted to use up the majority in a butternut squash quick bread recipe. While putting squash into a quick bread may seem weird at first, don't forget that pumpkin is a squash too! (Remember last year's butternut squash pie recipe?) So to make this bread, I just slightly modified one of the pumpkin bread recipes I've made in the past. If you'd prefer, you can easily sub in "pumpkin pie spice" for the list of spices I've called for below; personally, I prefer having a little say in which spices I add in, and at what amount. Feel free to experiment with the spices too; if you like a little more nutmeg or ginger, or no cloves -- go ahead and make those changes!

Butternut Squash Bread (printer-friendly version)
makes one 9" loaf

1 3/4 cups unbleached all-purpose flour
1 teaspoon ground cinnamon
1/2 teaspoon ground nutmeg
1/4 teaspoon ground ginger
1/4 teaspoon ground allspice
1/8 teaspoon ground cloves
1 teaspoon baking soda
1/2 teaspoon salt
1/4 teaspoon baking powder
1 cup butternut squash puree
3/4 cup firmly packed brown sugar
1/2 cup unsalted butter, room temperature
2 eggs
1 teaspoon vanilla extract

1. Pre-heat the oven to 350 degrees. Lightly grease a large bread pan.
2. Sift together the flour, spices, baking soda, salt, and baking powder. Set aside.
3. Cream together the butter and sugar until light and fluffy. Beat in the two eggs. Mix in the vanilla. Alternately add in the butternut squash puree and the sifted dry ingredients.
4. Spoon the batter into the prepared bread pan.
5. Bake for 45-55 minutes, or until a knife or toothpick inserted into the center of the bread comes out clean. Remove from oven, then let cool in pan for 10 minutes on a wire rack. Remove bread from pan and allow to cool completely. Wrap in aluminum foil or plastic wrap.
SHARE:

What I'm Bringing to the Party: Roasted Butternut Squash Phyllo Cups


In addition to the sweet salted caramel cheesecake bites I brought to this past weekend's Halloween party, I also brought along a savory treat. I had a butternut squash languishing in our pantry, so I knew I wanted to do something that involved roasted squash. Last Christmas's butternut squash lasagna rolls were a huge hit, so I decided to work from that dish's butternut squash filling to make an hors d'oeuvre. With that decision made, I opted to make things a little bit simpler for myself by using pre-made phyllo cups as the container for my roasted butternut squash filling.

Roasting the butternut squash is the most time-consuming part of this recipe; you can definitely do this part ahead of time and refrigerate the pureed squash until you're ready to use it. 

Roasted Butternut Squash Phyllo Cups (printer-friendly version)
makes 15 servings

1 cup roasted butternut squash purée (see below for roasting instructions)
1/2 teaspoon kosher salt
1/2 teaspoon ground black pepper
pinch ground nutmeg
2 tablespoons sliced almonds, chopped fine
1/2 cup grated Parmesan
1 teaspoon olive oil
1-2 teaspoon crumbled fried sage leaves (3-4 fresh sage leaves)
1 package mini phyllo cups, thawed (I used Athens brand)

To roast the butternut squash:
1 large butternut squash (about 2 pounds)
1 tablespoon unsalted butter, browned

1. Preheat oven to 400 degrees. Cover a rimmed baking sheet with aluminum foil or a silpat. Set aside.
Peel the butternut squash and cut in half. Remove the seeds with a spoon. Cut the squash into 1" cubes.
2. Place the squash cubes into a shallow bowl. Add in the browned butter and toss to combine.
3. Spread the squash cubes onto the prepped baking sheet.
4. Roast in the oven for 30-45 minutes or until tender, flipping the cubes once or twice while cooking.
5. Remove from the oven and cool on a wire rack.
6. Once cooled, purée the squash in a food processor. (Alternately, you could use a potato masher or blender for this step.) Use immediately or refrigerate in an airtight container overnight. Note: this recipe makes about 2 1/2 cups of roasted butternut squash purée; extra could be used in a pie or bread recipe.

To make the filling and bake the phyllo cups:
1. Preheat the oven to 375 degrees. Set the phyllo cups on a rimmed baking sheet.
2. In a medium bowl, stir together the pureed butternut squash, salt, pepper, nutmeg, chopped almonds, and Parmesan.
3. Spoon the filling into the phyllo cups. Fill each cup completely.
4. Bake in the oven for 10 minutes. (The phyllo cups are pre-baked; this step just warms the filling.)
5. While the phyllo cups are baking, fry the sage leaves: heat the olive oil in a small sauce pan over medium-high heat. Once heated, add in the sage leaves and fry until crisp, about 1 minute. Remove the leaves from the pan and place on a paper towel to remove any excess oil. Once cooled, gently crumble the leaves with your fingers.
6. After the phyllo cups have baked, remove them from the oven. Sprinkle crumbled sage leaves over each phyllo cup. Serve warm or at room temperature.

SHARE:

What's For Dessert: Salted Caramel Cheesecake Bites


A friend of ours hosted a Halloween party this past weekend (D and I went as Sam Shakusky and Suzy Bishop from Moonrise Kingdom), and I took the invitation as a good excuse to make a few nibbles to share. Since I still have a bit of salted caramel sauce leftover in the fridge, I had the idea to use some in a mini cheesecake bites recipe. And let me tell you, I'm pretty proud of these sweet treats.

Without fail I always sub in neufchâtel cheese for cream cheese, as it has a slightly lower fat content. Feel free to use the real stuff if you prefer; personally, I don't taste much of a difference between the two. The cheesecakes get a dose of salted caramel flavor both within the cake layer and as a generous drizzle on top. If you haven't any made-from-scratch salted caramel sauce on hand, you can use your favorite brand of caramel sauce instead. (But seriously, it is totally worth the effort to make your own caramel sauce from scratch!)

Bite-size mini cheesecakes are perfect for sharing at a party or other gathering; they are easy to eat as a finger food and though small in size, these little bites pack in plenty of satisfying flavor. If you're looking for a dessert to share at upcoming holiday gatherings, I urge you to give this recipe a try!


Salted Caramel Cheesecake Bites (printer-friendly version)
makes 24 servings

For the crust:
1 cup graham cracker crumbs (about 6-7 graham cracker sheets)
2 tablespoons light brown sugar
4 tablespoons unsalted butter, melted

For the cheesecakes:
1 (8 oz) package neufchâtel cheese (or regular cream cheese), softened
1 egg
1 teaspoon vanilla extract
1/4 cup raw sugar
2 tablespoons salted caramel sauce, plus a little extra for drizzling after baking

1. Preheat the oven to 375 degrees. Line a mini muffin tin with paper liners and set aside.
2. In the bowl of a food processor, use the steel blade attachment to make crumbs from the graham cracker sheets. Add in the brown sugar and pulse a few times to incorporate into the crumbs. Carefully add in the melted butter and process until incorporated.
3. Spoon the crumb mixture into each lined mini muffin cup, filling each cup about 1/4 full. Use the back of the spoon or your (clean!) fingers to press the crumb mixture firmly into the bottom of each muffin cup.
4. In the bowl of an electric mixer, mix the neufchâtel cheese, egg, vanilla, and raw sugar together at high speed. Use a rubber spatula to scrape down the sides of the mixing bowl as necessary. Mix in the caramel sauce and continue stirring at high speed until evenly combined.
5. Spoon the cheese mixture on top of the graham cracker layer, filling each muffin cup almost completely full.
6. Bake in the oven for 13-15 minutes, or until the cheesecake layer has set and appears matte, not glossy. Remove from the oven and let the cheesecake bites cool in the tin on a wire rack. Once cooled to the touch, place the tin in the refrigerator to chill.
7. To serve, remove the cheesecake bites from their paper liners. Drizzle salted caramel sauce over top each cheesecake bite before serving.
SHARE:

What's Baking: Maple-Glazed Baked Donuts


This past Saturday was rather gloomy -- grey skies all day long and precipitation that switched back and forth between rain and snow. After finally getting out of our (warm) bed, D and I contemplated a trip to Zadnick's to get some freshly baked donuts. But just one look outside made me rethink that plan. Since I already had all the ingredients on hand to make donuts myself, I figured it was about time I put my donut pan to use once again and set to making a small batch of maple-glazed baked donuts to complement our breakfast. (Plus, let's face it, with the holidays right around the corner, it's probably better for my waistline to eat donuts that are baked and not fried...)

The donut itself is basically a plain donut with a smidge of vanilla flavor; the real goodness comes in the form of a glaze that's generously spiked with pure maple syrup. You can opt to just dip the tops of the donuts in the glaze, or go whole hog and completely submerge them in the glaze. Let the donuts rest for a few minutes after glazing to let the glaze set. Then grab a cup of coffee, your favorite book, and curl up on the couch next to the fire while you enjoy your donuts. Or at least, that's what I did!


Maple-Glazed Baked Donuts (printer-friendly version)
makes 6-8 donuts

For the donuts:
1 cup unbleached cake flour
1/3 cup granulated sugar
1 teaspoon baking powder
1/4 teaspoon kosher salt
2 tablespoons plain nonfat Greek yogurt
1/4 cup organic skim milk
1 egg
3 tablespoons canola or vegetable oil
1/2 teaspoon vanilla extract

For the glaze:
1/2 cup powdered sugar, sifted
2-3 tablespoons maple syrup
1 tablespoon organic skim milk
1/2 teaspoon ground cinnamon

1. Preheat the oven to 350 degrees. Spray a donut pan with cooking spray and set aside.
2. Whisk together the dry ingredients.
3. Add in the yogurt, milk, egg, oil, and vanilla extract. Stir until smooth.
4. Carefully spoon the donut batter into the prepared baking pan. Fill each cavity about 3/4 full.
5. Bake for 9-12 minutes, or until the donuts just spring back when touched.
6. Allow the donuts to cool in the pan for five minutes. Then remove donuts from the pan and let cool completely.
7. While the donuts are cooling, make the glaze: In a small bowl, whisk together the powdered sugar, maple syrup, milk, and ground cinnamon until smooth.
8. Dip the top of each cooled donut into the glaze, letting any excess drip off. Place the glazed donuts on a plate and let the donuts rest for a few minutes to allow the glaze to set before eating.


SHARE:
© A Less Processed Life. All rights reserved.
BLOGGER TEMPLATE MADE BY pipdig