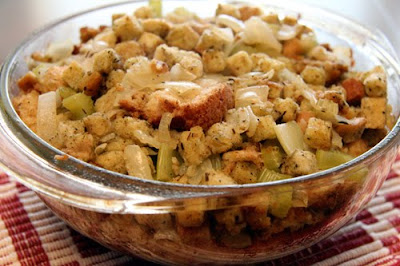
What's On the Side: Stuffing


I'm pretty sure stuffing is my favorite part of Thanksgiving dinner. Luckily, the following recipe makes enough to enjoy plenty of nights of leftovers after the big feast is over.

Mom's Bread Stuffing (printer-friendly version)
makes about six cups

4 tablespoons unsalted butter
4 tablespoons olive oil
½ bag Pepperidge Farm herb stuffing mix
2 cups chopped onion
1 ½ cups chopped celery
½ cup chopped fresh parsley
1 ½ teaspoons poultry seasoning
½ teaspoon salt
½ teaspoon thyme
¼ teaspoon savory
¼ teaspoon black pepper
4 slices bread, toasted
½ - 1 cups vegetable broth

1. Heat the butter and olive oil together in a large skillet over medium heat.
2. Add in the chopped celery and onions, and cook until tender, about 5-7 minutes.
3. Meanwhile, in a large bowl, combine together the stuffing mix and toasted bread, torn into large chunks.
4. Add the dry seasonings and toss well.
5. Next, add the onions and celery and toss again to combine. Stir in the parsley.
6. Pour in the broth until the stuffing is lightly moist. Check seasoning, adjust to taste.
7. Moisten the stuffing with additional broth and turn into buttered baking dish. Bake in 350 degree oven for 45 minutes.
SHARE:

What's Baking: Pumpkin Pie

You can't have a Thanksgiving Feast without a slice of pumpkin pie, right? At least this was the case in our household. By popular request, I made the traditional Libby's pumpkin pie recipe, only substituting in some fat-free evaporated milk for the regular kind. (Mainly because I had some richer plans for a whipped cream topping.) Clearly, this recipe is not exactly unprocessed -- and, horror upon horrors, I actually used a frozen pie crust! (Which, though I used the excuse that I've already packed my pie tins, it really was more that I was too lazy to make a crust from scratch . . .) But let's face it, there's a reason why this blog isn't called "An Unprocessed Life"! Sometimes convenience wins out. Anyway, on to the actual less processed part of this dessert -- the bourbon whipped cream! Making the whipped cream was the last hurrah for my Kitchenaid Mixer -- it is now happily boxed away and waiting to be opened back up and placed in a place of honor in our Philly kitchen (if we can find the room for it!)


Bourbon Whipped Cream
makes about one cup

1/2 cup organic heavy cream
1 tablespoon powdered sugar
1/2 tablespoon Maker's Mark bourbon

1. Chill the bowl of your mixer in the freezer for about 15 minutes.
2. Add the heavy cream, sugar, and bourbon to the chilled bowl.
3. Whisk on high until soft peaks form.
4. Serve a generous dollop on your slice of pie!

SHARE:

Snacktime: Spinach and Artichoke Dip

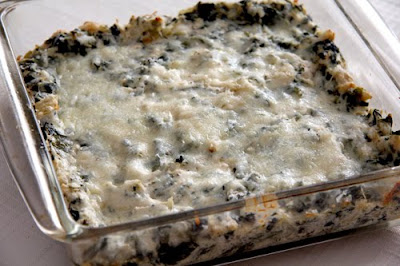
The first item on my cooking to-do list for Thanksgiving Day was to make a batch of spinach and artichoke dip. I decided to veer from the traditional recipe a bit, since its nutritional content in terms of calories and fat is a little scary. Instead of using sour cream and multiple logs of cream cheese, I opted to use Greek yogurt and neufchatel cheese. The resulting dip is admittedly a little dry, but still quite tasty.

Spinach and Artichoke Dip (printer-friendly version)
makes about four cups

1 tablespoon olive oil
1 onion, finely chopped
1 large garlic clove, finely chopped
1 cup nonfat plain Greek yogurt
8 oz neufchatel cheese, softened
1 ½ cups part-skim mozzarella cheese, shredded
1/4 teaspoon ground cayenne pepper
1 teaspoon dried oregano
1/4 teaspoon ground black pepper
small jar quartered artichoke hearts, drained, rinsed, and chopped
10 oz package chopped spinach, thawed, drained, and squeezed dry
1/4 cup finely grated pecorino romano cheese

1. Preheat the oven to 350 degrees.
2. Spray a baking dish with cooking spray. Set aside.
3. Heat the olive oil in a medium-sized skillet over medium heat. Saute the chopped onion and garlic until lightly browned and softened, about five minutes. Once cooked, remove from the heat.
4. In a large bowl, stir together the Greek yogurt, neufchatel cheese, 1 cup of the shredded mozzarella cheese, cayenne pepper, oregano, and black pepper.
5. Add in the cooked onions and garlic and stir to combine.
6. Stir in the artichoke hearts and thawed/drained spinach.
7. Spoon the dip into the prepared baking dish.
8. Top with the remaining mozzarella cheese. Then finely grate about 1/4 cup of pecorino romano cheese over top.
9. Bake in the oven for 25-30 minutes, or until the cheese is bubbling and the top is lightly browned.
10. Serve hot with baked pita chips or cut up veggies such as carrots or celery.

 (adapted from this recipe)

SHARE:

Made From Scratch: Cranberry Sauce

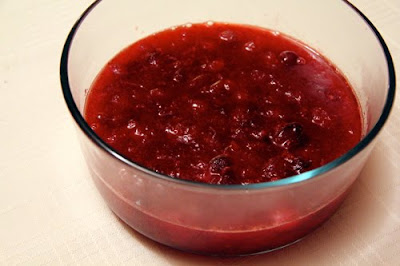
So around 9 p.m. last night I finally got around to starting the preparations for our Thanksgiving feast. We're keeping things fairly simple this year since our main priority at the moment is packing up the house and prepping for an international trip, for which we leave next Saturday. So, while we won't be feasting on a (organic, free-range, or heritage) turkey this year, we will enjoy a modest Thanksgiving dinner with organic, free-range chicken breasts and some of the traditional Turkey Day sides, including stuffing (dressing, really, since it isn't going to be used to stuff anything), mashed potatoes, and of course, cranberry sauce.

I first made cranberry sauce from scratch for last year's pre-Thanksgiving feast. Making your own cranberry sauce is actually quite simple -- not quite as simple as florping the canned variety out of its steel confines, but rather easy nonetheless. To make the sauce, I simply follow the instructions on the Ocean Spray cranberry bag. This year I made a couple adjustments, including adding in some orange juice and orange zest. More importantly, however, I remembered to cover the boiling saucepot with a splatter guard, thus avoiding pollacking my kitchen walls with the burst innards of cranberries, as happened last year.

{the ingredients, minus the water and plus a gorgeous centerpiece -- thanks Mom and Dad!}

Whole Berry Cranberry Sauce (printer-friendly version)
makes 4-6 servings

1 cup raw sugar
1/2 cup fresh orange juice
1/2 cup water
1 teaspoon orange zest
12 oz cranberries, rinsed

1. Rinse the cranberries in a colander. Set aside.
2. Add the orange juice, water, and sugar into a medium saucepot. Bring the mixture to a boil.
3. Once the mixture begins to boil, add in the cranberries and return to a boil. Then reduce the heat and allow to gently boil for about 10-15 minutes, or until the mixture begins to thicken. Be sure to cover the saucepot with a splatter guard at this point to prevent a mess. Stir the sauce occasionally.

4. Stir in the orange zest.
5. Use a wooden spoon to gently pop any cranberries that are still whole.
6. Pour the sauce into a container with a lid. Let the sauce cool to room temperature, then chill in the fridge (with the lid on) until ready to eat.

(adapted from this recipe)


Best Wishes for A Happy Thanksgiving to You and Yours!
SHARE:

What's For Breakfast: Eggnog Pancakes

I picked up a carton of organic eggnog the other day, and in addition to drinking it, I wondered if I could incorporate it into some recipes -- say, pancakes for example. A quick Internet search confirmed my suspicions, and I decided to give eggnog pancakes a whirl. The end result is a fluffy pancake with a delicious eggnog-y taste -- subtle, but not overpowering. Sprinkle with a little nutmeg, and you've got a pretty fantastic holiday breakfast!

Eggnog Pancakes (printer-friendly version)
makes six pancakes

1 1/2 cups unbleached all-purpose flour
1 tablespoon raw sugar
1 1/2 teaspoons baking powder
1/4 teaspoon salt
1 cup organic eggnog
2 tablespoons clarified butter
1 farm egg, lightly beaten
1/2 cup organic skim milk
nutmeg

1. Mix together the flour, sugar, baking powder, and salt in a medium-sized bowl.
2. Make a well in the center of the dry ingredients.
3. Add in the eggnog, clarified butter, egg, and skim milk. Stir to combine. Continue stirring until the dry ingredients are evenly incorporated into the batter.
4. Heat an electric skillet to 350 degrees.
5. Lightly grease the skillet.
6. Cook the pancakes, about 2 minutes per side, or until bubbly on one side, then flip.
7. Sprinkle with nutmeg and serve with warmed pure maple syrup.

(adapted from this recipe)
SHARE:

What's Baking: Pecan Streusel Banana Bread


More bananas in the freezer = more banana bread (and an excuse to not have to pack the Kitchenaid mixer just quite yet). For this recipe I melded together the recipe from last week (with a slight tweak to the spices) and the pumpkin streusel bread recipe I made a few weeks ago. Is there anything better than the aroma of banana bread baking in the oven? It makes the house smell so good. Perhaps the only thing better is actually eating the bread -- yum.

Pecan Streusel Banana Bread (printer-friendly version)
makes one large loaf

1/2 cup unsalted organic butter
1/2 cup raw sugar
2 farm eggs
1 teaspoon vanilla
1 3/4 cups unbleached all-purpose flour
1 teaspoon baking soda
1 teaspoon aluminum-free baking powder
1/4 teaspoon fine sea salt
1/2 teaspoon pumpkin pie spice
1/3 cup chopped pecans
4 uber-ripe bananas, mashed

For the streusel topping:
2 tablespoons flour
1/3 cup brown sugar
2 tablespoons unsalted butter, cold
1/2 teaspoon ground cinnamon
1/2 teaspoon ground nutmeg
1/8 teaspoon ground ginger

1. Preheat oven to 350 degrees.
2. Grease (use cooking spray or rub with butter) one large or one medium and one small loaf pan.
3. In a large bowl, cream together the butter and sugar. Add eggs and vanilla and beat well.
4. Sift together the dry ingredients (I just put them all in a bowl together and mix with a fork; sifting is overrated!)
5. Alternate adding the dry ingredients and mashed banana to the butter-sugar-egg-vanilla mixture.
6. Stir in the chopped pecans by hand.
7. Pour the mixture into the prepared baking pan.
8. Bake in the oven for 10 minutes. After ten minutes, remove from the oven and spoon the streusel topping evenly over the top of the bread.
9. Return the pan to the oven and bake for another 40-50 minutes, or until a knife inserted into the bread center comes out clean.
10. Remove the bread from the oven and place pan on wire rack. Allow bread to cool in pan for 10 minutes.
11. After 10 minutes, remove the bread from the pan and allow to cool completely on the wire rack.


SHARE:

What's For Dinner: Spicy Venison Curry

Another clean-out-the-freezer meal tonight. For this dinner, I thawed a package of venison "chunks." (Tasty terminology, I know.) Though my original thought was to make a standard stew in the slow cooker, I decided to change things up and try my hand at making a curry stew. A quick search on google brought up this recipe, which I adapted slightly to reflect the ingredients I already had on hand. I served the curry over jasmine rice, which I sprinkled with turmeric to tint it yellow.

Spicy Venison Curry (printer-friendly version)
makes four servings

1 T olive oil
1 lb venison, cut into 1" cubes
fine sea salt
freshly ground black pepper
2 cloves garlic, minced
1 t chopped fresh ginger
1 small can of diced green chiles, drained
1 T curry powder
1 (14.5 ounce) can diced tomatoes with juice
1 small onion, chopped
1 C organic vegetable broth

1. Heat the olive oil in a large skillet over medium-high heat.
2. Brown the venison on all sides (about 1 minute).
3. Remove the browned venison from the skillet and place in a shallow bowl. Season with salt and pepper to taste. Set aside.
4. Reduce the heat to medium-low. Pour the drained green chiles into the skillet. Stir in the minced garlic and chopped ginger. Cook for about 1-2 minutes.
5. Add in the diced tomatoes and juice and stir to combine. Stir in the curry powder. Let simmer for about 5 minutes.
6. Place the chopped onion in the bottom of the slow cooker bowl. Place the browned venison on top. Pour the tomato-curry mixture over the top of the meat. Pour in the vegetable broth.
7. Place the lid on the slow cooker and cook on the low setting for 6-8 hours.
8. Serve the curry over jasmine rice.
SHARE:

What I'm Drinking: Hot Spiced Apple Cider


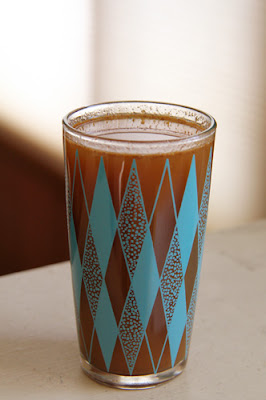
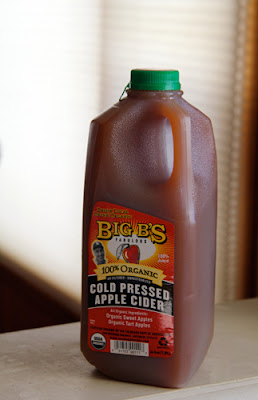
A simple but tasty drink is the highlight of my mid-morning snack today. While in Fort Collins last night, of course I had to swing by Whole Foods. Upon entering the store, I made a beeline for the juice section and quickly grabbed a half-gallon of apple cider. One of my favorite non-coffee drinks at Coal Creek here in town during the fall season is a large steaming cup of hot apple cider. But who wants to trek over the icy sidewalks to get there? I decided the next best thing would be to make my own spiced cider at home. This drink makes a perfect accompaniment to a slice of warmed spiced banana pecan bread. Now -- could someone tell me when nap time starts?

Hot Spiced Apple Cider (printer-friendly version)
makes one serving

1 1/4 C organic apple cider
1 cinnamon stick
1/8 t ground cloves
1/8 t ground nutmeg

1. Pour the cider into a small saucepot. Add in a cinnamon stick, the ground cloves, and the ground nutmeg.
2. Simmer over medium low heat for 30 minutes.
3. Serve immediately. Caution: it's gonna be hot!


SHARE:

What's Baking: Spiced Banana Pecan Bread


I figured I better use my stand mixer one last time before it gets added to the list of packed-up items. And, since I'm still in clean-out-the-freezer mode, I decided to make banana bread. (Given that there are still quite a few bananas in the freezer, I may have to break out the stand mixer at least one more time to take care of 'em -- or, hmmm, do I smell banana pancakes in our future??) Anyway, I decided to change the recipe up a little bit and added pecans instead of walnuts (crazy, I know) and I also added in some cinnamon and nutmeg to deepen the flavor a little bit. It appears I've got a handle on baking bread -- now, if only the kitchen would just magically pack itself up!

Spiced Banana Pecan Bread
(makes one large loaf)

1/2 C unsalted organic butter
1/2 C raw sugar
2 farm eggs
1 t vanilla
1 3/4 C unbleached all-purpose flour
1 t baking soda
1 t aluminum-free baking powder
1/4 t fine sea salt
1/2 t ground cinnamon
1/2 t ground nutmeg
2/3 C chopped pecans
4 uber-ripe bananas, mashed

1. Preheat oven to 350 degrees.
2. Grease (use cooking spray or rub with butter) one large or one medium and one small loaf pan.
3. In a large bowl, cream together the butter and sugar. Add eggs and vanilla and beat well.
4. Sift together the dry ingredients (I just put them all in a bowl together and mix with a fork; sifting is overrated!)
5. Alternate adding the dry ingredients and mashed banana to the butter-sugar-egg-vanilla mixture.
6. Stir in the chopped pecans by hand.
8. Bake for 45-60 minutes or until a knife inserted into the bread center comes out clean.
9. Remove the bread from the oven and place pan on wire rack. Allow bread to cool in pan for 10 minutes.
10. After 10 minutes, remove the bread from the pan and allow to cool completely on the wire rack.

SHARE:

What's On the Side: Steamed Millet


Millet is an ancient grain that has been cultivated for thousands of years. Though a common ingredient in bird food, don't let this dissuade you from trying it, too! Millet is an excellent source of manganese, phosphorus, and magnesium. Millet can be served as a substitute for rice, quinoa, or couscous and can easily be dressed up with the addition of roasted or fresh veggies, herbs, or other seasonings.

Steamed Millet (printer-friendly version)
makes about four servings

1 cup millet
2 cups vegetable broth
1/4 cup water
1 teaspoon olive oil

1. Combine the millet, veggie broth, water, and olive oil in a medium-sized saucepot.
2. Heat over medium until it begins to boil.
3. Turn down the heat, cover, and simmer for 20 minutes, or until all the liquid is absorbed.
4. Remove from the heat and let sit for five minutes.
5. Use a fork to fluff the millet and serve.

For the millet dish shown above, I combined cooked millet, green peas, and some homemade tomato sauce. Easy-peasy. (Peasy? Ha!)
SHARE:

What's For Dinner: Dijon Mustard Roasted Tilapia

Since we had a couple of tilapia fillets in the freezer, I decided that they would be the star of this evening's dinnertime entree. One of my favorite salmon dishes involves roasting the salmon with a topping of dijon mustard, so I decided to try a similar recipe with the tilapia fillets. A quick Internet search led me to this Ina Garten recipe. Since I didn't have a few of the ingredients on hand I just improvised a bit and came up with the following recipe.

Dijon Mustard Roasted Tilapia (printer-friendly version)
makes 2 servings

2 6-oz tilapia fillets
fine sea salt
freshly ground pepper
3 tablespoons Dijon mustard
1/4 cup nonfat Greek yogurt
2 teaspoons capers, drained
1/2 tablespoon olive oil
1/2 white onion, finely chopped

1. Preheat the oven to 375 degrees.
2. Cover a rimmed baking sheet with aluminum foil.
3. Place each fillet on the foil.
4. Generously season each filet with salt and pepper.
5. In a small bowl, stir together the mustard, Greek yogurt, and capers.
6. Heat the olive oil in a small saucepot over medium heat.
7. Add in the chopped onions and saute until lightly browned, around 5 minutes.
8. Stir the cooked onions into the mustard mixture.
9. Spoon the mustard mixture over each fillet. Cover each fillet completely.
10. Bake in the oven for 15 minutes, or until the fish is flaky.
11. Serve with the sides of your choice; I opted to serve my tilapia fillets with green peas and steamed millet.

P.S., Voting is open for the Marx Foods recipe contest -- You can vote for my entry here. Thanks!
SHARE:

What's For Breakfast: Oatmeal with Applesauce

What with the cold mornings (and snow!) of late, there's nothing quite like a nice bowl of steel-cut oats to greet you in the morning. For this breakfast, I added in a generous helping of homemade applesauce along with a dash (or two, or four) of ground cinnamon. It's like a hearty dose of autumn in a bowl -- a great way to start off a Monday morning.
SHARE:

Made From Scratch: Clean-Out-the-Cupboard Pasta Sauce

In preparation for our upcoming move, in addition to cleaning out the freezer, we also need to clean out the pantry. Hence, the following clean-out-the-cupboard pasta sauce, which took care of a can of diced tomatoes, a can of tomato paste, and a can of garbanzo beans. Slowly but surely we'll get this house packed up and cleaned out!

Clean-Out-the-Cupboard Pasta Sauce (printer-friendly version)
makes about 3 cups of sauce

1 tablespoon olive oil
1 small onion, chopped
2 cloves garlic, minced
1 can diced tomatoes
1 small can tomato paste
1/2 cup organic vegetable broth
1/2 teaspoon dried parsley
1/2 teaspoon dried oregano
5 leaves fresh basil, cut into a chiffonade
1 can garbanzo beans
fine sea salt
freshly ground black pepper

1. Heat the olive oil over medium heat in a medium-sized saucepot.
2. Saute the onion and garlic until softened, about 3-4 minutes.
3. Add in the diced tomatoes and pasta sauce. Stir to combine the ingredients.
4. Stir in the vegetable broth.
5. Add in the parsley, oregano, and basil. Stir to combine.
6. Let sauce simmer on low for about 20 minutes.
7. Stir in the garbanzo beans and simmer for a couple more minutes.
8. Season with freshly ground black pepper and salt to taste.
9. Serve over your favorite pasta.
SHARE:

What's For Lunch: Avocado, Portobello Mushroom and Muenster Cheese Sandwich

Another lunch featuring avocado! Since I had the remaining avocado half sitting all by its lonesome in the fridge, I decided it'd make an excellent filling for a sandwich. In addition to avocado, this sandwich also features sauteed baby portobello mushrooms, muenster cheese, and some hummus. This sandwich can easily be made under 15 minutes, if not under 10! The perfect simple sandwich (with complex flavors!) for a busy workday.

Avocado, Portobello Mushroom and Muenster Cheese Sandwich 
(printer-friendly version)
makes one sandwich

1 t olive oil
1 C sliced baby portobello mushrooms
2 slices bread
1 T hummus
2 slices muenster cheese
1/2 avocado, cut into slices

1. Heat the olive oil in a medium-sized skillet over medium heat. Saute the mushrooms until softened, about 3-4 minutes. Remove from the heat.
2. Toast the bread.
3. Slather one side of each slice of bread with hummus.
4. Add a slice of muenster cheese to each bread slice.
5. Layer the slices avocado on one bread half.
6. Add the sauteed mushrooms evenly over each slice of bread.
7. Carefully place both halves of the sandwich together.
8. Cut the sandwich into two triangles.
9. Eat!
SHARE:

What's For Lunch: Alphabet Soup with Avocado Slices

I haven't done a lunch post in a while -- since I tend to work through my lunch hour, the quicker it takes to cook up lunch, the better. Meaning, long story short, my lunches aren't quite as interesting (or intensive!) as my dinners. This lunch features another Amy's Organic soup -- this time I tried out alphabet soup. As a kid I was a huge fan of soups with fun noodle shapes, and it turns out I haven't outgrown that trait! Since this soup is fat-free, I decided to amp up the nutrition a bit by adding some avocado slices. Gosh, I love avocados! Nothing beats one when it's perfectly ripe. Yum!


A look at the ingredients -- not too shabby:

SHARE:

What's For Dinner: Spinach and Feta Salmon Burger

I know that Whole Food's nickname is "Whole Paycheck," but honestly, there are a lot of deals to be found. Case in point: (another round of) salmon burgers! Sure, they're not quite as cheap as a 79 cent box of Mac and Cheese, but at under $4 per serving, (and a whole heckuva lot healthier than that blue and orange box!), these burgers are a good budget buy for me. Last time I featured teriyaki burgers; tonight we gave spinach and feta burgers a try. I think I liked these burgers even better than the last kind. Since D was heading out to a meeting, I was in charge of cooking them up this time. I started by making a pot of quinoa (1/2 C quinoa in 1 C water, bring water to a boil, then reduce heat, cover, and let simmer for about 15 minutes, or until all the water is absorbed). To cook the burgers, I sprayed olive oil cooking spray on a medium-sized skillet, which I then heated over medium-high heat. Once the skillet was heated, I added the burger patties and cooked each side for about three minutes. I finished the burgers in a 350 degree oven for five minutes. End result? Perfection. In addition to the quinoa, I also served the burger alongside a spinach salad with (more!) feta cheese and a balsamic dressing.
SHARE:

Marx Foods Recipe Contest: Pasta with Mussels, Scallops, and Porcini Mushrooms

I was recently given the opportunity to participate in a recipe contest using a variety of ingredients provided by Marx Foods. The items I received included a package of pasta, a small package of dried porcini mushrooms, a small portion of truffle salt, and a small portion of fennel pollen. My task was to create an original recipe using the pasta and at least one other ingredient. For my dish, I opted to use the porcini mushrooms and truffle salt in addition to the pasta. My inspiration for the following dish was the entree D most often orders at Italian restaurants -- pasta con frutte del mare (pasta with the fruits of the sea -- or as I like to call it, Little Mermaid in a bowl.) For the fruits of the sea, I opted to use fresh mussels and sea scallops. D and I made a special trip down to Fort Collins to pick up both of these items at Whole Foods. The mussels hail from Prince Edward Island (home of Anne of Green Gables!) and the sea scallops are from the US. Cooking both of these ingredients was new for me -- the closest I've gotten to cooking seafood prior to this meal was as an attendee at a cooking demonstration (which featured a linguini dish with clams) several years ago. But, I'm not one to back down from a challenge! In the end, though the timing was a bit of a dance (luckily D made an excellent sous chef) -- the end result was delicious.

Pasta with Mussels, Scallops, and Porcini Mushrooms (printer-friendly version)
makes two servings

For the mushrooms:
dried porcini mushrooms

1. Place the dried porcini mushrooms in a non-reactive bowl.
2. Bring a small pot of water to a boil.
3. Pour the boiling water over the mushrooms until they are submerged. Let sit for 20 minutes.

For the mussels: [Note, this makes a ton of mussels -- feel free to cook up less, just remember to adjust the other ingredients as well]
2 lbs Prince Edward Island mussels
3/4 cup chardonnay
1/4 cup mushroom broth
2 tablespoons unsalted butter
1 small onion, chopped
2 cloves garlic, minced

1. Check over the mussels. Discard any that are open. Gently scrub the remaining mussels and remove any remaining beards. Put them in a bowl and set aside.
2. In a large pot (that has a lid), melt the butter over medium heat. Once melted, add in the chopped onions and garlic and saute until softened, about one minute. Pour in the chardonnay and mushroom broth. Once the mixture begins to simmer, place the mussels in the pot. Cover and steam for about five minutes. Shake the pot a couple times while steaming.
3. After five minute has elapsed, check to make sure (the majority of) the mussels have opened. Remove from the heat.
4. Place a medium-sized bowl underneath a colander. Pour the broth out of the cooking pot and reserve. Place the lid back on the pot and set the mussels aside.

For the pasta:
1/2 package Garofalo Pappardelle Pasta

1. Bring a large pot of water to a boil. After the water begins to boil, add a generous amount of salt to the water.
2. Add the pasta to the water and cook for eight minutes, or until the pasta is al dente.
3. Drain the water from the pasta, and place the pasta back in the cooking pot.

For the scallops:
1 tablespoon unsalted butter
1 tablespoon olive oil
2 cloves garlic, minced
6 fresh sea scallops

1. Heat a large skillet over medium-high heat. Add the butter and olive oil.
2. Stir in the garlic and saute until fragrant, about 30 seconds.
3. Add in the sea scallops. Cook for about two minutes per side, or until each side is lightly browned. Once browned, remove from the heat.

Put it all together:
reconstituted porcini mushrooms
prepared mussels
prepared scallops
cooked pasta
truffle salt

1. Use about 3/4 cup of the reserved mussel broth to deglaze the skillet in which the scallops were cooked. Let liquid cook down slightly. Add in the reconstituted porcini mushrooms.
2. Add in the pasta and toss until coated.
3. Plate the pasta. Add three sea scallops to each plate along with a handful of mussels in the shell. If preferred, remove the mussels from their shells before serving.
4. Lightly season each serving with truffle salt.
5. Mangia!
SHARE:

What's For Dinner: Venison Pot Roast

Are you ready for another installment of "clean out the freezer"? For tonight's dish, I made a pot roast in the slow cooker with a venison roast from the freezer. To thaw the roast, I simply placed it in a bowl in the fridge for about 24 hours. Since venison is a fairly low-fat type of meat, it is important to sear the roast to retain the juices before cooking it in the slow cooker. As you can see from the image above, I went a little potato-crazy with my veggies -- I've suggested only using one potato in the recipe below; two were a little, uh, too much.

Venison Pot Roast (printer-friendly version)
makes two servings

3 lb venison roast
unbleached all-purpose flour
1 tablespoon olive oil
1 medium potato, peeled and cut into 1" cubes
1 cup baby carrots (or one cup chopped carrots)
1 cup chopped celery
1 1/2 cups organic vegetable broth
5 tablespoons homemade dried onion soup mix (see below for recipe)

1. Heat the olive oil in a large skillet over medium-high heat.
2. Sprinkle flour over each side of the venison roast.
3. Add the roast to the heated skillet and brown the roast on all sides.
4. Remove from the heat and place the roast in the bottom of a 4-quart slow cooker.
5. Add in the chopped potato, carrots, and celery.
6. Pour the veggie broth over the top of the meat and veggies.
7. Add in the dried onion soup mix.
8. Pour in the cream of mushroom soup.
9. Cook on low for 8-9 hours.
10. When ready to serve, remove the meat from the slow cooker and cut into slices.
11. Serve with the veggies.
12. To make the remaining broth into a gravy, add in a tablespoon of cornstarch and stir until thickened.

Dried Onion Soup Mix
makes about 5 tablespoons

1/4 cups dried minced onions
1 teaspoon onion powder
1/2 teaspoon dried parsley
1/8 teaspoon celery salt
1/8 teaspoon freshly ground black pepper

1. Combine all the ingredients in a bowl. Stir. Done!

SHARE:

Made From Scratch: Cream of Mushroom Soup


A recipe I made recently called for a can of cream of mushroom soup. However, I wasn't too enthused about the long list of ingredients I found on the cans of different brands of soup at the grocery store. So I decided, what the heck, I'll make my own. How hard can it be, anyway? Cream of mushroom soup is basically just a bechamel (white sauce made with milk, butter, and flour) with some sauteed mushrooms in it. And seriously, it is pretty simple to make. I encourage you to skip the canned stuff next time you need cream of mushroom soup and make your own!

Cream of Mushroom Soup (printer-friendly version)
makes about 1 1/2 cups

1 teaspoon olive oil
1 cup sliced portobello mushrooms, chopped
1 tablespoon unsalted butter
3 tablespoons unbleached all-purpose flour
1/2 cup organic vegetable broth
1/2 cup organic heavy cream
1/2 cup organic skim milk
fine sea salt
freshly ground black pepper

1. Heat the olive oil over medium-high heat. Saute the chopped portobello mushrooms until softened, about five minutes. Remove the mushrooms from the heat and set aside.


2. Heat a small sauce pan over medium-low heat. Add the unsalted butter and cook until melted.
3. Once the butter has melted, stir in the flour.
4. Remove the pot from the heat and stir in the veggie broth, heavy cream, and milk. Continue stirring until the mixture is smooth.
5. Return the saucepot to the heat. Stir in the sauteed mushrooms.
6. Bring the mixture to a slow boil. Whisk constantly and continue stirring until the mixture thickens.
7. Season with salt and/or pepper to taste.
8. Remove from the heat. Use immediately or let cool and store in a closed container in the fridge.
SHARE:

What's For Dinner: Organic Chicken Breasts with Barbecue Sauce

Another clean-out-the-freezer dinner! D was in charge of this meal; all I did was thaw out the organic boneless and skinless chicken breasts. I did this by putting the chicken into a plastic zippered bag (squeeze out any air before closing the bag entirely) and then placing the bag into a bowl of cold water. D also cooked up some slightly freezer-burned green beans as a side as well as a bag o' rice. Sooner or later we should have the pantry and freezer cleaned out!

Organic Chicken Breasts with Barbecue Sauce (printer-friendly version)
makes 2 servings

2 organic boneless and skinless chicken breasts
1 cup barbecue sauce

1. Preheat the oven to 350 degrees.
2. Cover a rimmed baking sheet with aluminum foil.
3. Place the thawed chicken breasts on the prepped baking sheet.
4. Generously slather each breast with barbecue sauce.
5. Bake in the oven for 30-35 minutes, or until the juices are clear and the meat is no longer pink on the inside.
SHARE:

What's For DInner: Baked Penne with Chorizo, Onions, and Garlic


The following recipe is a riff on my standard baked penne (ziti) dish. For this version, I added in some sauteed garlic and onion along with a healthy portion of cooked chorizo sausage. Adding meat to this dish gives it an extra-hearty flavor, making it an ideal entree for a cold autumn night.

Baked Penne with Chorizo, Onions, and Garlic (printer-friendly version)
makes eight servings

6 cups penne pasta
2 small onions, chopped
1 clove garlic, chopped
1 lb chorizo sausage
1 jar marinara sauce
16 oz non-fat organic cottage cheese
1 1/2 cups shredded mozzarella cheese
1 teaspoon dried oregano

1. Preheat the oven to 375 degrees.
2. Bring a large pot of water to a boil. When the water begins to boil, add in a generous sprinkle of sea salt. Add in the pasta and cook until al dente -- approximately 12 minutes.
3. While the pasta is cooking, heat a teaspoon of olive oil in a large skillet.
4. Saute the minced garlic and chopped onion until softened, about three minutes. Remove from the heat and place the sauteed garlic and onion into a large mixing bowl.
4. Place the skillet back on the heat, add the chorizo to the skillet, and cook until browned.
5. Line a colander with paper toweling and dump the browned sausage into the colander to drain off the excess fat.
6. Place the cooked sausage into the mixing bowl. Stir in half the jar of marinara sauce, cottage cheese, mozzarella cheese, and dried oregano.
7. After draining the cooked pasta, pour it into the sausage mixture as well. Stir thoroughly to combine all the ingredients.
8. Pour a small amount of marinara sauce into a 4-quart glass dish with a cover. Carefully spoon in the pasta mixture, adding more cheese and sauce as necessary.
9. Top with any remaining pasta sauce and mozzarella cheese.
10. Place the lid on the baking dish and cook in the oven for 30 minutes, or until the sauce is bubbling and the cheese has melted.
11. Remove from the oven and let cool for five minutes before serving.

{onions from Jana and Dan's garden -- thanks!}
SHARE:

What's For DInner: Rosemary Crusted Tilapia with Whole-Wheat Spaghetti

So, now that I have a big ol' jar of bread crumbs, I suppose it would make sense to actually use them! For this recipe, I used the bread crumbs to bread tilapia fillets. I based my bread crumb mixture on the parmesan-crusted tilapia fillets we bought at Whole Foods a couple of weeks ago. When eating the fillets the last time around I thought it was a little dry, so this time I served the crusted (mmm, such a delicious word!) with a side of spaghetti and mariana sauce.

Rosemary Crusted Tilapia with Whole-Wheat Spaghetti (printer-friendly version)
makes 2 servings

2 tilapia fillets
2 egg whites
2 tablespoon water
1/3 cup bread crumbs
1/3 cup pecorino romano cheese
1 teaspoon dried rosemary, chopped
1/2 teaspoon dried oregano
freshly ground black pepper
fine sea salt
olive oil

whole wheat spaghetti
1 cup marinara sauce

1. Preheat the oven to 375 degrees.
2. Cover a rimmed baking sheet with aluminum foil. Set aside.
3. In large shallow bowl, mix together the egg whites and water. Set aside.
4. Another large shallow bowl, stir together the bread crumbs, romano cheese, rosemary, and oregano.
5. Dip one fillet into the egg-white mixture.
6. Season the fillet with salt and pepper.
7. Then place the fillet in the bread crumb mixture and coat both sides evenly.
8. Place on the prepared baking sheet. Repeat the process with the second fillet.
9. Drizzle the tops of each prepared fillet with olive oil.
10. Bake in the oven for 15 minutes, or until the fish is flaky.
11. While the fish is cooking, cook the spaghetti and warm the marinara sauce.
12. Place a fillet next to (or on) a bed of spaghetti.
SHARE:
© A Less Processed Life. All rights reserved.
BLOGGER TEMPLATE MADE BY pipdig