What I'm Organizing: My Recipe Clippings


Confession: I have a bit of a magazine problem. I just kind of love them . . . and subscribe to a lot of them. This obsession has a bit of a downfall -- as in, piles of magazines, everywhere. Even when I try to corral them in magazine racks, they still manage to escape, piling themselves on the coffee table, on the side table, and on my bedside table. (Hmm . . . maybe it's me that scatters them about.) For the most part, I keep the magazines around because there's something in them that I want to clip out and save for later use. This is particularly the case for Food & Wine, Sunset, Everyday Food, and Real Simple magazine recipes. About a month or so ago I finally sucked it up and set to organizing the unwieldy stack of magazines.


I decided the best way to organize my magazine clippings was to pick up a big ol' binder (the large "economy" size) and a couple packages of clear plastic page protectors.


Though I considered for a second to use an x-acto knife or similar to cut pages out of each magazine cleanly, in the end I decided to just (carefully) rip out the pages. If the torn edge was a total mess, I used my desktop paper cutter to clean the edges up. Real Simple happens to be a larger format and thus the pages didn't fit into the page protectors, for those pages I used my paper cutter to significantly cut down the size of the pages.


Another bonus of using the page protectors is that they come in quite handy when you're a messy cook and happen to spill things all over the recipe page when cooking -- a quick wipe with a damp cloth, and the recipe page is good as new!

Admittedly, my binder organization is still a bit of a work-in-progress. Though I've put all the recipes into the binder, the step I have yet to do is to further organize the pages--most likely by either type of recipe (appetizer, dinner, etc.) or by major ingredient. But, the hard part is done, and now my old magazines are in the utility closet, waiting for a trip to the local recycling center.

P.S., Today is the last day to vote for my Project Food Blog, Challenge #2 entry. You can vote for me here. Thanks!
SHARE:

What's Baking: Golden Cornbread


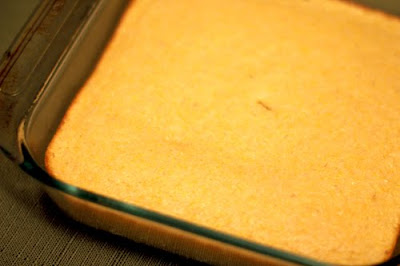
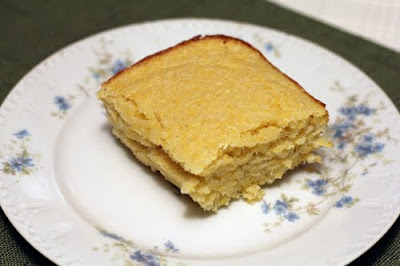
Admittedly, in the past we've usually reached for a boxed mix when making cornbread. Well, that doesn't sound all that less processed, now does it? For this chili accompaniment, I opted to make the cornbread from scratch. No more lard-in-a-box cornbread for this girl!

Golden Cornbread (printer-friendly version)
makes 12 servings

1 cup unbleached all-purpose flour
1 cup yellow cornmeal
1/2 cup raw sugar
1 teaspoon kosher salt
2 teaspoons aluminum-free baking powder
1 egg
1 cup organic skim milk
1/3 cup unsalted butter, melted

1. Preheat the oven to 400 degrees.
2. In a medium-sized bowl, combine together the flour, cornmeal, sugar, salt, and baking powder. Stir together with a whisk.
3. Stir in the egg, milk, and melted butter. Continue stirring until all ingredients are evenly combined.
4. Spray an 8" square glass baking dish with cooking spray. Pour the batter into the dish.
5. Bake in the oven for 20-25 minutes, or until a toothpick inserted into the center of the cornbread comes out clean.

(adapted from this recipe)


P.S., Tomorrow is the last day to vote for my Project Food Blog, Challenge #2 entry. You can vote for me here. Thanks!
SHARE:

What's For Dinner: Antelope Chorizo Chili


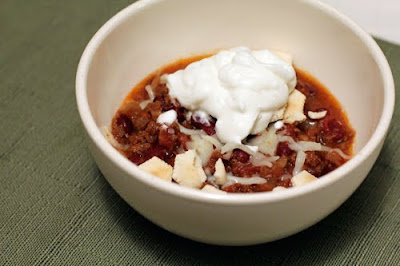
D was in charge of this dinner entree -- the perfect meal for an autumn evening. Now, if only the temperatures outside were actually reminiscent of fall -- by this time last year, we had already had our first snow of the season! This year we're still facing daytime temperatures in the mid-80s. I'm definitely ready for crisp autumn days. Of course, once winter really hits I'll long for these warm days. The grass is always greener, I guess.


Antelope Chorizo Chili (printer-friendly version)
makes 4 hearty servings

16 oz can organic diced tomatoes
16 oz red kidney beans, drained and rinsed
8 oz can tomato sauce
1 lb [antelope] chorizo
1 cup white onion, chopped
2 garlic cloves, minced
1 teaspoon ground cumin
1 teaspoon chili powder
coarse sea salt
freshly ground black pepper

Optional toppings:
shredded cheese
oyster crackers
Greek yogurt
scallions

1. Combine together the diced tomatoes, kidney beans, tomato sauce, chorizo sausage, onion, garlic, cumin, and chili powder in a 2-quart slow-cooker bowl.
2. Season with salt and pepper.
3. Place the lid on the bowl and set the slow cooker to low. Cook for 8-10 hours. Season with additional spices if necessary.
4. Serve with toppings such as shredded cheese, oyster crackers, and/or Greek yogurt.

P.S., Voting is still open for Project Food Blog, Challenge #2! You can vote for me here. Thanks!
SHARE:

What's For Breakfast: French Toast Sticks

D offered to make breakfast and I gladly accepted the offer. He gave me several options and I chose french toast sticks. I think the last time I had french toast sticks they were of the "stix" variety at Arby's. To amp up the flavor and make the sticks a little sturdier, D cooked them up once, then re-battered each stick and cooked 'em again.

French Toast Sticks (printer-friendly version)
makes 2 servings

5 slices of bread (go with a country white or similar; wheat bread is way too dense)
6 farm-fresh eggs
1/2 cup organic half-and-half
1 teaspoon ground cinnamon (plus more if necessary)
powdered sugar

1. Heat an electric skillet to 375 degrees.
2. In a medium-sized flat platter, beat together the eggs, half-and-half, and cinnamon.
3. Slice the bread lengthwise into fourths.
4. Dip each stick into the batter, covering both sides.
5. Place the sticks on the heated electric skillet and cook for about 2-3 minutes on each side.


6. Remove from baked sticks from the skillet and place on a cutting board.
7. Once all the sticks have been cooked once, re-dip each stick and cook again.


8. To keep the sticks from getting cold while you finish cooking up the rest of the batch, place the cooked sticks on a baking sheet in the oven set to "warm."
9. Sprinkle the french toast sticks with powdered sugar and serve with a small bowl of pure maple syrup for dipping. Oh, and a few napkins, too, since this is definitely finger food!


P.S., Voting opens today for Project Food Blog, Challenge #2! You can read my entry here, and vote for me by clicking the link at right below the Foodbuzz ad. (Or use this link.) Thanks!
SHARE:

Project Food Blog Challenge #2: The Classics - Saag Paneer


The second challenge for Project Food Blog is to tackle a classic dish from another culture. I chose to make saag paneer (also called palak paneer), a classic vegetarian dish from northern India. I have to confess that I tried to make Indian cuisine (mutter paneer) from scratch once before. Suffice it to say that it didn't go too well, as I scorched the milk when making the paneer and the gravy was way too watery and hardly the creamy and flavorful sauce I'm used to eating at my favorite Indian restaurant in Fort Collins. Giving Indian cuisine another go is most definitely an attempt at redemption after that abysmal failure.

Upon researching recipes for saag paneer, the unifying theme seemed to be that there isn't one agreed-upon recipe for this dish. In the end, I chose to meld together a recipe from one of the cookbooks I had on hand (1,000 Vegetarian Recipes) and recipes found online to make my final dish. In addition, this YouTube video was indispensable in helping me to visualize what the recipe would look like as I prepared it.

I opted to make the paneer (cottage cheese) from scratch. However, if you are lucky enough to have an Indian or international grocery store in town, you should be able to pick up pre-packaged paneer. If you'd rather make a vegan version of this dish (or, say, your homemade paneer turns into a mushy, oil-spitting disaster at the frying stage), you can substitute extra firm tofu, cut into cubes and dry-fried.

Since one of my favorite sayings is "Go Big, or Go Home," I also decided to make some naan from scratch as well. The results were not quite the same as what you'd find in an Indian restaurant, but also not too shabby for my first attempt, either. In the end, my (second) foray into Indian cuisine was definitely more successful than my first attempt, and I used a number of spices that I hadn't used before -- all in all, I'd call it a success. And hopefully this time I won't let another year pass before I cook Indian cuisine at home again!

makes 4-6 servings

2 teaspoons minced fresh ginger
2 cloves garlic
1 teaspoon ground coriander
1 teaspoon whole cumin seeds
1/2 teaspoon garam masala
1/2 teaspoon paprika
1/2 teaspoon ground turmeric
4 tablespoons ghee, divided (see instructions below)
1 can organic diced tomatoes, pureed
20 oz fresh organic spinach, stems removed and chopped
1 1/2 cups freshly-made paneer (see recipe below)

1. Mince the ginger and garlic cloves. Place both in a small bowl and use the back of a spoon to create a paste. Set aside.
2. Bring a large pot of water to boil. Blanch the de-stemmed spinach leaves in the boiling water (I did about three batches) for about 30 seconds. After removing the spinach from the boiling water, place in a colander and rinse with cold water to stop the cooking process. Use a potato masher to squeeze out most of the liquid from the spinach leaves. Place the drained spinach leaves on a cutting board and roughly chop. Set aside.
3. Heat 2 tablespoons ghee over medium-high heat in a medium-sized skillet. Fry the paneer until golden brown (about 5 minutes). Remove from the heat, and place the paneer cubes on a paper towel to drain off any excess oil.
4. Add 2 tablespoons ghee to a medium-sized saucepan and heat over medium-high heat.
5. Add in the ground coriander, whole cumin seeds, garam masala, paprika, and ground turmeric. Cook until fragrant, stirring frequently. Stir in the tomato puree and ginger-garlic puree. Next, stir in the spinach and paneer. Cook for another 5 minutes, or until heated through.
6. Serve with basmati rice.

For the ghee:
makes ~8 tablespoons

1 stick (1/2 cup) unsalted butter

1. Melt the butter in a medium-sized saucepan over medium-low heat.
2. Once the butter has melted, turn up the heat slightly and bring the butter to a boil. Continue cooking until the butter stops sizzling and brown solids have formed.
3. Remove the pan from the heat and let butter sit for at least 10 minutes.
4. Pour the liquid butter through a sieve to remove the milk solids.


For the paneer:
makes about 1 cup of cheese

8 cups organic whole milk (be sure that it is not ultra-pasteurized)
100 mL lemon juice (about 2 lemons-worth)

1. Bring the milk to a boil in a large saucepan over medium heat. Stir while heating to prevent the milk from scorching on the bottom of the pan.
2. Stir in the lemon juice until curds form. Remove from the heat.
3. Line a colander with cheesecloth. Pour the milk mixture through the cheesecloth to capture the curds.
4. Gather up the ends of the cheesecloth to form a ball. Squeeze out any excess moisture.
5. Tie the corners of the cheesecloth around the sink faucet or onto a wooden spoon placed over a bowl to drain off the excess liquid. (I did not use a long enough piece of cheesecloth, so I used a rubberband to tie up the ends of the cheesecloth and another rubberband to attach the cheesecloth pouch of cheese to the sink faucet.)
6. Let the paneer drain for at least an hour.
7. Compress the cheese by placing it underneath a heavy item (such as a cookbook) for 15 minutes or more. Cut into cubes for immediate use, or store in water in a lidded container in the refrigerator for up to week.

For the naan:
makes 10 pieces

2 cups whole wheat flour
2 cups unbleached all-purpose flour
1 teaspoon aluminum-free baking powder
1 teaspoon fine sea salt
2 cups plain organic low-fat yogurt

1. Mix together the flour, baking powder, and salt in a medium-sized bowl.
2. Stir in the yogurt.
3. Turn the dough out onto a lightly-floured surface and knead the dough for about five minutes, or until it softens and becomes smooth and elastic.
4. Form the dough into a ball and place into a lightly-oiled bowl. Cover the bowl with a damp tea-towel and place in an oven set to warm. Let rest for an hour.
5. Divide the dough into 10 different balls. Roll out each ball one at a time into a rounded disk.
6. Place a heavy baking sheet on the top rack of your oven and turn on the broil setting.
7. Carefully place a flattened dough disk onto the heated baking sheet. Watch closely and remove once the dough has begun to bubble and lightly brown in spots, about 1-2 minutes.
8. Remove from the oven, brush with ghee, and serve immediately.
SHARE:

What's For Dinner: Flap Steak with Herb-Hazelnut Salsa

Another recipe courtesy of Food & Wine magazine. This recipe comes from the September 2009 issue, which seems to be my go-to issue of late! When I asked the butcher at Whole Foods for skirt steak, he replied that they didn't have any, nor did they have hanger steak. He suggested flap steak as a substitute, and I took his suggestion. I put together the herb-nut salsa and, as resident grillmaster, D was in charge of cooking the meat. He cooked it up perfectly -- medium rare and quite juicy. The herb-nut salsa adds a bit of a piquant flavor and contrasts quite well with the rich red meat.

Flap Steak with Herb-Hazelnut Salsa (printer-friendly version)
makes 2 servings

For the steak:
1 lb flap steak (or try skirt or hanger steak)
olive oil
fine sea salt
freshly ground black pepper

For the salsa:
1/4 cup hazelnuts, chopped
1/2 cup fresh flat-leaf parsley, minced
1/4 cup fresh chives, snipped
2 teaspoons fresh tarragon, minced
2 teaspoons capers, rinsed
1 medium shallot, minced
2 tablespoons red wine vinegar
1/4 cup extra-virgin olive oil
fine sea salt
freshly ground black pepper

1. Heat a skillet over medium-high heat on the stovetop.
2. Add the chopped hazelnuts to the skillet and toast until fragrant (about 5-10 minutes). Stir frequently to prevent the hazelnuts from burning.
3. Place the hazelnuts in a medium-sized bowl. Add in the fresh herbs, capers, and minced shallot.
4. Stir in the red wine vinegar and olive oil. Season with salt and pepper. Set aside.
5. Light the grill.
6. Rub the flap steak with olive oil and season liberally with sea salt and freshly ground black pepper.
7. Cook the meat on the grill over moderately high heat for about six minutes per side. Remove from the grill and let rest for at least five minutes on a cutting board.
8. Slice the meat against the grain and serve with the herb salsa.

(adapted from this Food & Wine recipe)
SHARE:

What's For Dinner: The Flavors of Fall

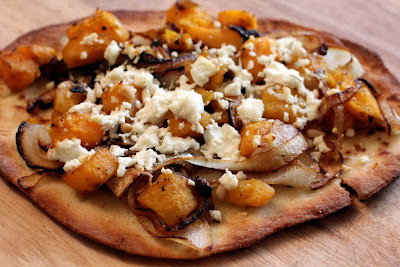
Oh how I love autumn -- time to break out the sweaters, long sleeves, boots, and lots of layers. Of course, the fall season also means the arrival of fall flavors, including a variety of squashes and just-harvested apples. As a welcome dinner for the fall season, I opted to make two pizzas inspired by autumn. First up, a flatbread pizza with butternut squash, caramelized onion, goat cheese, and pine nuts. To make things a little easier on myself, I used frozen butternut squash, but I did buy a whole squash the other day, so look for a recipe featuring "real" butternut squash in the near future. I also made a dessert pizza featuring cinnamon apples. Super-easy to make and quite delicious to eat! I subbed in naan bread for the crust of each pizza since I had a package on hand, but I think any flatbread could be substituted in its place. Enjoy -- and Happy Autumn!

Flatbread Pizza with Butternut Squash, Caramelized Onion, Goat Cheese, 
and Pine Nuts
(printer-friendly version)
makes 2 servings

2 pieces plain naan (I used 365 Everyday Value Original Tandoori Naan from Whole Foods)
1 package diced organic butternut squash (I used Stahlbush Island Farms Diced Butternut Squash)
1 medium white onion, cut into 1/4" slices
1 tablespoon pine nuts
2 tablespoons goat cheese
olive oil
freshly ground pepper
fine sea salt
dried thyme
dried rosemary

1. Place a baking stone on the middle rack in the oven and preheat to 400 degrees.
2. Heat 2 tablespoons of olive oil in a large sized skillet over medium heat.
3. Add the sliced onions to the skillet. Stir occasionally during the first 15 minutes of cooking. The onions will soften and become translucent.
4. During the next 10 minutes of cooking, stir the onions about every minute or so to prevent them from sticking to the skillet bottom and burning. Add more olive oil if necessary.
5. The caramelized onions are done once the onions are lightly browned; the entire cooking process should take about 25-30 minutes.
6. While the onions are caramelizing, cook the butternut squash according to the manufacturer's instructions.
7. Once the onions are caramelized, add the butternut squash to the skillet. Season with salt, pepper, and dried thyme. Gently stir the mixture.
8. Prep the two pieces of naan (or flatbread) by brushing each with olive oil. Spoon the onion and butternut squash mixture over both slices of naan. Season with dried rosemary. Add the pine nuts and goat cheese over each slice of naan. Drizzle olive oil over both pizzas.
9. Place each pizza on the baking stone and bake for 15-20 minutes, or until the flatbread is lightly browned and the cheese has melted slightly.
10. Remove from the oven and let cool a few minutes before serving.

Flatbread with Cinnamon Apples (printer-friendly version)
makes 2 servings

1 slice naan or other plain flatbread
cinnamon sugar (1 tablespoon ground cinnamon in 1/4 cup raw sugar will make plenty to have on hand)
2 Granny Smith apples, peeled, cored, and cut into slices
1 tablespoon raw sugar
1/2 teaspoon ground cinnamon
1/4 teaspoon ground ginger
1/4 teaspoon ground nutmeg
1 tablespoon unsalted butter
1 teaspoon unsalted butter, melted
turbinado sugar for garnish

1. Preheat the oven to 400 degrees.
2. In a medium-sized bowl, toss together the apple slices, sugar, cinnamon, ginger, and nutmeg.
3. Melt one tablespoon of unsalted butter in a large skillet over medium heat.
4. Add the apple mixture to the skillet and cook the apples until softened, about 10-15 minutes. Stir occasionally.
5. Melt 1 teaspoon of butter in a small dish. Use a pastry brush to brush the melted butter over the top of the flatbread.
6. Sprinkle the cinnamon sugar evenly over the flatbread.
7. Top the flatbread with the cooked apples.
8. Bake in the oven for 5 minutes.
9. Remove from the oven, let cool, and serve. (Vanilla bean ice cream would be an excellent accompaniment, as would some caramel sauce -- additions I will definitely try next time I make this!)
SHARE:

What's For Dinner: (Naked) Tacos

The one downfall of following a recipe is that it typically makes a lot more than two servings -- even when I half the ingredients. Case in point the chorizo sandwiches I featured earlier in the week -- even after making three sandwiches there was plenty of chorizo sausage left over. I decided a good way to use it up would be to have a taco night. I opted to eat a deconstructed taco -- and made up a plate with some jasmine rice, black beans, chorizo, baby arugula, salsa, shredded mozzarella cheese, and a dollop of guacamole. D made up some tacos with some shells we had leftover from a previous taco night, and filled them with refried beans, black beans, chorizo, and all the fixings.

(Naked) Tacos
When we do taco night, I typically gather all the ingredients together, cook what needs to be cooked, set everything on the kitchen table, and then ring the virtual dinner bell. Following is a list of the ingredients I use for our tacos; if you opt to make rice, you could season it with a teaspoon or two of taco seasoning before cooking -- I opted to make it plain since I have plans to use up the leftovers later this week.

jasmine rice (I cooked up the rice in my rice cooker; 1 cup rice to 2 cups water)
chorizo sausage and black beans (reheated in the microwave)
black beans (warmed on the stovetop)
organic baby arugula
salsa
Greek yogurt
shredded mozzarella cheese (or cheese of your choice)
guacamole
SHARE:

What's Baking: Chocolate Zucchini Bread with Walnuts and Hazelnuts


Since I picked up three zucchinis at the farmers market last week, I decided the best way to use them up would be to make a couple loaves of bread. I found a recipe for yogurt-zucchini bread with walnuts in an issue of Food & Wine magazine from last September and decided to tweak it a little bit by adding in some cacao powder, ground cinnamon, and hazelnuts I had on hand. The resulting bread is subtly chocolaty with a hint of cinnamon and full of zucchini and nutty goodness.

Chocolate Zucchini Bread with Walnuts and Hazelnuts (printer-friendly version)
makes one 8" loaf and one 5.75" loaf

1 cup walnut halves
1/2 cup chopped hazelnuts
2 cups unbleached all-purpose flour
1/2 teaspoon baking powder
1/2 teaspoon baking soda
1/2 teaspoon fine sea salt
1/2 teaspoon ground cinnamon
1/4 cup cacao powder
3/4 cup plus 2 tablespoons raw sugar
2 eggs
1/2 cup vegetable oil
3/4 cup fat-free plain Greek yogurt
1 cup coarsely grated zucchini (from 1 small zucchini)

1. Preheat the oven to 325 degrees. Grease an 8" bread pan and a 5.75" bread pan with cooking spray. Set aside.
2. Heat a skillet over medium-high heat on the stovetop. Add in the walnuts and hazelnuts and toast (this should take only a few minutes). Remove from the heat and chop the walnuts. Place the nuts in the freezer for a few minutes to cool.
3. In a medium-sized bowl, use a whisk to sift together the flour, baking powder, baking soda, sea salt, cinnamon, and cacao powder.
4. In a large bowl, mix together the sugar and eggs. Stir in the vegetable oil and Greek yogurt.
5. Slowly add the dry ingredients to the wet ingredients. Mix together between additions. Stir in the zucchini and nuts.
6. Spoon the batter into the prepared bread pans.
7. Bake in the oven for 45-60 minutes, or until a knife or toothpick inserted into the center of each loaf comes out clean.
8. Remove from the ovens and place the pans on a wire rack to cool. After 5 minutes, remove the bread from the pans and let cool completely. Wrap loaves in aluminum foil and refrigerate if not serving immediately.

(adapted from this Food & Wine recipe)

SHARE:

What's For Dinner: Mexican Tortas with Black Beans and Chorizo

Before my last trip to Whole Foods, I flipped through my binder of recipes (worthy of a post of its own) for some inspiration. Rather than writing out an ingredient list, I decided to just bring along the binder pages with the recipes on them so that I could reference the pages as I shopped. One of the pages I pulled was from an issue of Food & Wine magazine and featured a recipe from Rick Bayless for Mexican tortas (sandwiches) with black beans and chorizo. Though I never managed to hit up any of his restaurants when I lived in Chicago, I've long been a fan of Bayless' -- and was totally rooting for him to win the first season of Top Chef Masters, which he did. The sandwiches were good, if a little dry, hence I added on a little salsa. (Later in the week I may have made a little déclassé version with ketchup; dare I say it was even better?)

Mexican Tortas with Black Beans and Chorizo (printer-friendly version)
makes 2 servings

1 tablespoon vegetable oil
1/4 lb (antelope) chorizo sausage
1 can black beans, drained and rinsed
1 cup arugula
2 tablespoons goat cheese, softened
1 avocado, peeled, pitted, and cut into slices
2-4 tablespoons salsa [optional]
2 Kaiser rolls, split into halves
organic olive oil cooking spray

1. Heat the vegetable oil in a large skillet over medium-high heat. Once the oil is shimmering, add the chorizo and cook until browned, about 12 minutes. Reduce the heat to medium and add in the black beans. Use a potato masher to mush the beans up.
2. Cook until the black beans are heated. Remove from the heat.
3. Move a rack into the top position in the oven. Turn on the broiler.
4. Cut the kaiser rolls in half. Scoop out some of the bread from the bottom half of each roll.
5. Spray the roll halves lightly with olive oil cooking spray.
6. Place the rolls on the top rack in the oven and toast. Keep your eye on the rolls as they can quickly burn.
7. Once the rolls are toasted, remove them from the oven.
8. Spread the goat cheese on the top half of each kaiser roll.
9. Spoon the chorizo-black bean mixture into the scooped-out portion of each roll's bottom half.
10. Top with arugula, avocado slices, and a spoonful or two of salsa (if desired).
11. Place the top half of each roll on each sandwich, and serve immediately.

(adapted from this Food & Wine recipe)

Voting for Project Food Blog is open! If you like what you see, please consider voting for my blog here. Thanks!
SHARE:

Project Food Blog


Foodbuzz, for whom I am a featured publisher, is sponsoring a contest called Project Food Blog in which nearly 2,000 food bloggers are "competing in a series of culinary blogging challenges for the chance to advance and a shot at the ultimate prize -- $10,000 and a special feature on Foodbuzz.com for one year." Sounds like a pretty tasty reward to me! For the first challenge, bloggers are asked to write a post about "what defines you as a food blogger and why should you be the next food blog star."

My New Year's Resolution for 2010 was to eat fewer processed foods. For January, I made it a goal to not eat any processed foods at all (or in the very least, eat foods that were only minimally-processed) -- as the months have passed I have become a little more lenient in what I eat, but the goal remains the same -- to reduce the amount of processed foods in my diet and increase the number of natural ingredients that I use and eat each day. I decided to start my blog as a way to keep track of what I was eating and hold myself accountable to my resolution.

Here's my first post about my plan here:

I was a (lacto-ovo) vegetarian for about a decade. In the past few years, I have slowly (and conscientiously) added meat back into my diet. To learn more about my thoughts on eating meat, check out this post here:

Monday through Friday I post an article about a recent meal I've eaten -- either one I've eaten at a restaurant or one I've made from scratch (or nearly from scratch!). Here are a few of my favorite posts:


Local food, farmers markets, organic, free-range, and sustainable farming practices are just a few of the buzzwords floating around the foodie world these days. As it happens, these are all very important things that I take into consideration when deciding what to buy at the grocery store or what to order at a restaurant. As a food blogger, my hope is that I can make eating fewer processed foods a goal that can be easily attainable by any of my readers by showing what works for me, through the ingredients and tools I use and recipes I make. Thanks for visiting!
SHARE:

What's For Dinner: Margherita Pizza

Since I had several heirloom tomatoes and some quickly-wilting fresh basil on hand, I decided the best way to use it up was to make a margherita pizza. I opted to pick up some organic pizza sauce to do the fresh ingredients justice. The resulting pizza was tasty and full of flavor. What am I going to do when heirloom tomato season is over??

Margherita Pizza (printer-friendly version)
makes 12 servings

1 organic whole wheat pizza crust (I used a 365 Organic Everyday Value whole wheat crust)
extra virgin olive oil
3 small heirloom tomatoes, cut into thin slices
10 oz low-moisture fresh mozzarella, cut into 1/4" slices
20-30 fresh basil leaves

1. Preheat the oven to 400 degrees.
2. Drizzle the whole wheat pizza crust with the olive oil and brush to coat the crust evenly.
2. Spread the pizza sauce over the pizza crust.
3. Place the heirloom tomatoes on the pizza in a circular pattern.
4. Evenly cover the pizza with the mozzarella slices (I topped each tomato slice with the cheese and then placed additional mozzarella pieces atop the pizza as well.)
5. Scatter the basil leaves over the pizza. Drizzle olive oil atop the entire pizza.
6. Bake the pizza in the oven for 15-20 minutes, or until the cheese is melted and lightly browned.
7. Let cool for a few minutes and then serve.
SHARE:

What's For Dinner: La Salade de Roquette et Tomate avec le Poulet

Dinner just sounds fancier when it's in French, right? Er, oui? Since the dressing for this salad incorporates herbes de Provence (a blend that includes thyme, rosemary, basil, marjoram, sage, fennel, and lavender), it only seemed natural to give the entree a French name. I found this recipe online while looking for inspiration for what to do with chicken cutlets (yet another Whole Foods purchase). This Cooking Light recipe met my requirements for dinner -- it used chicken cutlets, it was light, and it was quick. Another winner!


Arugula and Heirloom Tomato Salad with Chicken (printer-friendly version)

For the salad and dressing: 
3-4 cups organic baby arugula
1 heirloom tomato, sliced thinly
1 1/2 tablespoons white wine vinegar
1 teaspoon dried herbes de Provence
1/4 teaspoon ground black pepper
1/4 teaspoon fine sea salt
1/2 teaspoon Dijon mustard
1 garlic clove, minced
1 tablespoon olive oil

1. In a medium-sized bowl, combine together the white wine vinegar, herbes de Provence, black pepper, sea slat, mustard, and minced garlic clove. Stir the ingredients together. While whisking, drizzle in the olive oil.
2. Place the arugula and sliced heirloom tomato in a large bowl. Pour the dressing over the salad. Toss gently to combine. Set aside.

For the chicken:
1 teaspoon lemon zest
1 tablespoon fresh lemon juice
1 tablespoon olive oil
2 chicken cutlets
freshly ground black pepper
fine sea salt
olive oil cooking spray

1. Add the lemon zest, lemon juice, and olive oil into a quart-sized sealable plastic bag. Add in the chicken cutlets and let stand for at least five minutes.
2. Remove the cutlets from the marinade and season with salt and pepper.
3. Heat a large skillet over medium-high heat. Spray the skillet with cooking spray.
4. Add the cutlets to the skillet and cook for two minutes on each side, or until the interior is no longer pink. Remove from the heat.
5. Cut each chicken cutlet across the grain into even slices.

 To construct the salad:
1. Plate the salad. Top each salad with a sliced chicken cutlet. Pour any remaining dressing over top the chicken and serve immediately.

(adapted from this Cooking Light recipe)

SHARE:

What's For Dessert: Roasted Fig Stuffed with Goat Cheese and Served on a Crispy Wonton

For some random reason, I've had figs on my mind lately. On contemplating figs, I realized that I've only ever eaten them in fig newton form. Time to rectify that situation! While in Whole Foods I happened upon a display of organic figs, and decided to try my hand at making roasted figs stuffed with goat cheese. I decided that an excellent addition to this simple dessert recipe would be to serve each fig on a crispy wonton -- the star of a dessert I've made previously. The sweetness of the crispy wonton was a perfect foil for the savory flavor of the goat cheese. Add a little drizzle of honey, and you've got a little piece of heaven in your mouth!

Roasted Fig Stuffed with Goat Cheese and Served on a Crispy Wonton
(printer-friendly version)
makes 2 servings

2 figs
1/2 tablespoon goat cheese
2 wonton skins
1 teaspoon ground cinnamon
2 teaspoons raw sugar
1 teaspoon unsalted butter, melted
honey

1. Preheat the oven to 425 degrees.
2. Cut the stem off each fig. Quarter each fig by making an X-shaped cut 3/4 of the way down the fig.
3. Stuff each fig with a rounded portion of goat cheese.
4. Spray a pan with olive oil cooking spray. Place the figs on the pan and roast in the oven for 10-12 minutes.
5. While the figs are roasting, prep the wonton skins. Melt the unsalted butter in a small dish in the microwave.
6. Brush each wonton skin with the melted butter. (Cover both sides.)
7. In another small dish, mix together the cinnamon and sugar.
8. Sprinkle the cinnamon-sugar mixture on each wonton skin, again covering both sides.
9. When two minutes of cooking time remains for the figs, place the wonton skins on the pan in the oven.
10. Remove the pan from the oven when the cooking time is complete.
11. Place each crispy wonton on a plate. Top each wonton with a roasted fig.
12. Drizzle honey over each roasted fig. Garnish each plate with a sprinkle of ground cinnamon and serve immediately.


SHARE:

What's For Dinner: Mountain Picnic

Since our days in the mountains are soon going to come to an end, it makes sense to live it up now as much as possible. We decided that one way to enjoy our surroundings would be to head up to the mountains for an evening sunset picnic. Since D had some hot dog buns leftover from his bachelor weekend while I was away in the Big City a week ago, I decided that we might as well grill up some hot dogs for our picnic meal. We also brought up some of the curried tofu and avocado dip and pita chips to eat as an appetizer.

I can't remember the last time I had a hot dog -- and to be honest, I still don't have a desire to eat a "real" one. So, I opted to have a tofu dog:


While waiting for the coals to heat up, we enjoyed a glass (or two) of Frontera cabernet sauvignon. The plastic glasses are part of a picnic backpack set we received as a wedding gift.


As the resident grillmaster, D was in charge of manning the grill:


After our dog dinner, it was time for dessert. This time I (wo)manned the grill and toasted up the marshmallows. The coals were the perfect temperature for roasting marshmallows -- I managed to toast the marshmallows to an even brown all around -- and no marshmallow flambe -- a miraculous feat!


D eating his s'more -- I made his with Hershey's chocolate (which he requested); I made mine with Safeway milk chocolate (really delish; I can't stand the taste of Hershey's chocolate, even if it's the traditional chocolate bar for a s'more).

Though it was a little nippy at 10,000+ feet (hence all the layers!), the scenery (and company) definitely made up for any chills. We're really lucky to have a mountain range located just a short drive from town!

SHARE:

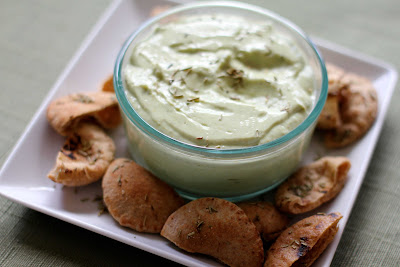
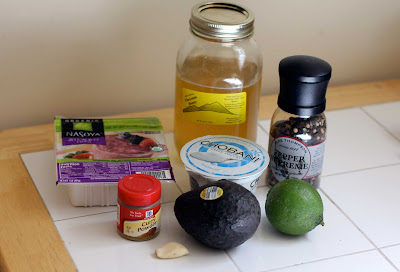
Snacktime: Curried Tofu and Avocado Dip with Rosemary Baked Pita Chips

Before heading to Whole Foods this weekend, I flipped through my binder of recipes to search for a little shopping inspiration. One of the recipes that caught my eye was from a recent issue of Food & Wine magazine for a dip made with silken tofu and avocado. I've never used silken tofu before, so I figured now was as good a time as any to give it a try.

Curried Tofu and Avocado Dip with Rosemary Baked Pita Chips 
(printer-friendly version)
makes 10+ servings

For the dip:
7 oz silken tofu, drained (about 1/2 a package -- I weighed out the 7 oz using a food scale)
1 Haas avocado, peeled, pitted, and chopped
1/2 C nonfat Greek yogurt (I used a single-serving container of Chobani Greek yogurt)
1 t grated lime zest (one lime)
2 T fresh lime juice (one lime)
1 garlic clove
1 t curry powder
1 1/2 t honey
freshly ground black pepper
fine sea salt

1. Combine the tofu, avocado, Greek yogurt, lime zest, lime juice, garlic clove, curry powder, and honey in the bowl of a food processor. Puree until smooth. Season with salt and pepper.
2. Spoon into a bowl with a lid and refrigerate until ready to eat.

 (adapted from this Food & Wine recipe)


{dip ingredient mise en place}

Rosemary Baked Pita Chips (printer-friendly version)

12 small pita rounds (or 4 whole wheat pitas)
1 T olive oil
1 T chopped rosemary
fine sea salt

1. Preheat the oven to 325 degrees.
2. Cut the small pita rounds into halves. (If using regular-sized pitas, cut each pita pocket in half and then into six wedges.)
3. Place the cut pita wedges into a bowl. Add in the olive oil and rosemary. Season liberally with the fine sea salt. Toss to combine the ingredients.
4. Spread the pita wedges onto a baking sheet. Bake for 20-30 minutes, or until the wedges are slightly browned and crispy.
5. Cool on a wire rack.


{pita wedges ready for the oven}
SHARE:

What's For Lunch: Lentil Soup Served Over Rice

Last year I was in a bit of a soup rut -- I had soup nearly everyday for lunch, picked from a variety of Progresso soups that I kept on hand in the cupboard. Then one day I took a look at the sodium content in the soups and had a bit of a double-take -- there's a TON of salt in these soups, and if you eat the whole can of soup in one sitting, as I used to do, you are eating over half of your RDI for sodium in just one meal. (Yikes!) I swore off canned soups shortly thereafter. However, the one thing I love about canned soups is how simple a choice it is for a meal -- just dump the contents into a pot, warm on the stove, and in a few minutes it's ready to eat. Can't get much easier than that! As autumn approaches, I find myself craving a warm lunch, and I've decided to give canned soup a second chance. My ideal soup is low in sodium, but rich in whole ingredients.

My new soup of choice:


A look at the ingredients:

Amy's soups fit my requirements. In order to ensure that I keep my sodium intake low, I am trying to limit myself to eating only half a can of soup in one sitting, which is actually the given serving size. As it is often the case, I had a bunch of jasmine rice left over from a recent dinner, so I re-warmed the rice in the microwave, then served the lentil soup over the rice -- my easy take on dal baht! The addition of rice definitely helped to satiate my hunger, meaning I no longer need to eat the whole can of soup in one sitting!
SHARE:

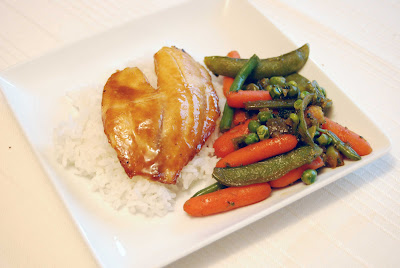
What's For Dinner: Ginger Teriyaki Tilapia with Stir-Fried Veggies and Rice

For dinner tonight I headed to the freezer -- on the menu were tilapia fillets and a veggie stir-fry. On a recent trip to Whole Foods, D and I picked up a few packages of frozen tilapia fillets -- gotta love getting two antibiotic-free, preservative-free, and no-added-hormone fish fillets for only $2.99 a package!

To thaw the fillets, I used the quick method, which involved removing the fillets from their packaging, placing them in a sealed plastic bag, and then placing the bag in a bowl of cold water for 30 minutes. After thawing, I seasoned each fillet with a little sea salt and freshly ground pepper and then liberally brushed both fillets with some ginger teriyaki sauce I had on hand. I baked the fillets in the oven (preheated to 375 degrees) for 15 minutes. About two minutes before the cooking time was complete, I removed the fillets from the oven and brushed each with some ginger peanut sauce I also had on hand before cooking for a couple minutes more.

Each fillet was served over a bed of jasmine rice along with a side of stir-fried veggies. To stir fry the veggies, I added about 1/2 T of toasted sesame oil to an electric skillet. After the oil heated, I added in a variety of frozen veggies from the freezer including haricots verts, green peas, broccoli florets, and a stir-fry blend that include sugar snap peas, mini corn, and baby carrots. After the veggies warmed up, I added about 1/2 C of the ginger teriyaki sauce and about 2 T of the ginger peanut sauce that I used on the fish. I let the veggies cook for a few minutes more before serving with the fish.
SHARE:
© A Less Processed Life. All rights reserved.
BLOGGER TEMPLATE MADE BY pipdig